Tips n’ Tricks for Crafting Miniature Houses

Like all things creative. . . it’s really just about mastering some skills, once you have the skills down pat – the creativy possiblites become endless.
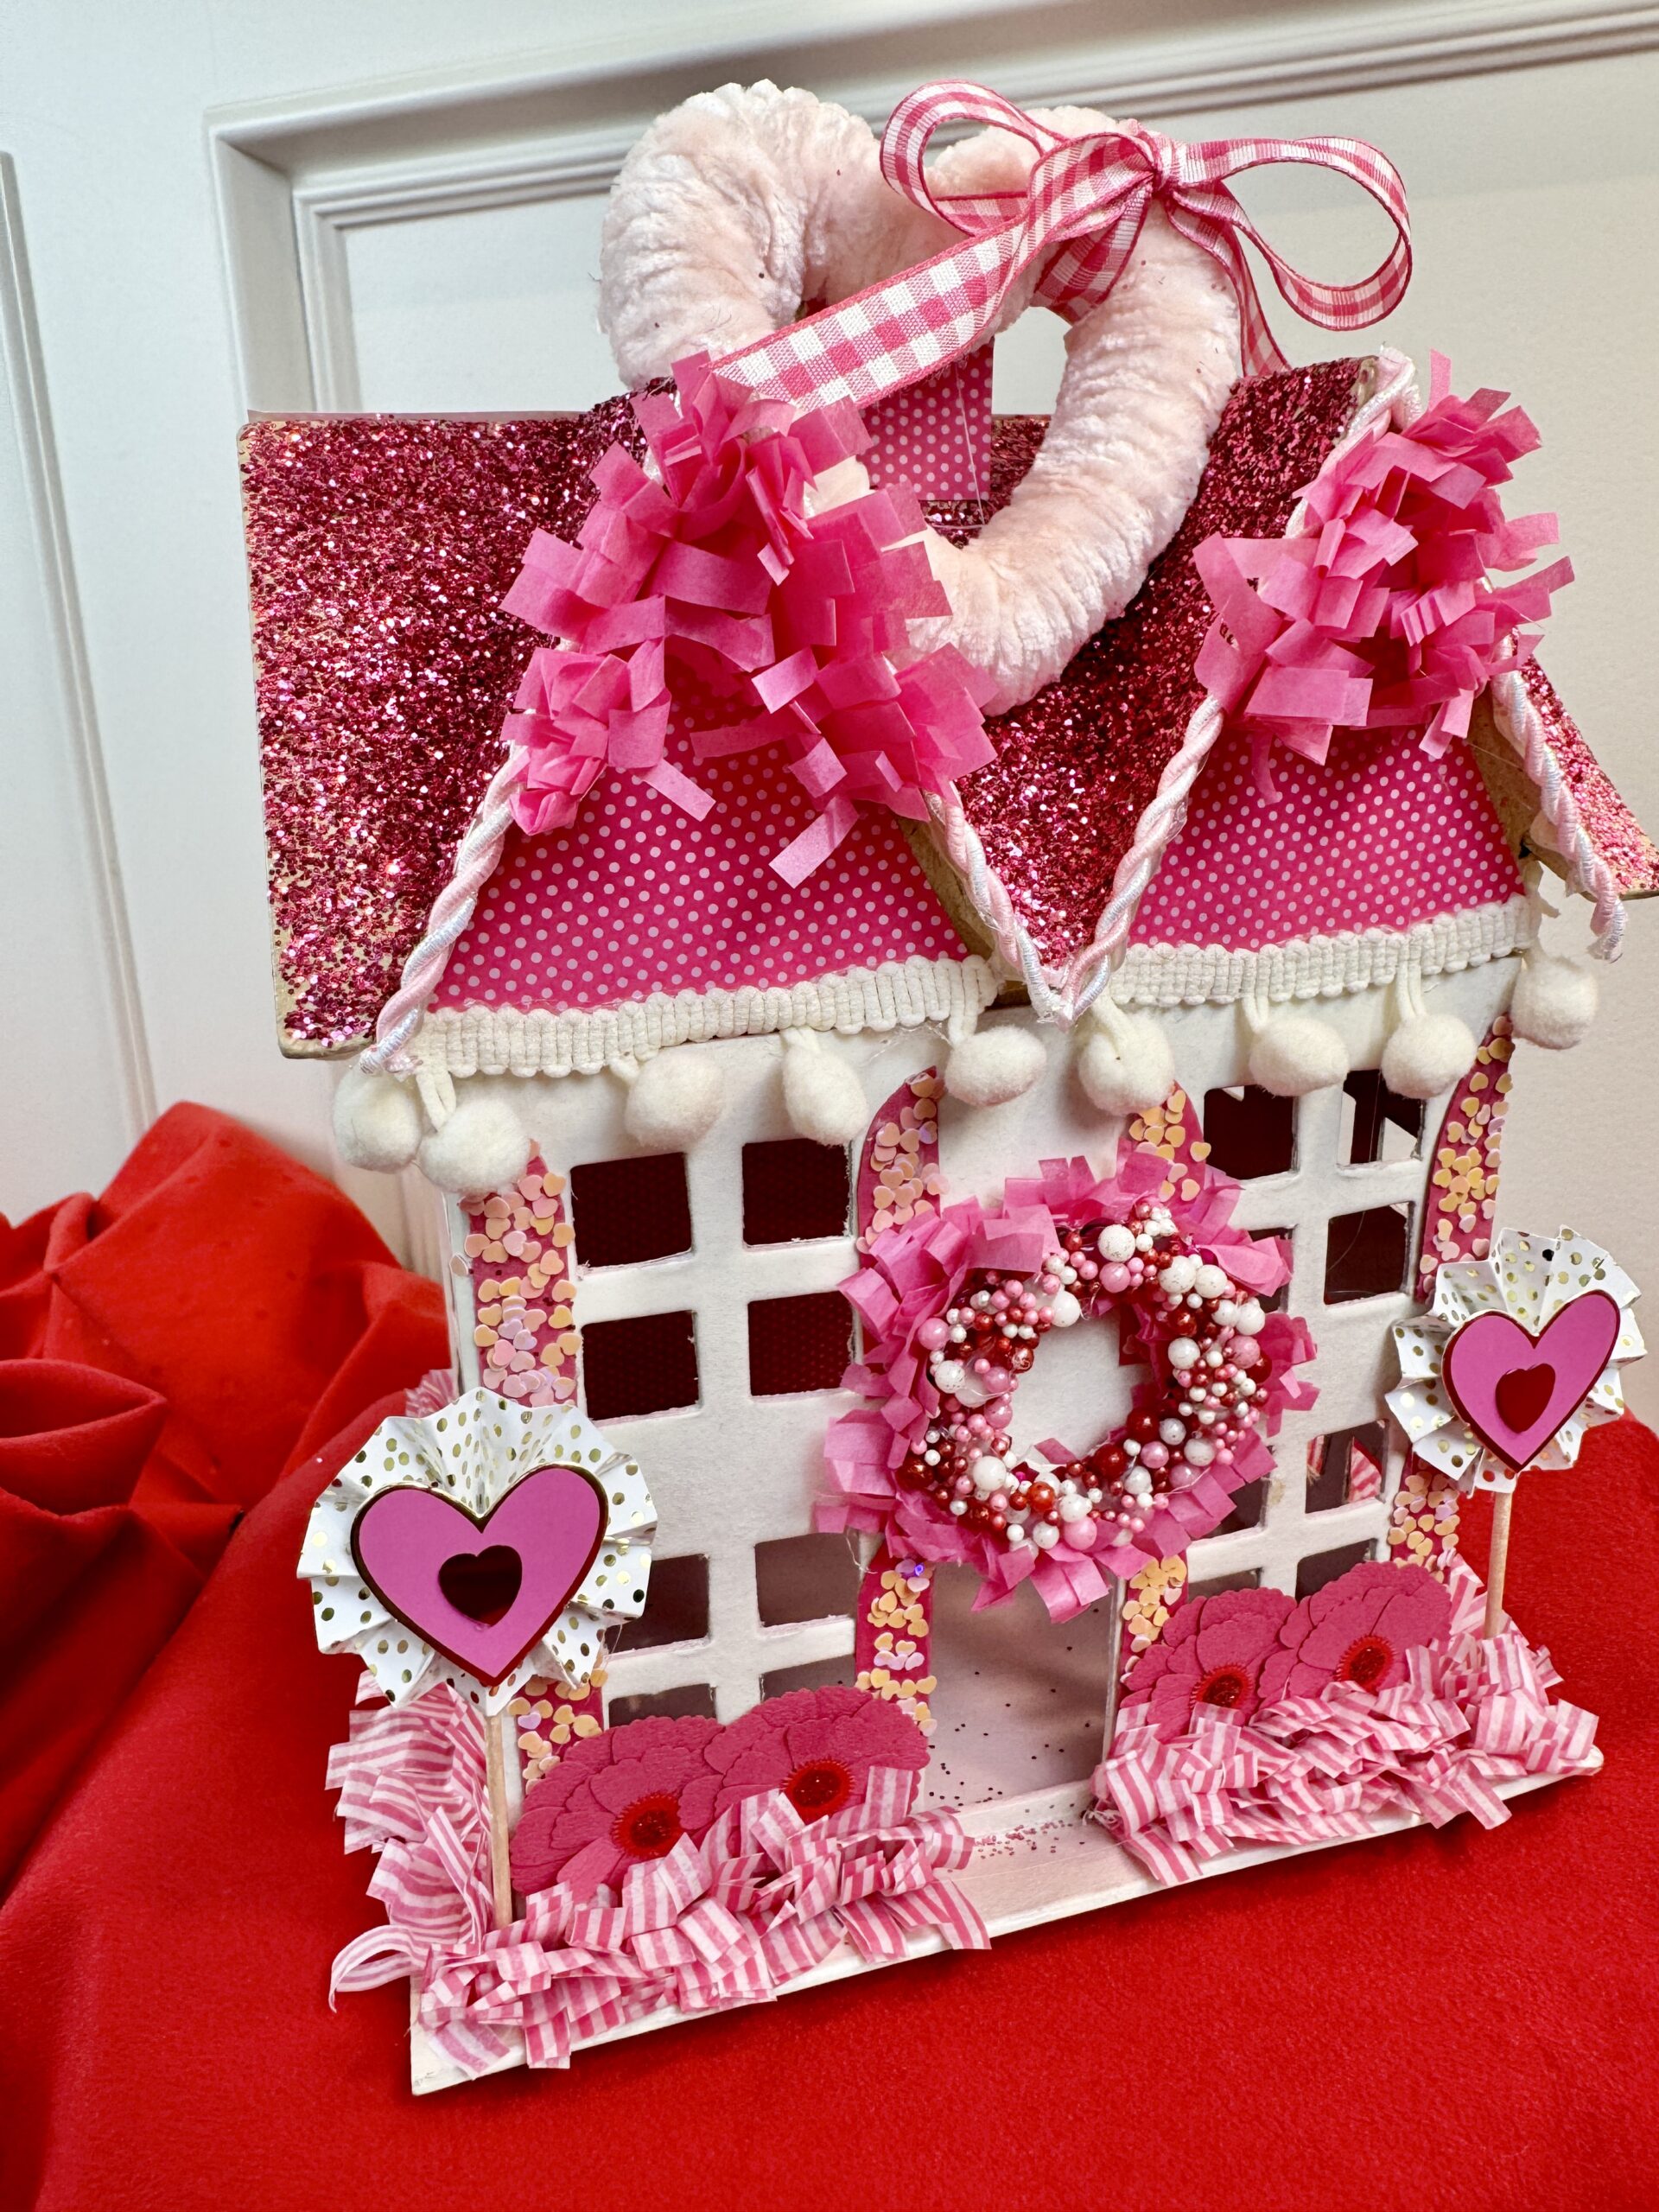
This week I’m sharing some of the techniques I use to create my miniature paper mache houses. Whether youre wanting to make one for Christmas, Valentines Day, Halloween, Spring, Summer, Winter or Fall – the techniques are the same. The only things that change to reflect the season are the materials you select.
The Beginning –
I use paper mache’ houses from Factory Direct – They come in several sizes. I most prefer the set of 3 stacking houses (meaning they stack inside eachother). My favorite of the sizes is the medium/middle sized house.
Prep the House
Depending on what medium your going to cover the house with will determine what, if any, prep work you’ll need to do.
If you want to paint your house with either spray paint or craft/acrylic paint you’ll want to cover the house with primer first. The paper is very porus and thirsty. If you don’t prime first, it will drink up your paint and leave the finish blotchy. I recommend using a spray paint primer for it’s ease and smoother finish.
It’s no secret that I almost always prefer the smooth finish and the ease of spray paint. Because the houses have windows and you can see through them into the inside of the house, I also like to spray both the inside as well as the outside of my houses.
If painting the inside a different color than the outside I recommend painting the inside first. After the inside paint drys completely, mask off the inside with blue painters tape before spraying the outside with your second color.
Adding Bling:
It’s fun to add some sparkle, tiny beads or sprinkles to the painted walls. I do this two different ways, you can choose. Both work well, but with different results.
Sparkly or Beaded Walls Method #1 – Glitter on Wet Paint
An easy way to add some sparkle or sprinkles to the walls is to spray paint the house and while the last coat of paint is still damp, sprinkle on the glitter. The trick is for the paint to be damp but not still “wet.” There is a sweet spot to add the glitter, not too wet vs. not too dry. All this to say – you’ll need to work fast,
Notes: In my experience, brushed on paint doesn’t work as well for this method.
Also, if you want glitter on some parts of the house but not on other parts, you’ll need to paint the parts you don’t want sparkled, let dry completely and then mask-off those parts before doing the sparkle coat.
Sprakley or Beaded Wall’s – Mod Podge Method #2
This method is easier to control, but produces a different finished effect. I actually like both effects, so I still use both methods, depending on the look I’m going for on an individual house project.
After either painting and/or covering the house with paper, be sure to let it dry completely. Brush over the parts you want glittered or beaded with a very light coat of Mod Podge (dont get crazy with too much Mod Podge) and then generously sprinkle with the glitter, sprinkles or beads.
I always use a glitter tray (not sure that’s the official name of these things, but it seems like the most logical name to me, so. . . ) By placing your project in the tray to sprinkle, it captures allllll the excess glitter. Using the little funnel at the bottom the tray I’m able to pour all that product back into the bottle, eliminating SO much waste and mess!
Notes: Be aware that most glitter tends to be staticy. This means that it will likely stick to places you didn’t add glue to. You can remove most unwanted glitter by brushing the dry surface lightly with a clean, dry paint brush.
Be aware of the finish on the Mod Podge you use. There are lots of different formulas and finishes of Mod Podge. Some are shiny, some are matt, none are flat. I suggest experimenting with it before you put it on our house, just to be sure you like the effect before you go for it!
Covering the house with paper:
This is my favorite way to design my houses. In real life I adore all textiles – fabrics, trims & wallpapers, so it’s no surprise that I love to cover my little faux houses in fanciful patterns and textures too.
I use all kinds of papers, crafting or scrapbooking paper is an obvious choice. But just as often I bring in wrapping paper, paper napkins and wallpaper scraps. I’ve yet to try fabric, but I’m certain it would work if backed with some Heat n’Bond to control the inevitable fray!
If you decide to cover your house with paper you won’t need to prime or paint the house.
Cutting the paper to fit all the angles can feel a bit daunting at first, but I’ve mastered some methods that should make you a pro in no time!
Rather than pre measuring, I usually put the paper to the surfaces of the house and mark or bend (crease) the paper where I want to cut it. I either cut it in place with an exacto blade or I take it back up, cut with scissors and then adhere it to the house.
Papering the Roof
The roofline is the most difficult to cut given all the different angles. Again I typically lay my paper over the area, pressing and bending the corners and edges into ATG tape along the rooflines. I then cut the paper with an exacto blade as I go.
ROOFLINE TIPS:
Here’s my step-by-step process for cutting papers for the roofline. It may take some practice. I recommend having extra sheets of paper at the ready in case you mess it up. . . a couple of times. It gets much easier the more you do it!
One
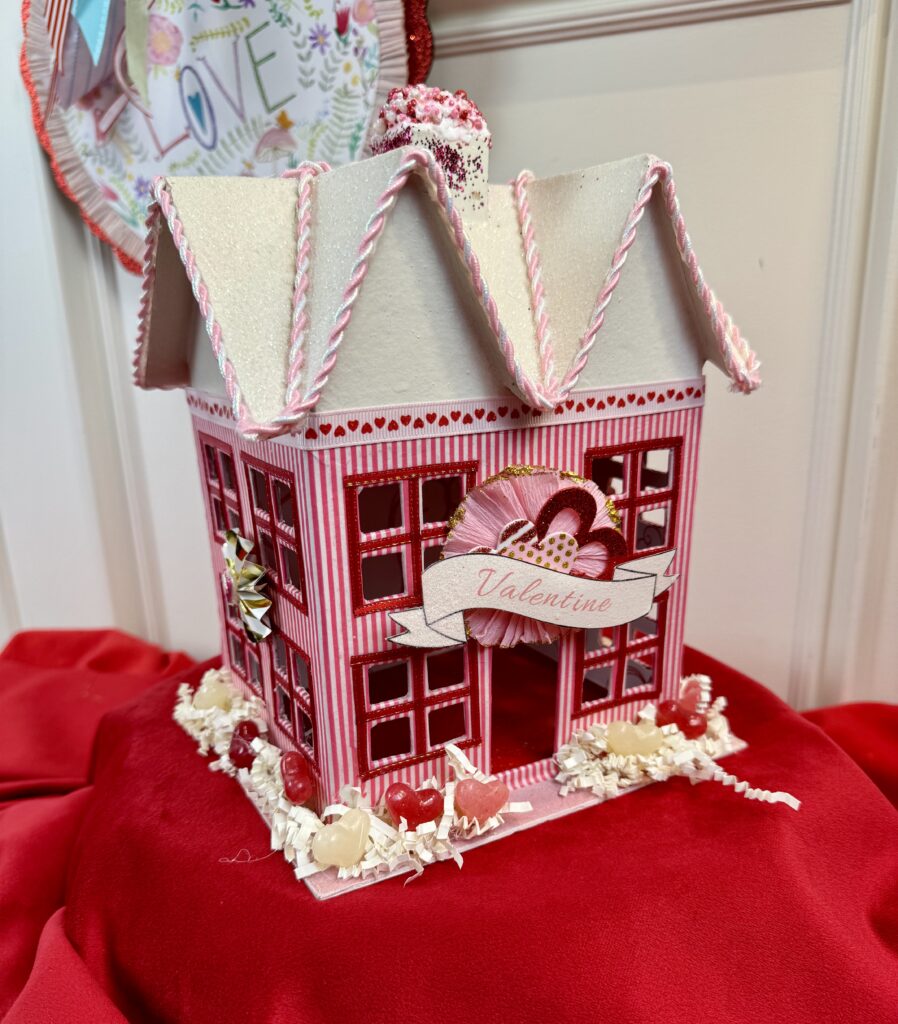
I do the main roofline first, before I tackle the dormers. Sometimes I use two seperate pieces, one for the front of the roof and one for the back. Other times I attempt to do both front and back with the same sheet of paper, folded over at the peak of the roof. It all depends on the paper I’m using, and if I’m okay with adding a decorative element to the peak of the roof to cover the unsightly seam.
Take note that the main roof is much easier to do in two pieces, however I have to be okay with having the seam that doesn’t look good and needs to be covered with something pretty. I often use a tiny ribbon or beads to cover the seam. The bonus is that this actually adds desirable detail and looks even prettier, which is a big win/win!
Two –
I apply whatever adhesive I’m using to adhere the paper to the roof FIRST. I then lay the paper onto the roof, knowing I will likely need to take it up and reposition it as I work. Be sure to add adhesive all around the base of the chimney prior to papering the roof.
- Lay the back first. Using a small exacto blade, cut around the chimney.
- Now do the front by either folding the paper over the ridgeline of the roof or cutting a second paper. Again, cut carefully around the chimney. If your house has dormers, press the paper down the center between the two dormers.
- Trim the paper at the crease line next to the dormers.
- Next, if your house has dormers – cover each dormer individually by laying the paper over each dormer roof, creasing the paper at center ridge of the dormer and pressing down the sides into the creases along roof’s edges.
- Trim the paper away with an exacto blade – or – take the paper up, cut it at the creases with scissors and then relay the cut paper back onto the roof.
About the Eves
You’ll want to think about the eves of your roof. You can finish them in a variety of ways:
- Wrap the paper over the edges and tuck it under the eves.
- Cut the paper at the edges of the roofline and add ribbon or a tiny strip of different paper to the eves.
- Paint the eves in a complimentary color.
- Decorate the eves with anything that strikes your fancy.
Adhesives for Papering
I use a variety of techniques to adhere papers to my houses. Each has it’s own pros and it’s cons. I’ll share them all with you and recommend you just experiment with them to see what works for you!
Applying Papers – Spray Adhesive
Pros – Spray Adhesive is going to hold! It covers really, really well.
Cons – It’s messy and requires A LOT of masking to keep from spraying glue to parts you don’t want glued yet, or at all. . .
The best way to use spray glue is to cut out the paper panel to size and shape first, then spray the back of the paper, let it sit for a few minutes so its’ not “wet” before applying it to the house.
Notes:
I recommend using a removable or repositionable spray glue. Don’t use permanent adhesive spray, as this is guaranteed to make your life very messy and very frustrating!
To keep spray glue from flying everywhere I find a great big (ie, wide and deep) cardboard box (thank you Amazon!) and set my paper pieces inside to spray them. After each spray I place fresh paper inside the box so that unwanted glue doesn’t accidently get onto the face of the next piece that I spray.
When using spray glue you’ll want to be sure you are wearing short sleeves and probably something you don’t care that much about. Disposable loves are a must! As a matter of habit, I usually pull on my mechanics jumpsuit over my cloths when spraying glue (or paint). It’s a great little investment that pays off over and over again, saving my cloths!
Applying Papers – ATG Adhesive Transfer Tape
Pros – ATG Tape is super easy to use with little to no mess.
Cons – Hmmm, can’t think of any cons.
If you’ve followed me for any length of time you know ATG Transfer Tape is my “Go-To, Can Not Live Without” crafting buddy! I buy all three widths in bulk and keep extra on hand at all times!
To use ATG tape to apply papers to your house, run the tape along all the edges, seams, nooks and crannies where you want to add paper. ATG tape is essentially like using double sided tape, only WAYYYY better!
Place the tape where you want it, leaving the brown paper backing in place. Go back over the paper backing of the tape with a kitchen scraper or credit card, pressing it firmly into place. Remove the paper backing as you add your decorative paper to each section.
If you need to remove the tape, simply rub it with a clean finger and it will ball up and come off (kinda like rubber cement, for those of us old enough to have had the pleasure of breathing in the fumes while making covert glue balls in art class!)
Typically I lay my paper over the area, pressing the corners and edges into the sticky tape. I bend and shape the paper around corners and edges and cut the paper with an exacto blade as I go.
Rather than pre measuring, I put the paper to the surface and mark or bend (crease) the paper where I want to cut it. I either cut it in place with an exacto blade or I take it up, cut with scissors and then adhere it to the house.
Applying Papers – Xyron Machine
I made A LOT of houses before it even occurred to me to use my Xyron Machine to add adhesive to the back of my papers. Duh! This was a big miss, as the Xyrom has become my favorite method for papering my houses.
To use a Xyron machine you can either pre-cut your pieces or. . . not. You can also run a full sheet of paper through the machine to add the adhesive before you cut. Both ways work great and I don’t really have a preference. The only caveat I’d give is that the Xyron adhesive rolls aren’t exactly free, so pre-cutting probably saves waste and money.
If you’ve never used a Xyron before, or don’t even know what a Xyron is, check out this link to have your crafting life changed!
Note:
Only use repositional adhesive in your Xyron for this project. Permanent adhesive will be a problem, for all the same reasons that using permanent spray adhesive will cause undue headaches.
Applying Papers – Decoupage Method
To use paper napkins or tissue paper, first you will need to prime the house white. Prime it first and then paint it only if you want to (painting isn’t necessary, but priming is).
Separate the napkin layers, removing both of the two backing layers. I use little pieces of tape in a tiny corner of both sides of the napkin to help pull apart. See the video – this little tip will save you skads of frustration!
Work in sections or one panel of the house at a time. Apply a thin layer of Mod Podge to a section of the house and lay the napkin over the section. Do not pre-cut the paper shapes. Let the paper dry completely before removing edges and excess paper.
Cut a piece of plastic from a ZipLock Freezer storage bag (I would not use sandwich bags, the plastic is thinner and doesn’t work as well). Using the slick surface, gently smooth the paper napkin in place. Let it dry thoroughly before continuing work on the house.
Note: Don’t over work (attempt to over smooth) the napkins. If you try to smooth or manipulate the paper once the Mod Podge begins to set, it will easily peel and tear the delicate paper.
IMPORTANT NOTE: Part of the beauty of decoupage is it’s imperfections. It inherently will have some tiny wrinkles on the surface. If you do not like the imperfect finish I’d choose a different paper for your house.
Applying Papers – What NOT To Do!
Two additional adhesive methods I have tried and DO NOT recommend are Hot Glue or Mod Podgeing paper to the house.
Hot Glue makes the paper lumpy and looks bad.
Mod Podge makes the craft or wrapping paper too wet, causing wavy wrinkles and tearing. It’s frustrating and doesn’t turn out well.
Caveat Note: The one obvious exception would be if you are wanting to use paper napkins or tissue paper to create a decoupage effect on your house. These you can (and should) apply with Mod Podge.
Get your Creative Genius Flowing!
Once the main body of your house is covered, either with paper or paint (or a bit of both) it’s time to get your creative on!
Adding all the little and big details is just the most fun!
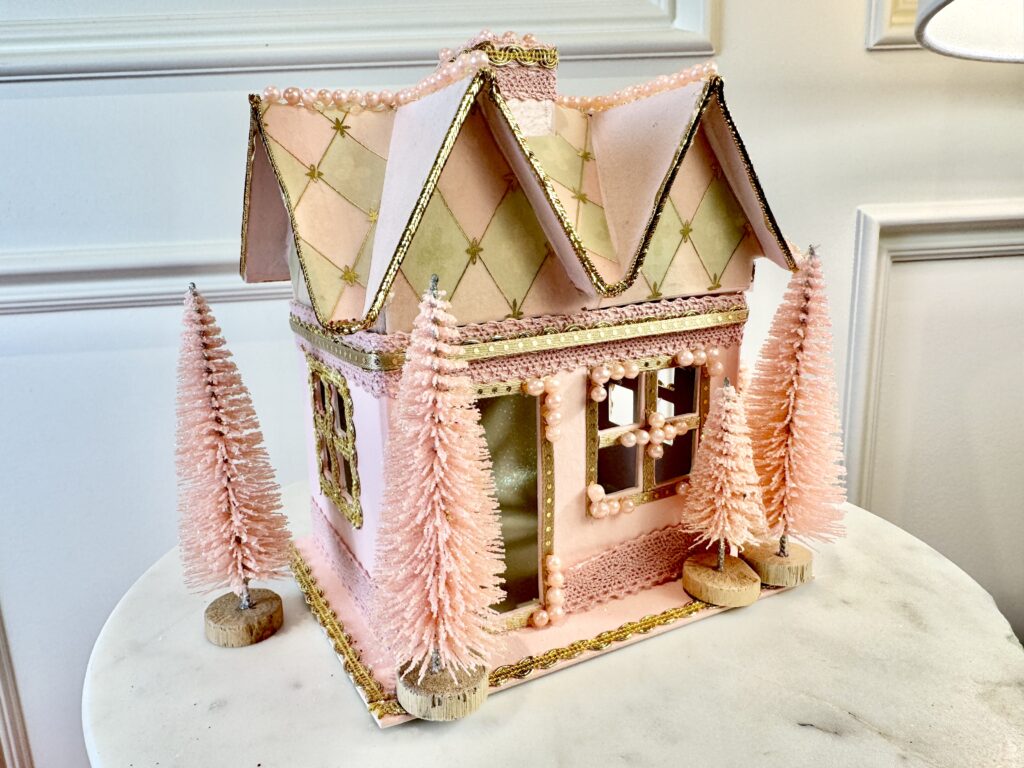
It’s impossible for me to list every single possibility! The possibilities truly are limitless. Let your imagination run wild! What I can do is show you how I’ve decorated my own houses, so far. . . And I can demonstrate the methods I’ve used to achieve the creations I’ve made, so far. . .
Trims & Ribbons
Adding ribbon or trim is easy. I apply them with one of two methods; ATG Transfer tape and/or Hot Glue. Watch the video here to see how to apply ATG tape to ribbon and trims.
I like to edge the rooflines and windows with tiny ribbon. I often cut my ribbon thiner than it comes on the roll to achieve a delicate, subtle effect. See the How To video HERE
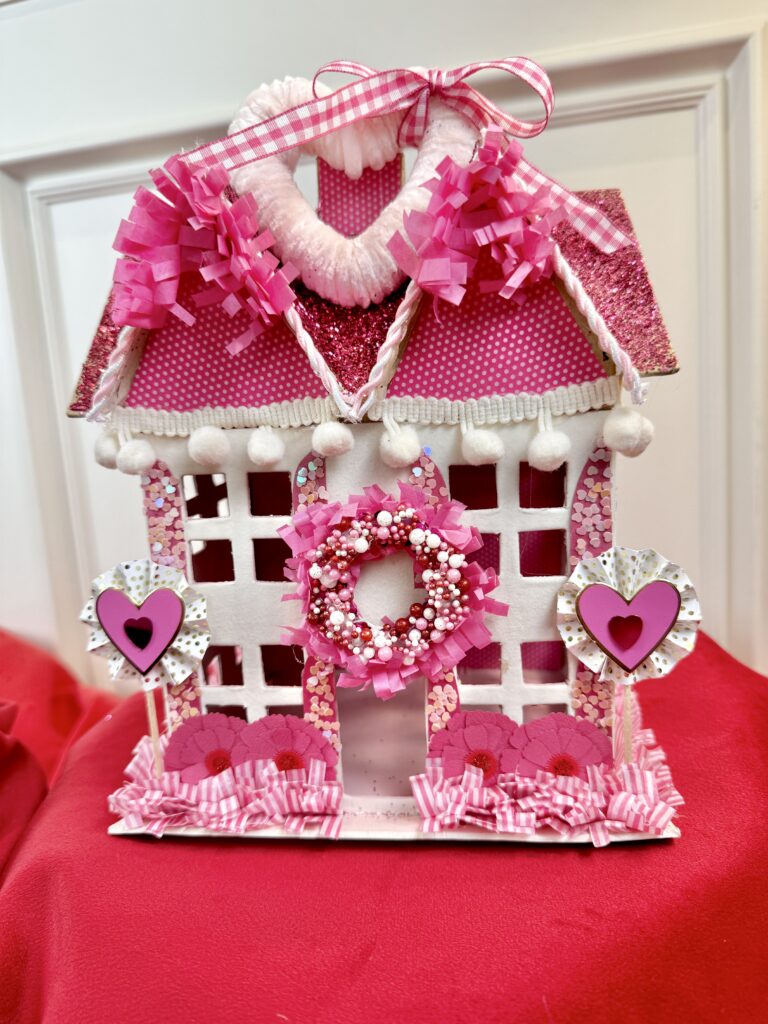
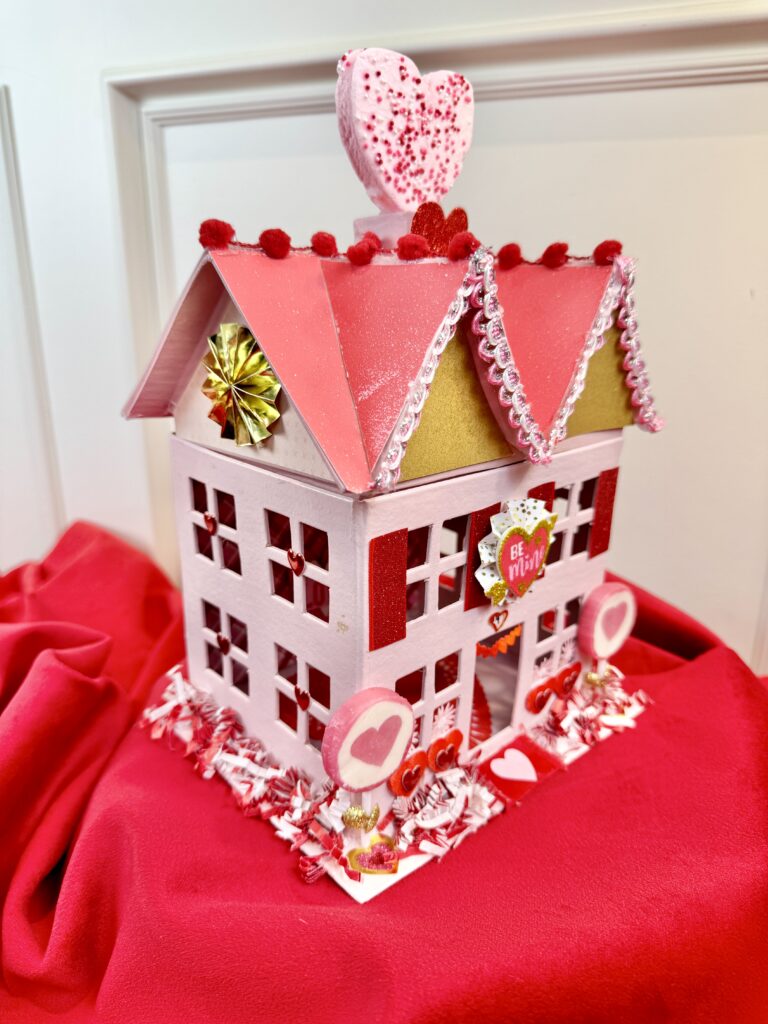
Crinkle Paper Fluff
You know, the little crinkly paper stuff you use in the bottom of gift bag. . . it makes a cute hedge or “grassy” trim around the outside edge of the house. I put a thick line of ATG tape around the edge of the house and pressed the paper onto the sticky tape. You could also use hot glue here. Be careful not to burn your finges as you press the paper into the glue.
I then use scissors to give it a little hair cut so it isn’t’ too wild and crazy. Then I scatter candy or baubles into the hedge for added color and interest.
I’m always a little skeptical of Hot Glue Guns. I’ve been burned more than a few times, quite literally! Also, I dislike (aka; hate) how the glue often leaves a lumpy, unprofessional finish.
That said, there are things Hot Glue is simply best for. Thicker items are good with hot glue, not ribbon, fabric or most papers. However, I have found a glue gun I really, really like. I like it because it has a temperature control and best of all, a variety of tips that allows me better control of the flow and size of glue bead. It’s the only glue gun I want to use.