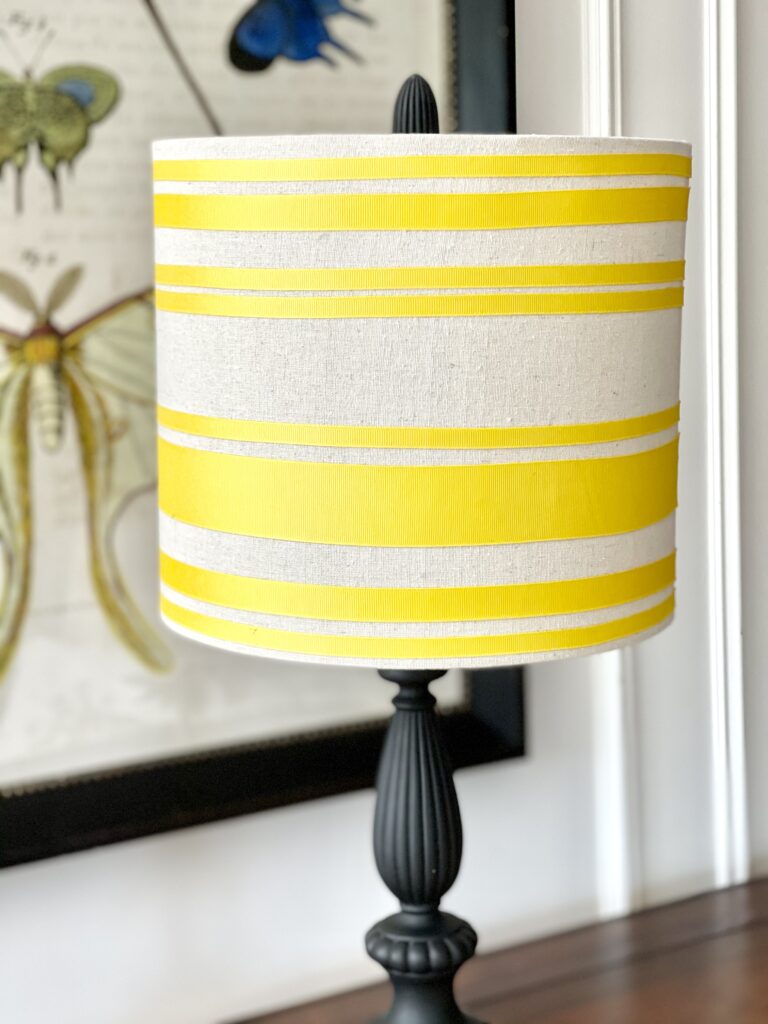
Create Your Own Ribbon Striped Lampshade

It’s the littlest details that make a room extra beautiful. I love adding personal pizzazz to a room by creating my own custom lampshades. Lampshades are one of the best and simplest DIY home decorating projects. There are loads of styles and methods for customizing lampshades, create your own custom ribbon lampshade using grosgrain ribbon, 3M ATG Transfer Tape and painters tape. This DIY ribbon lamp shade happens to be super quick and super easy.
NOTE: You can watch the full Video Tutorial at the end of this article.
Even the supplies are simple:
- A drum (cylinder) shaped lampshade in a color and material you like. This one is similar to mine HERE
- Several spools of Grosgrain Ribbon in varying widths. (*See note below about ribbon choices.)
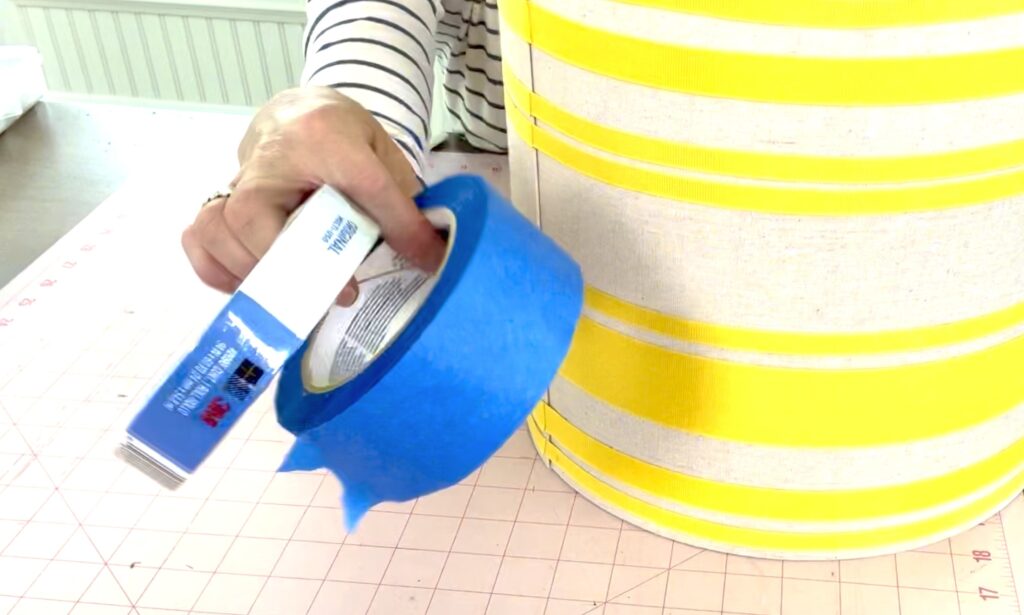
- Painters Tape in varying widths. A pack with 4 different widths is great for this project HERE
- 3M ATG Tape (this stuff is hard to find on stores, 1/4′ HERE, 1/2′ HERE, 3/4″ HERE)
- Kitchen scraper (or a credit card works too). HERE These are cuter than mine, hmmm, maybe I need a cute new one?
* A Note About Grosgrain Ribbon. Grosgrain ribbon is a sewing and crafting staple. It’s the ribbon with little horizontal lines woven into it. It comes in probably hundreds of colors, widths, and often with designs printed on it. Because there are SO many options, I don’t want to limit your imagination. For this reason I’m not linking you to a specific product or place to buy from. There are options on Amazon, but SO many more options from every place you can buy ribbon.
A Couple Extra Hints:
Take note that for this particular project, using a cylinder-shaped lamp shade is critical for success. Remember back to Junior High geometry class? A cylinder mean that it has the same circumference at the top, middle and bottom. The reason for this is because the grosgrain ribbon is not flexible and will only wrap in a straight line. If the shade is cone shaped it won’t wrap evenly all the way around. Trust me on this one. . .
Also, it’s important to use painters tape. DO NOT use masking tape. Masking tape is too sticky and likely will leave a sticky residue on the fabric or paper of the shade which will collect dust over time. The permanently dirty look is not the look we’re going for. . .

Watch the video Tutorial
Create the Pattern
You don’t need to over think or over plan this one. . . just start at the bottom (or top) and work your way to the other end. Placing the painters tape and then ribbon one stripe at a time. The great things is, with the ATG Tape, its super quick and easy to go back and change the placement of any stripe of ribbon.
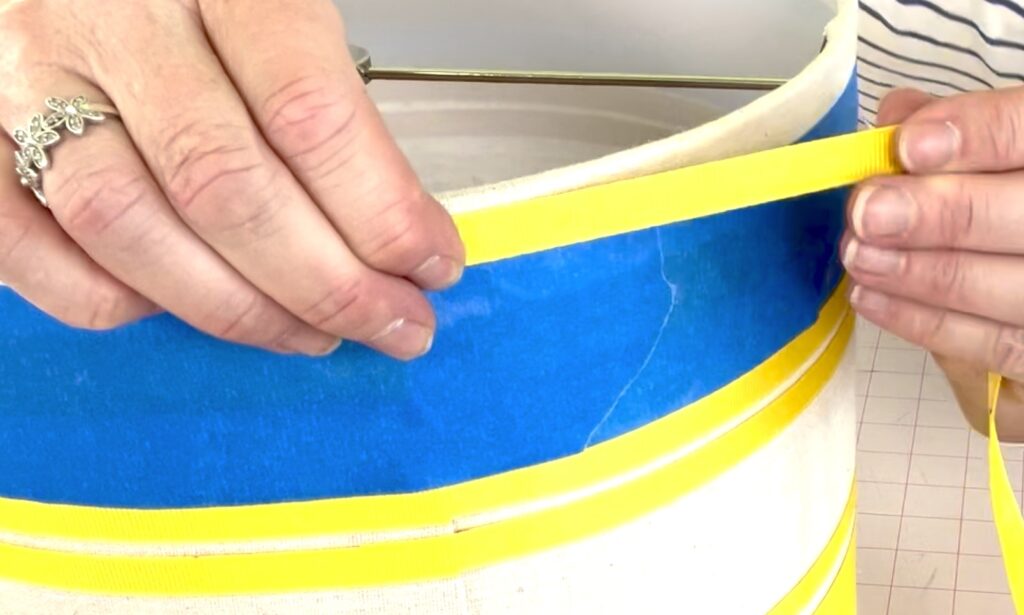
To start, place painters tape around one of the edges of the shade. Then proceed to create your pattern spacing by continuing to use your previously applied ribbons and painters tape as the guides for placing next row, or stripe of ribbon perfectly straight and even.
The painters tape is your guide for keeping the ribbon straight and evenly spaced all the way around the shade. Strategically placing different widths of painters tape at different heights along the shade helps to create a pattern of perfectly positioned horizontal stripes.
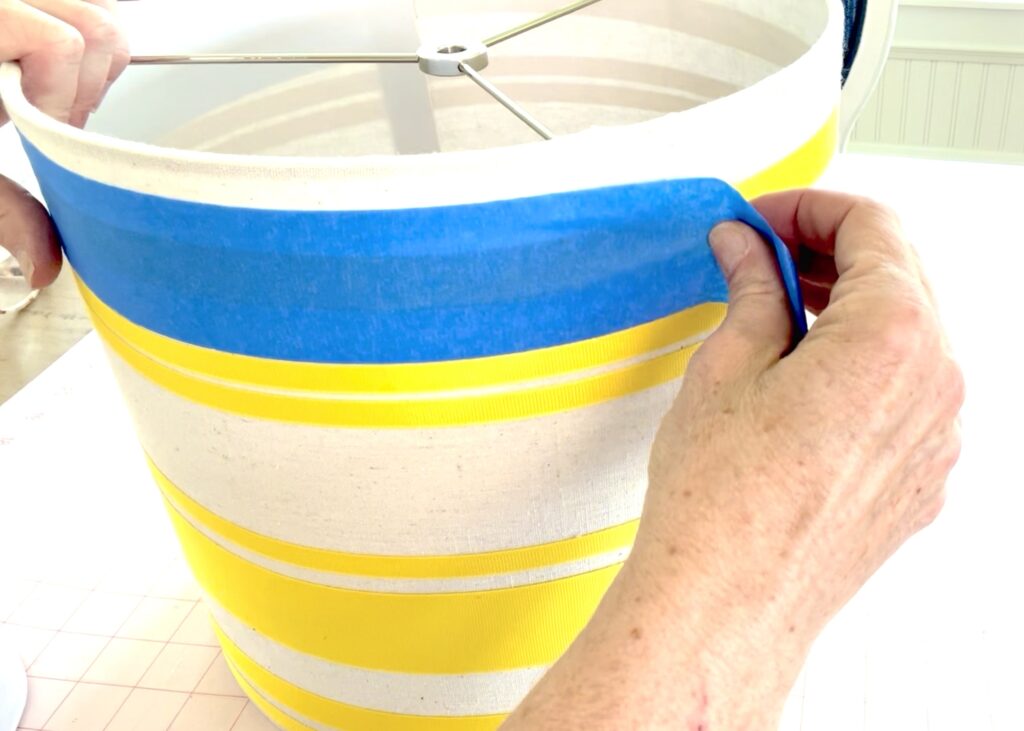
Using different widths of painters tape and/or different edges of ribbon helps to space the horizontal stripes in just the right place.
As a side note, this same method will also work for creating vertical stripes.
Applying Ribbon with ATG Tape
The ATG Transfer Tape is such a fantastic product! I go through this stuff like toilet paper in a girls dorm! I buy it in bulk in all the widths and hope never, ever to be without it. I use it when creating a plethora of different kinds of projects.
Here’s how the stuff works:
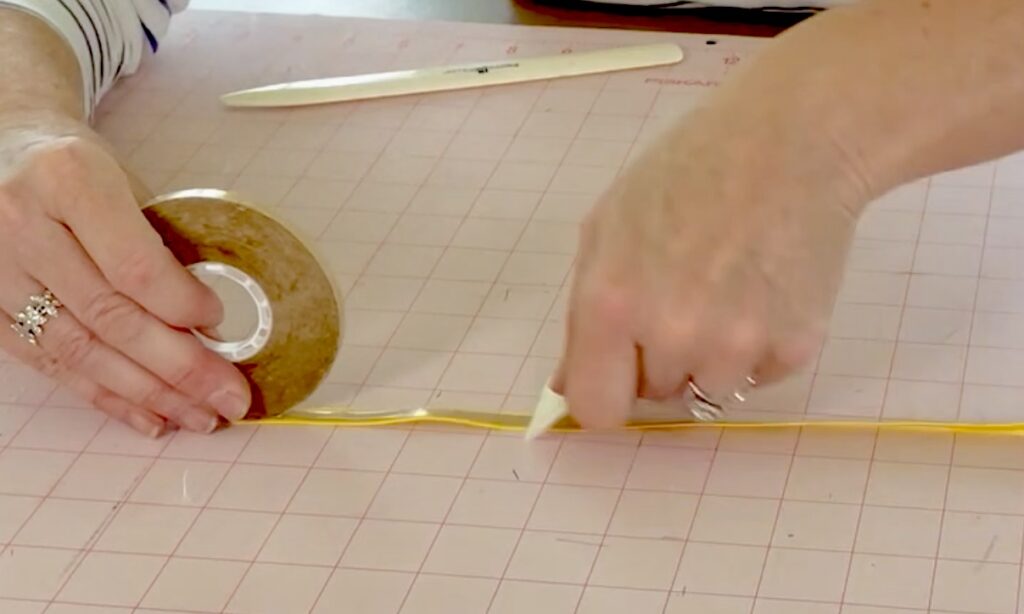
Roll it onto your ribbon (or paper, fabric, walls, wood, whatever material you’re working with).
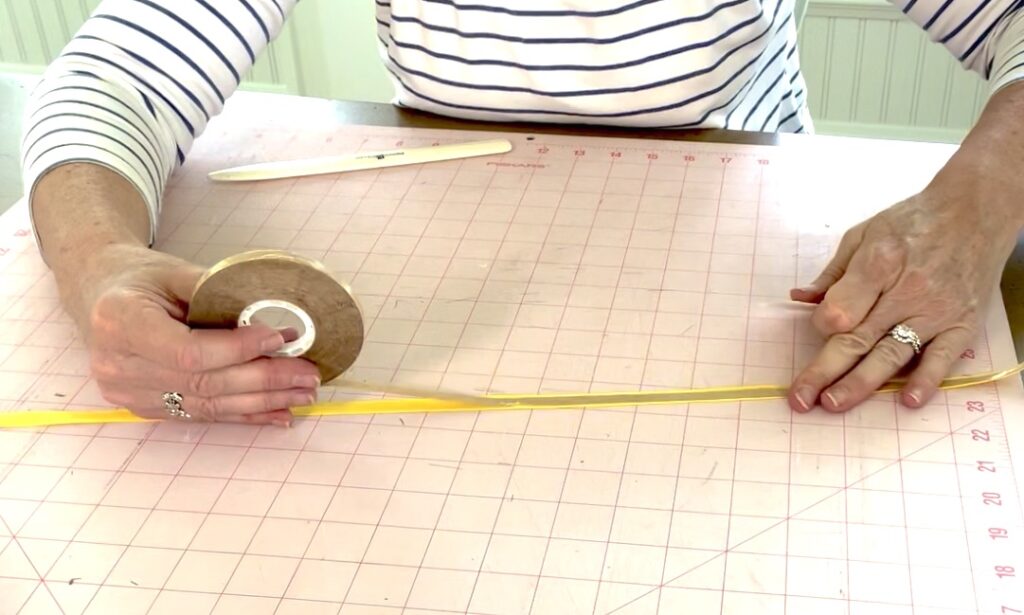
Press it down firmly using a hard edge. I have a small kitchen scraper that does the trick. A credit card works just as well, only I’d forget to put it back in my wallet and it’d be lost. . . because that’s how I roll.
When you’re ready to adhere the ribbon to your lampshade, peel off the paper backing and firmly press it in place with your fingers.
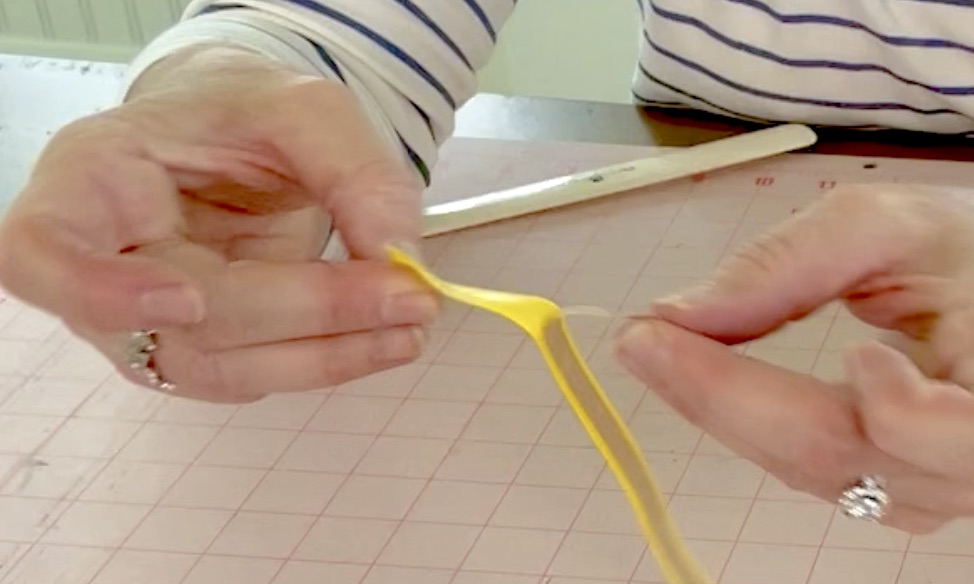
After placing the ribbon where you want it, you can go over it again with your scraper, just for good measure.
The ATG Tape has a good strong hold, but it’s not permanent. Which is great news because if you need to reposition things it pulls off easily. Any tape residue from a removed strip of ribbon can be rolled off a surface with your clean fingers (“clean” being the key word here). It comes off kinda like rubber cement, Are you old enough to remember the joys of rolling up little balls of rubber cement when you were a kid?
A Note about ATG Tape – ATG tape is meant to be used in a Transfer Tape Dispenser Gun. I own the dispensers. . . they’re in a box in my studio collecting dust. I don’t like them. I find I have much more control of the placement using my hands and fingers. If you want to try out the dispenser, you can get them HERE. You’ll need a different size dispenser for the different widths of tape you use.
Don’t Forget to Share. . .
When your all done with your own lampshade creations, don’t forget to send me photos! I love to see and share ideas with my friends!