Coffee-Table Ottomans

A Coffee-Table Ottoman is the perfect combination of pretty and comfort.
Coffee Tables or Ottomans? Which do you prefer?
Not that a person can only like just one. But indulge me here, if you DID have to choose, which would it be? Why?
As much as I love a pretty coffee table, I’ve decided I’m an ottoman kinda girl. A warm, inviting home is my goal. In my opinion, an ottoman says “welcome” much more convincingly than a coffee table.
You see, I like a low, deep sofa, The kind that swallows you up when you sit in it. The kind that you have to “lounge in” rather than “sit on.”
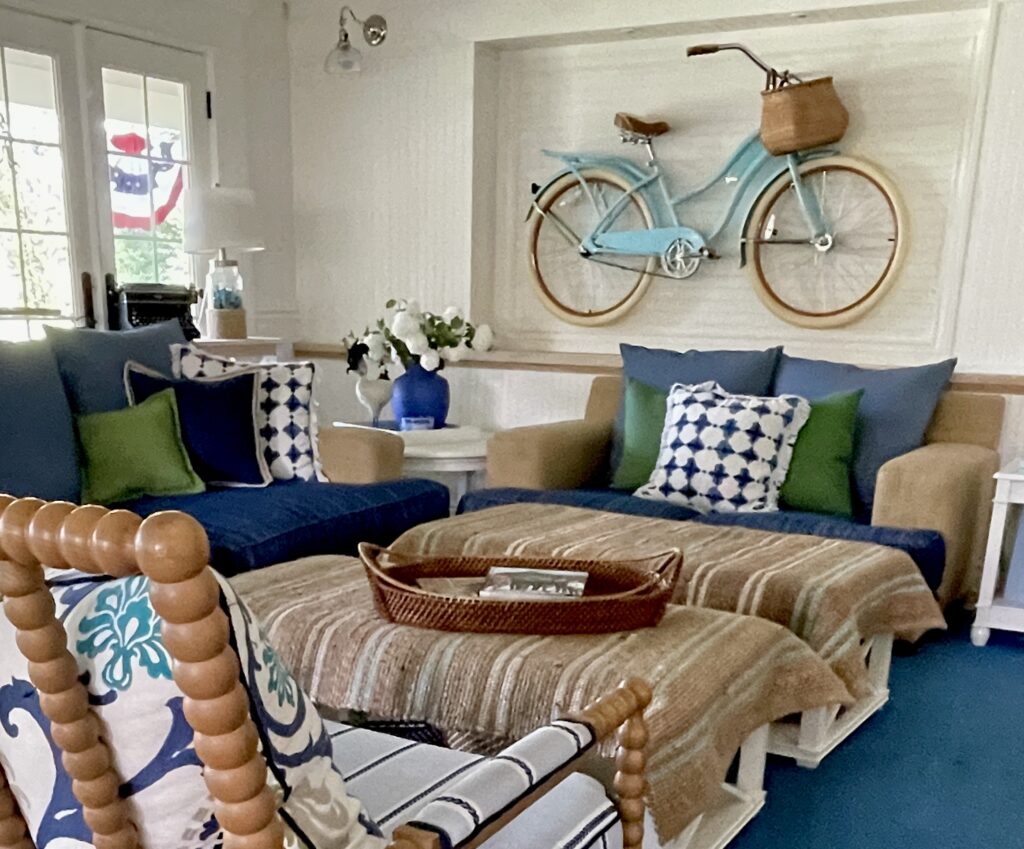
These deep sofas swallow you up. Because there is a lot of seating with space between, I used two coffee table ottman’s. This ensures everyone can prop their feet up, no matter where they sit.
A comfy sofa like this just seems to demand an accompanying ottoman to go with it. One really does need to be able to put their feet up when reclined in my imaginary perfect sofa.
I’m the kind of person who actually prefers my guests put their feet up on my furniture. Feet on the furniture says to me they’re comfortable in my home. It means they intend to stay and chat for awhile. It’s probably a personalty thing.
But. . . here’s the thing, I also think coffee tables are prettier and more interesting to look at than an ottoman.
Eye Candy vs Comfort – Why do we have to choose?
My problem is I want it ALLLLL. I want the comfort factor of an ottoman, but I also want the eye candy of a coffee table.
A little thing about me. . . . I’m pretty good at finding ways to “have my cake and eat it too!” So years ago I devised a way to get both my cozy ottoman AND my pretty coffee table at the same time!
So far I haven’t seen them in stores. I create my own, it’s not hard
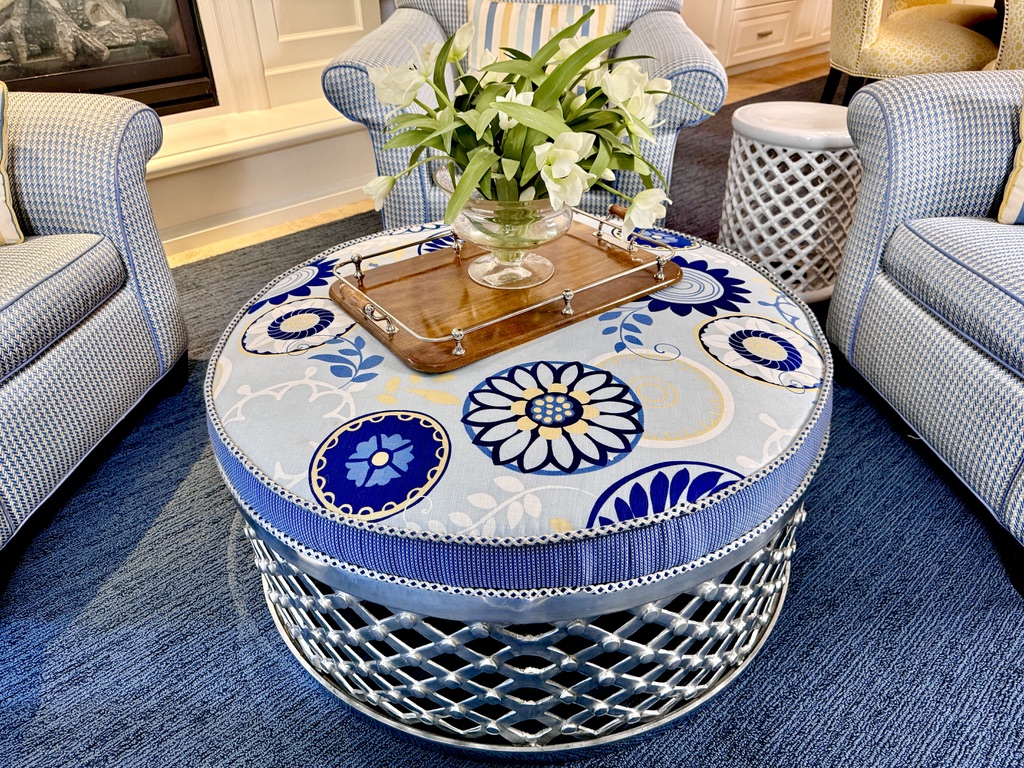
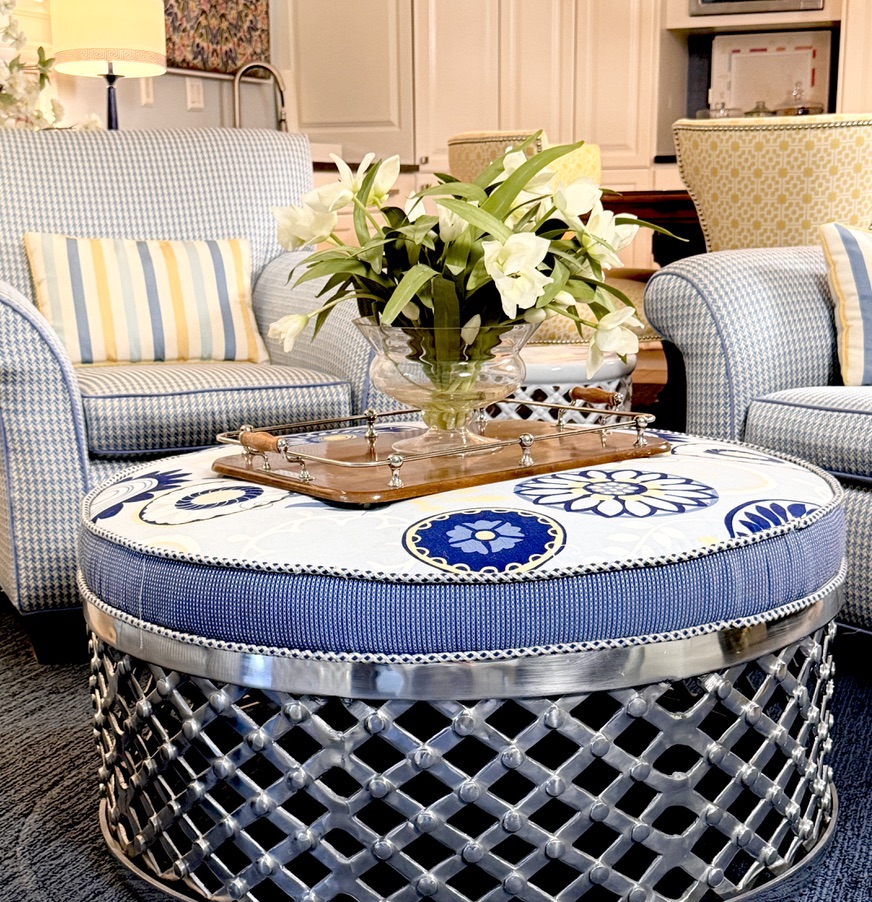
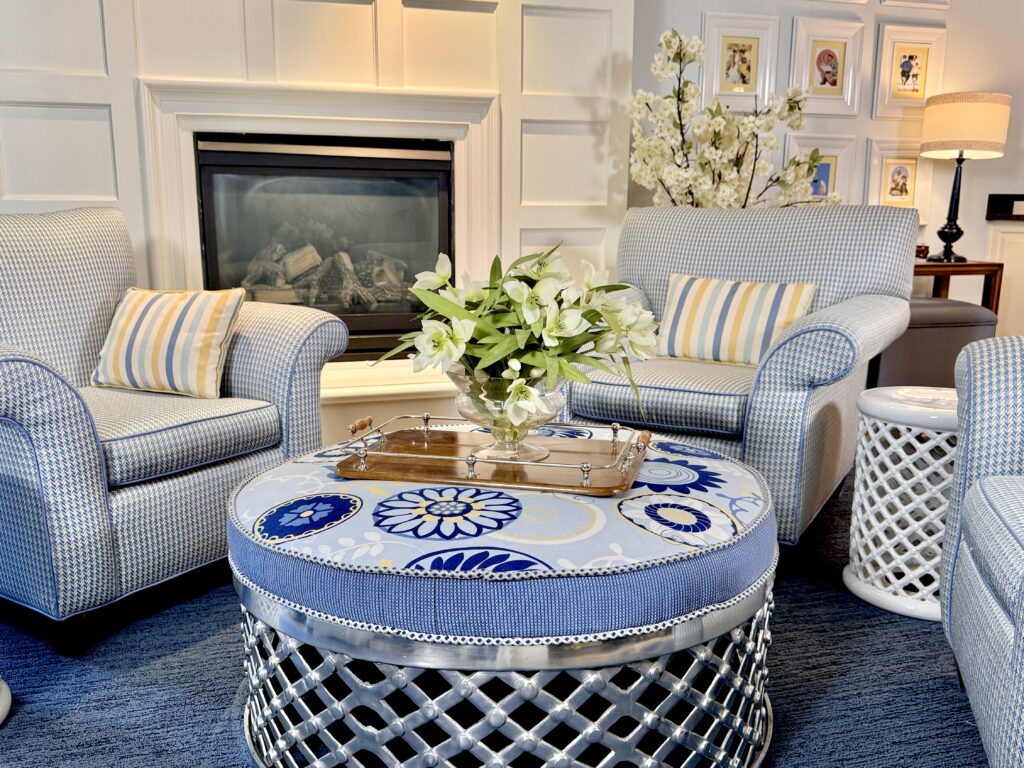
Instead of the expected sofas flanking the fireplace, I’ve clustered 4 matching armchairs around a round coffee table ottoman. This configuration makes for a cozy, convivial conversation area.
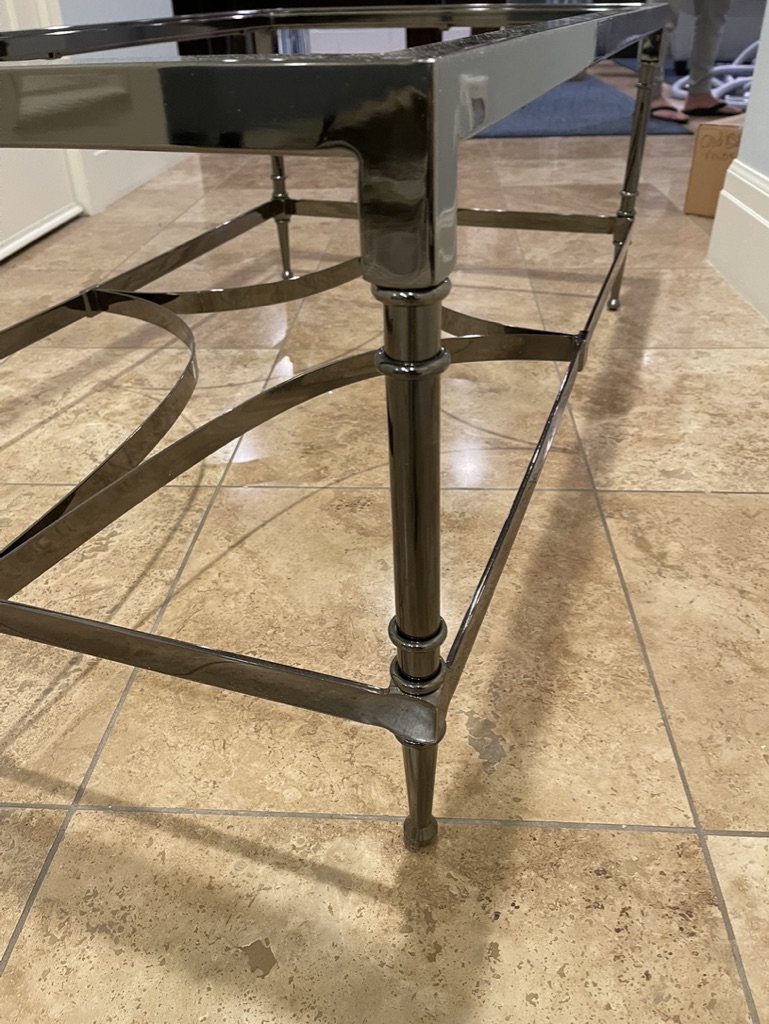
My first was this round metal coffee table from Ballard Designs that I really, really wanted. I was drawn to the juxtaposition of the almost tribal drum looking shape with lattice and knob design, combined with a sophisticated silver finish.
The hard metal surface was not exactly issuing an invitation to “get comfortable” . . . yet I really, really had to have this coffee table.
The thought occurred to me that I could have both just by converting the table into an ottoman. It’s a Win/Win idea!
As soon as the table was delivered it was whisked off to my favorite upholster. I gave him the fabric and the drawings of what I wanted. He nailed it. . . literally!
A Win/Win Idea
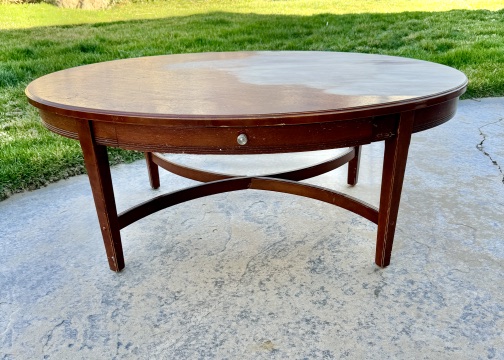
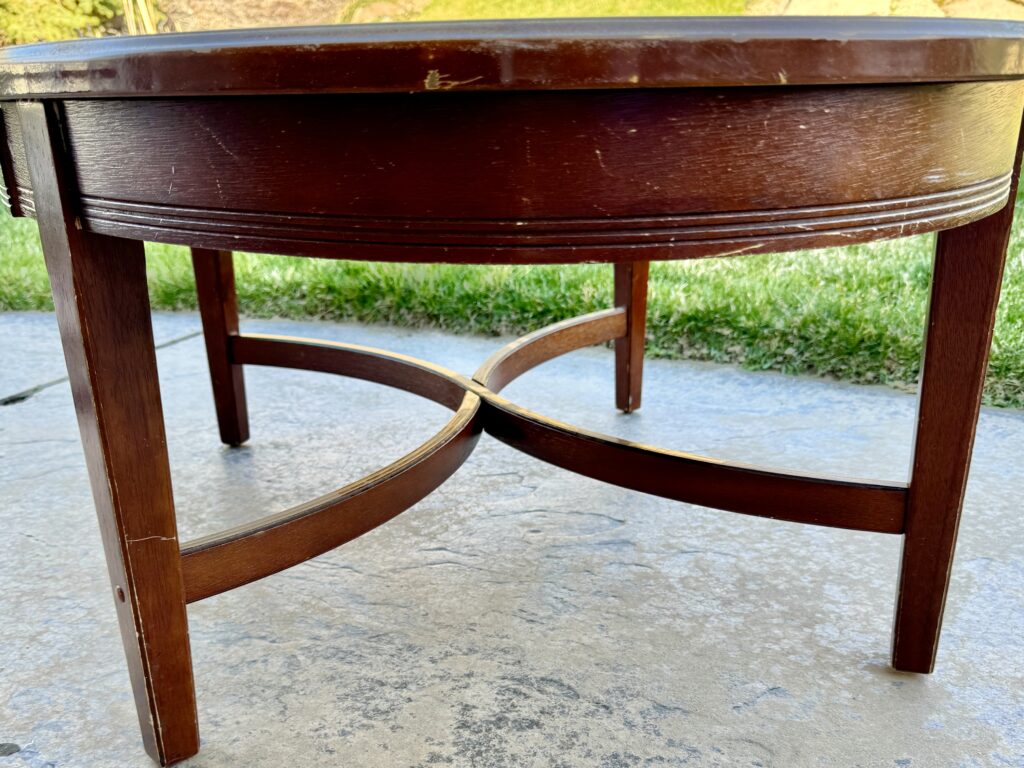
The traditional X-bases of these coffee tables seemed as though they were custom made from my brain to reality. It’s rare that I find something that is EXACTLY what I want, just the way it is . . . well, almost exactly. . .
The Pottery Barn coffee tables were almost perfect for my great room redesign. All I needed to do was add a some cushion. THEN it would be absolutely perfect.
I wanted two Coffee Table Ottomans so that they could be moved around independently as needed. Having two of them makes it so that every seat (and feet) in the room has easy access to an ottoman. They are used not only for propping feet, they’re also benches for extra seating, as well as a great surface for our frequent game playing.
They take A LOT of abuse. Recently I decided to reupholster them in rugs rather than fabric. A rug will be more durable. I like the beachy, casual vibe of this one that also won’t show stains as easily. The subtle turquoise blue stripe gives a little nod to the turquoise bike hanging on wall in the room.
The Hunt Is On
When searching for a great coffee table to convert into an ottoman, I look pretty much everywhere. I’m always keeping one eye out for great furniture finds. I have my favorite furniture brands, so of course I’ll look to see what they have.
I’m also a big believer in thrifting. Older furniture is often much better quality, more interesting, unique and, as a bonus, less expensive.
It’s also a bit more effort to find. . . Facebook Marketplace, KSL Classifieds and thrift stores are fantastic sources. You’ll be astonished at what amazing used furniture is out there to be discovered and rescued from fate in a landfilll.
Shape & Size – What to Look For
Shape
Half the fun is in hunting for the perfect coffee table for converting into an ottoman. What I’m looking for is shape and size. Color doesn’t matter because that can easily be changed.
I look for a table that has something interesting or unique going on. A provocative leg, a striking trim, a useful shelf or drawer, a distinctive shape. . . something that makes it special.
Choosing a square, rectangular or round shape can also make a critical difference. If a space is smallish or feels a little squishy, a round shape will help. Rounded edges help to give the illusion of more space and make maneuvering around a tight room easier.
Also, if a room has lots of hard or square edges, adding some rounded or oval features can soften the look and make the room feel more pleasing.
Height
The ideal height of an ottoman is at or slightly below seat height. However I actually don’t over worry about this. If my finished coffee table ottoman is slightly higher than the seat height it still looks and feels great.
Keep in mind however, that when converting the coffee table to an ottoman there will be some added height to the existing table. The padding will be anywhere between 2-4 inches. The exact added height is determined by personal preference.
To compensate for the addition of the cushion or wheels on the legs, I frequently shorten the legs on the table.
So, about wheels. . . I love them. I like being able to move the coffee table/ottoman easily. I add wheels whenever I can.
Size
How the table/ottoman fills up, or floats in the space of the room matters. Ideally, it should be large enough that every seat that surrounds it can easily reach it with their hands and feet. It’s awkward if a nearby chair or sofa is almost close enough, but not quite. . .
On the flip side, the ottoman should not be so large that it consumes the space. You should be able to walk and move easily between the seats and the ottoman. I highly recommend making sure that your vacuum can easily maneuver between as well. Trust me on this, it’ll make your cleaning life much easier!
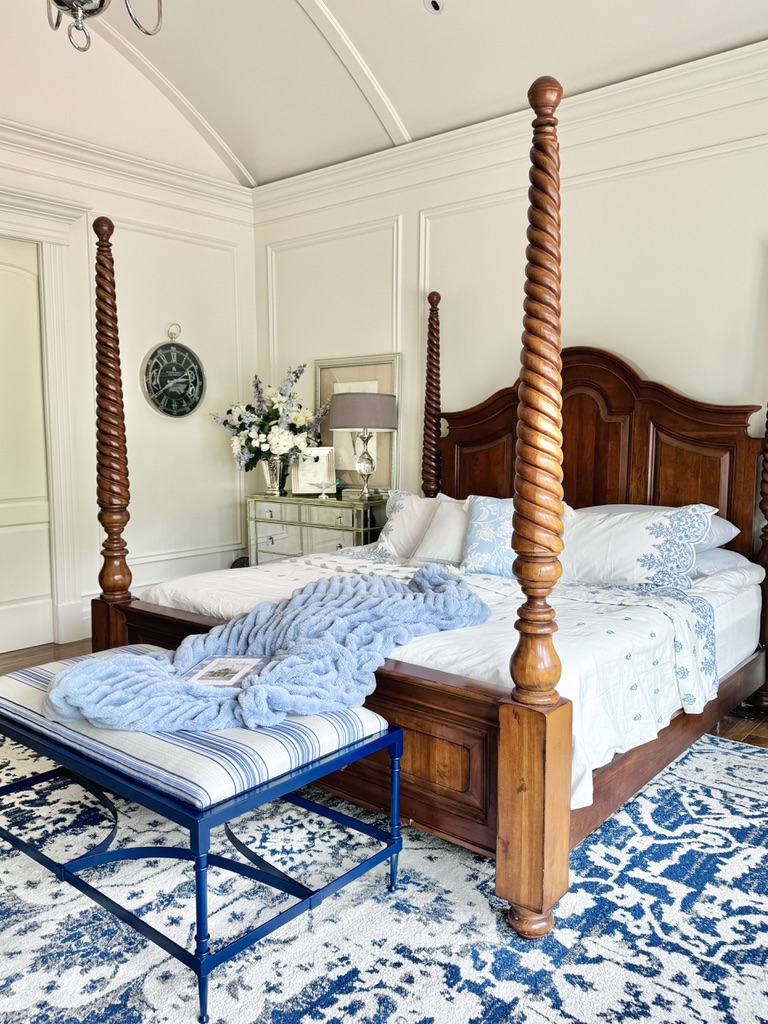

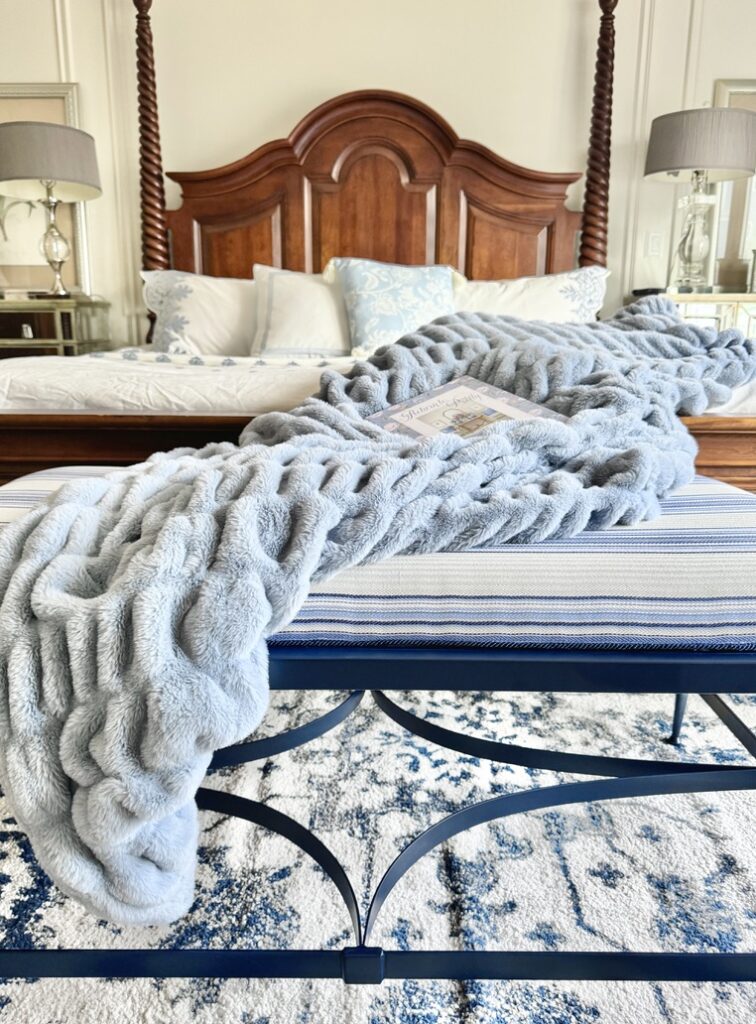
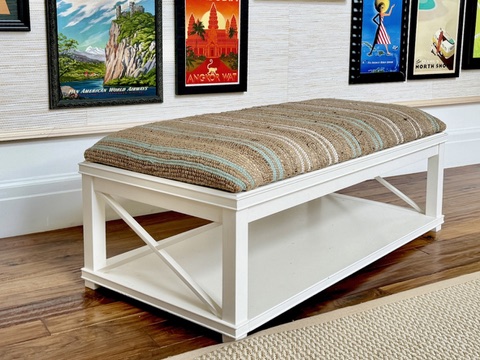
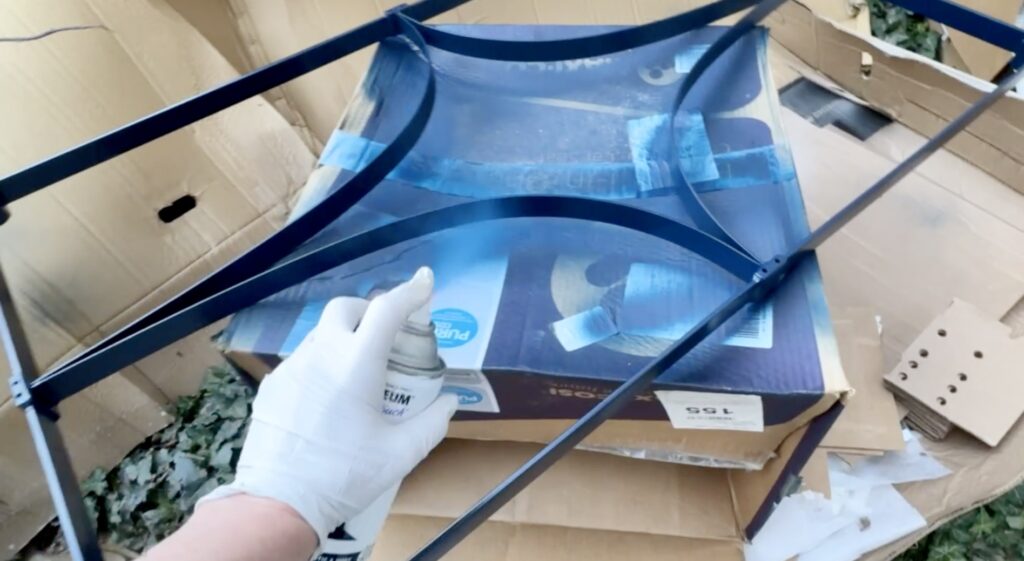
I swiped this coffee table from our family room, sprayed it blue and added a blue striped fabric. Now it’s a bench in our Primary Bedroom.
One Ottoman Is Great, Is More Even Better?
I’m going say in this case, sometimes more IS better! I frequently utilize two, three or even four ottoman’s in a room.
It can be a challenge when there is too much space between seating, knowing it’s ideal to make sure every seat has a place to prop a foot and a beverage. Extra long sectionals can be challenging in this way.
Sometimes one extra large ottoman can do the trick, however a massive ottoman may feel too bossy and overbearing. Another space that can be tricky is one that’s narrow and has seating that runs long but not wide. A big ottoman won’t fit width ways, but is actually needed in a long, linear fashion.
Using multiple ottoman’s can be a great solution to a myriad of these space issues. I often select two identical rectangular ottoman’s instead of one large square ottoman. (Same principle can apply to coffee tables.) The separation between the two ottoman’s allows each to be ideally placed in a larger, wider space.
When a space is really large or awkwardly shaped, three or even four, ottoman’s can be the magic solution. These can be moved about and placed individually.
I love the look and practically of four square ottoman’s which can be bunched together for a cohesive look when not in use. These can then be pulled apart and moved to where they are needed as guests are sitting around chatting or watching TV.
Choosing Materials:
You will need High Density Foam. It’s available at most craft stores, upholstery fabric stores, some cities and towns will have businesses that specialize in foam. Mine came from HERE.
Choosing fabric for the top is where the fun, and sometimes the anxiety, comes in. This can be the place we get “stuck.” I have a few tips on selecting your material for the top of your ottoman.
- The first one is rather obvious. Select something that works with the room it’s going into. My recommendation, for what its worth, don’t play it safe! Go with pattern, color and/or texture! This can be a great feature and conversation piece. Make it matter!
- Think of the unusual. Fabric is the first place our minds go, but don’t limit yourself.
I love to use rugs – they’re fun, come in lots of colors and patterns and they’re super durable.
It can be fun to use unusual fabrics or textiles. Don’t rule out tablecloths, shower curtains, a pretty shawl or scarf. (If using a light weight fabric, there will be some extra steps.) - If your new coffee table ottoman is going into a high traffic room, I highly recommend using a performance or Indoor/Outdoor Fabric. These will stand the test of time better. After all, an ottoman is meant for feet and food. . .
- If you are not using a performance fabric or a rug be sure to give it several good coats of Scotch Guard before you even set it in your room. This will be a game changer and help save your pretty new piece of furniture!
Other Supplies You’ll Need
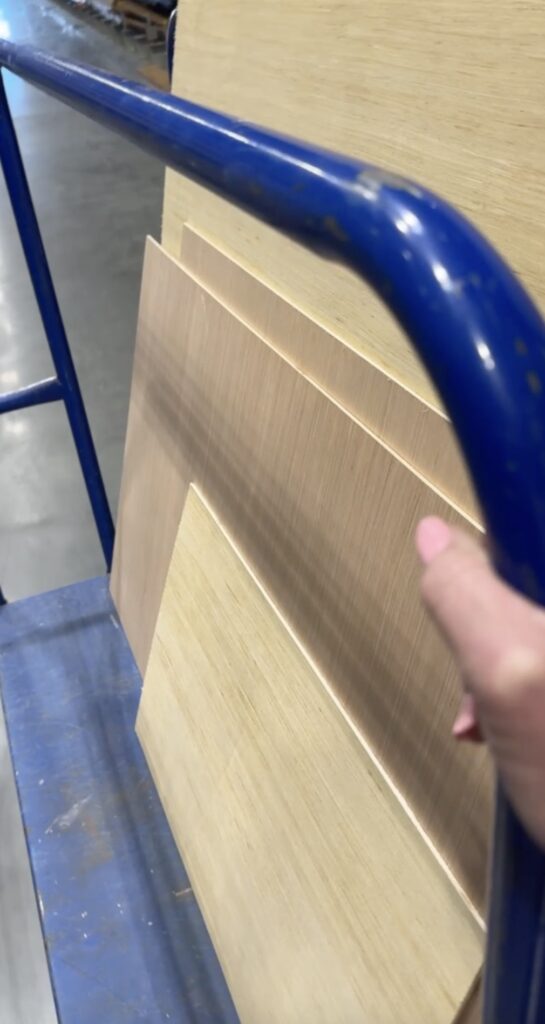
- 1/4″ sheet of wood, cut to size.
- 3/4″ wide bolt, nut and washer (the length will depend on your specific coffee table)
- Foam HERE
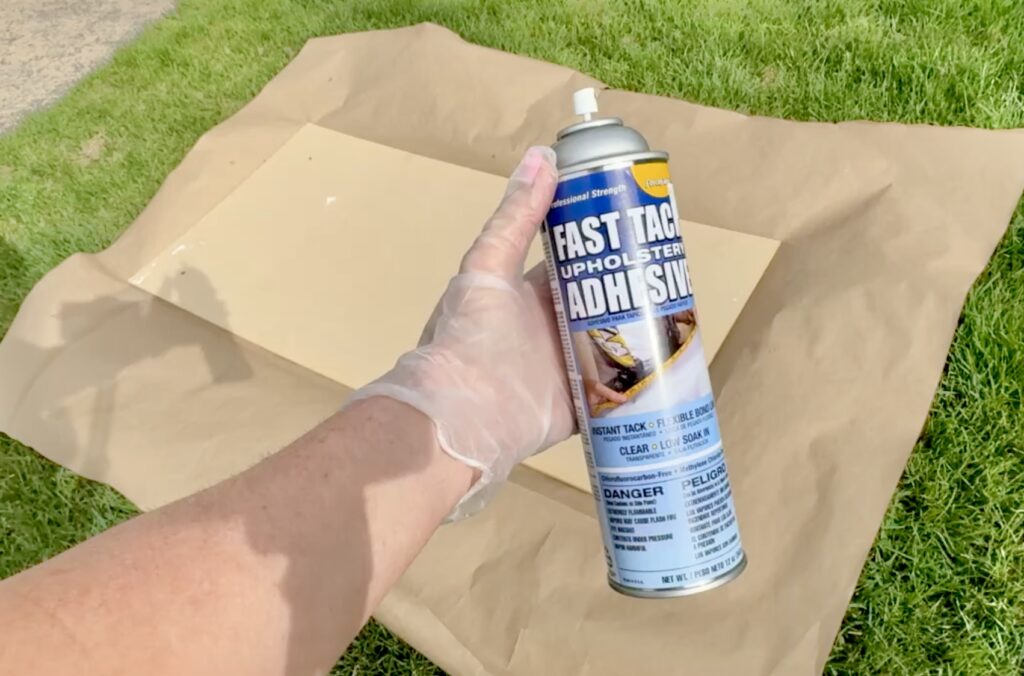
- Upholstery or Foam Adhesive Spray HERE
- Electric Staple Gun – This is the battery operated one I wish I had HERE
- Flat Head Screwdriver
- Pliers – These one’s HERE are just a bit pricey, but they’re the bomb, I use them always!
How To Do It
From Coffee Table to Ottoman
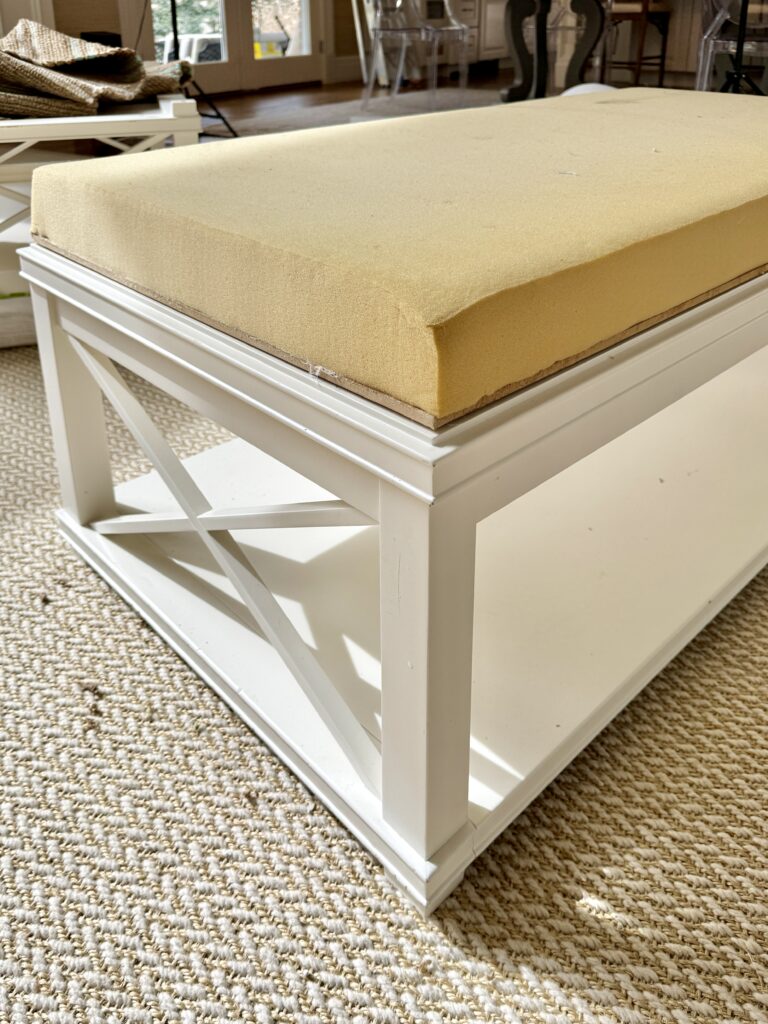
Basically all we are doing is adding some foam and fabric to the top of the coffee table.
Measure:
Measure the top of the coffee table. Take off 1/4″ from each measurement (the total width and the total length). Taking off 1/4″ allows for the fabric and padding you’ll be adding.
You’ll need a piece of stable but thin 1/4′ wood to use as a base.
Cut:
Cut the wood base to the size and shape you need.
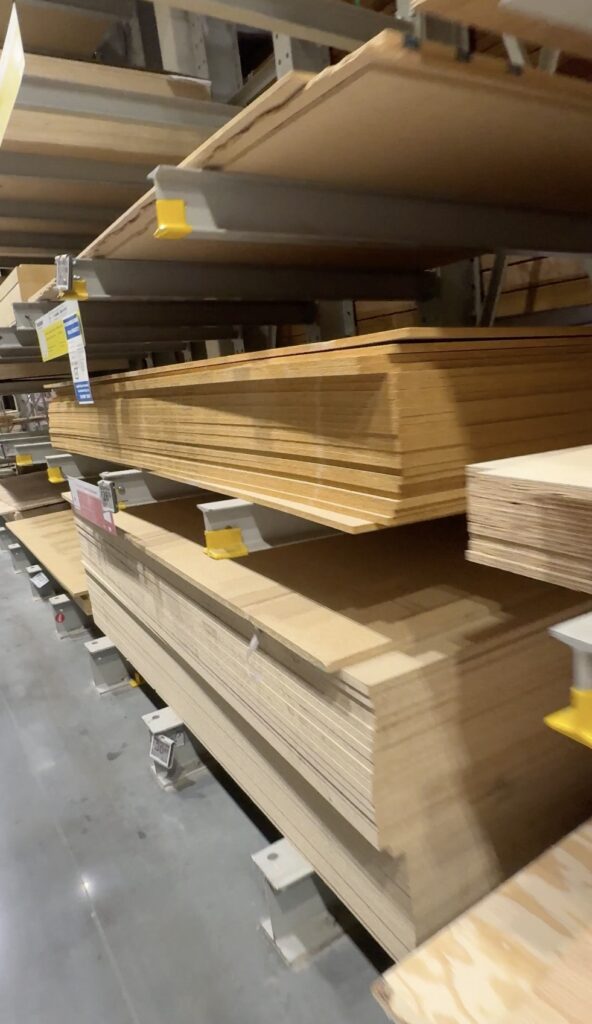
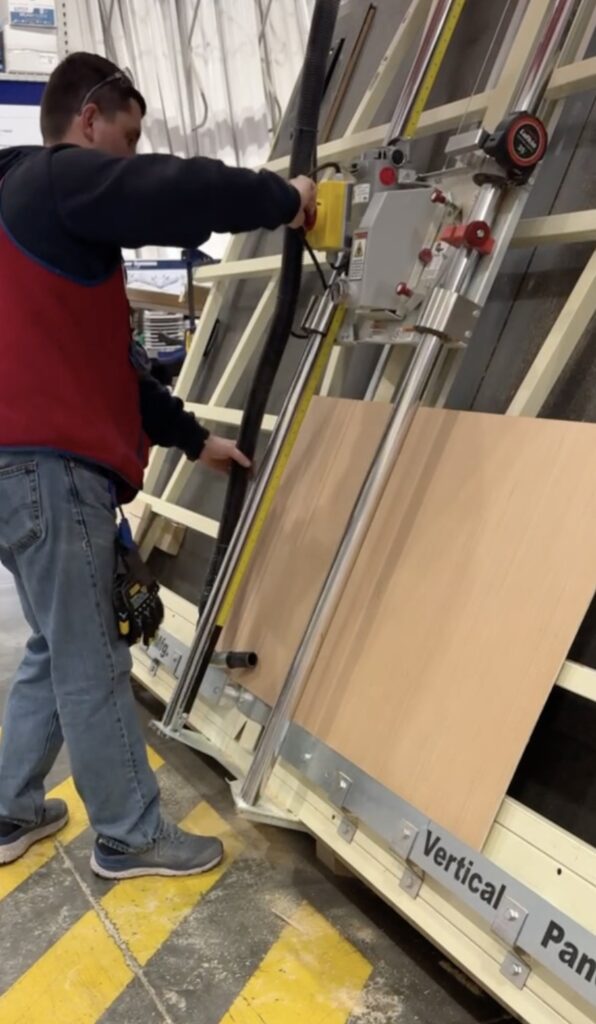
Hint: Did you know that most hardware stores will cut your wood exactly to the size you need it – for FREE? Just look for anyone in an orange or blue apron, they’ll to help you out!
I even have my own saws at home, but it’s so convenient to just have them do it for me! I often go this route if I know my measurements when I’m in store.
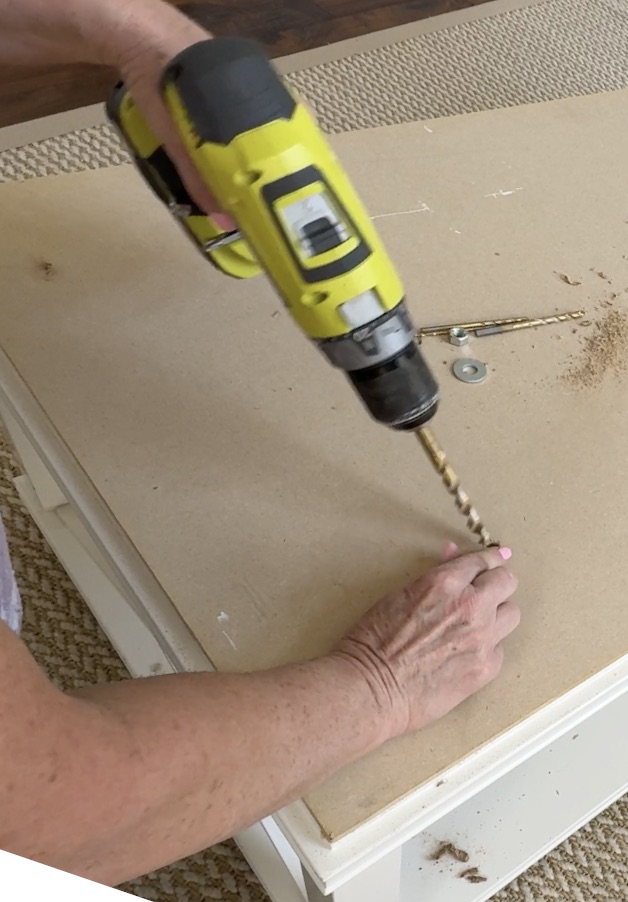
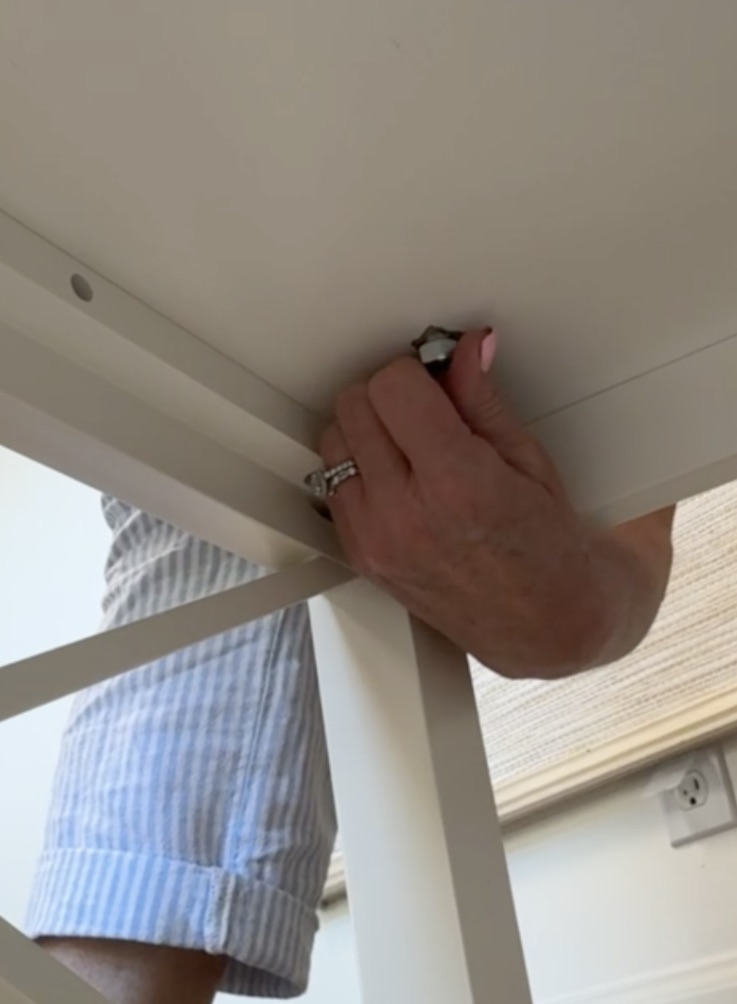
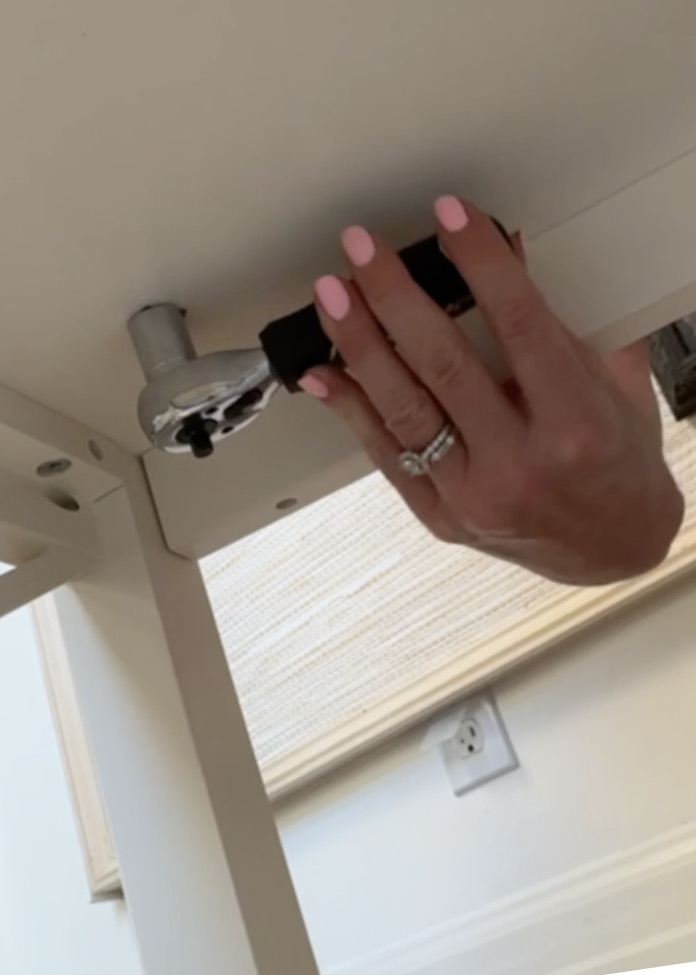
Drill:
Lay your cut wood on top of the coffee table. Next, drilling through both the wood toper and the wood of the coffee table at the same time, drill the holes for the bolts that are going to hold the ottoman top in place.
Tip #1: I always drill pilot holes. Meaning use a tiny bit to drill a small hole first. Then drill the larger hole to the size you need. This helps to keep the wood from getting chunked up and also makes the drilling easier and faster.
Tip #2: I put the bolt into the hole after drilling each hole. This holds the wood in place so that it won’t shift as I drill each additional hole.
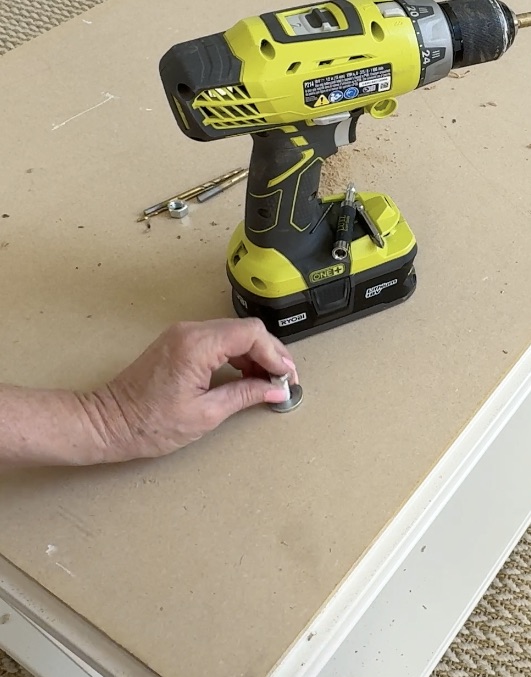
Add Washers & Bolts
I add metal washers to both the top and underside of my bolts. This helps prevent the bolt from tearing loose from the wood over time.
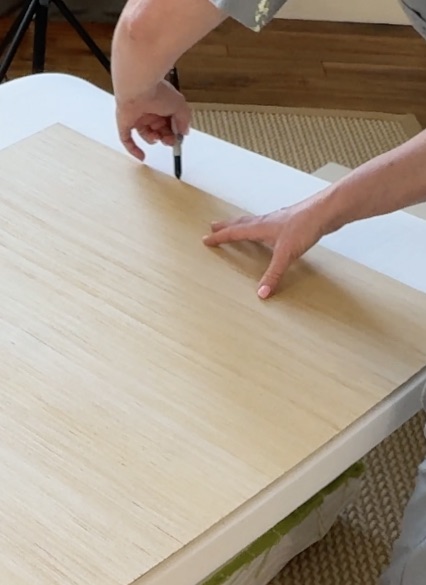
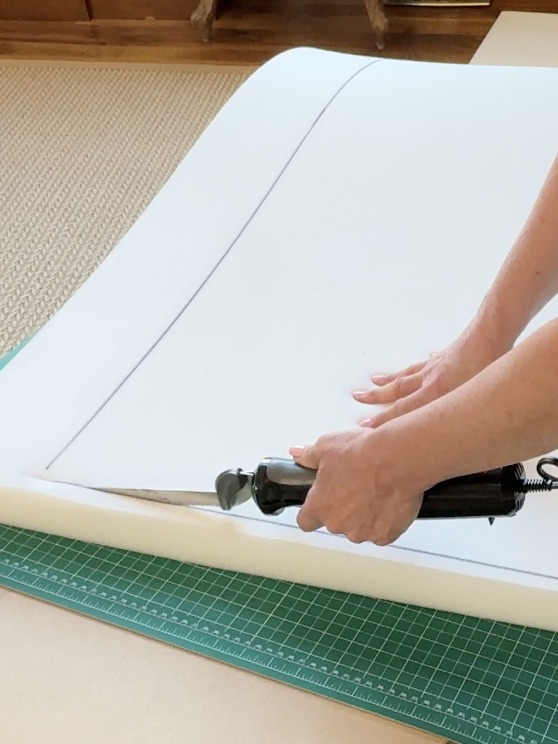
Foam
Remove the wood base and lay it on top of your foam. Trace it out. Add 1/4″ to each side (1/2″ to total measurement). Using an electric kitchen knife (or a foam cutting blade if you have one), cut the foam as smoothly and evenly as possible. Go slow, don’t rush the blade. Rushing the blade will tear the foam and make your cuts chunky. You don’t want that.
Spray
Remove the wood base. Spray the wood base with a heavy duty Spray Adhesive. Be VERY generous here. Use lots and lots of spray glue. I mean, cake that stuff on!
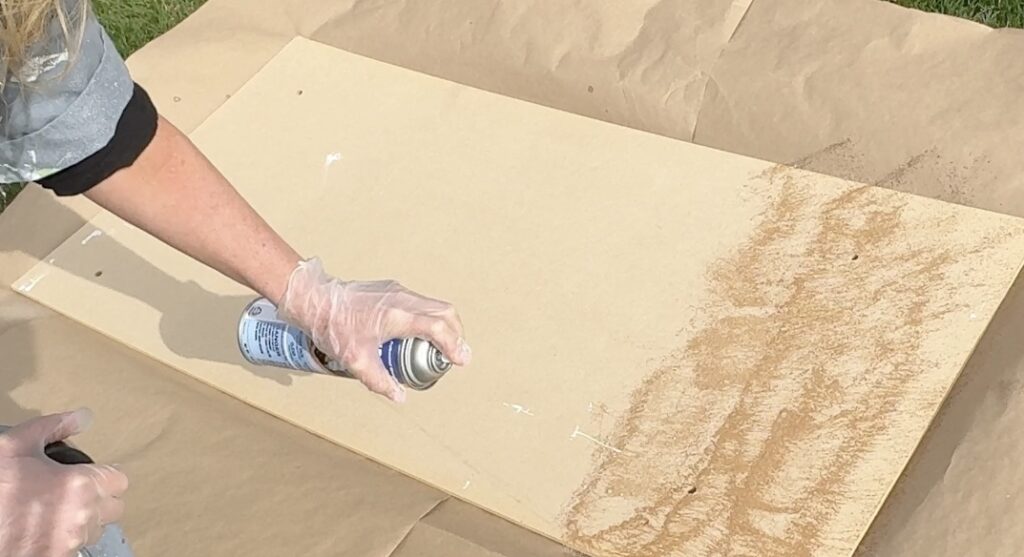
Hint: Double check to make sure that your spraying the TOP of your base. If you get it flipped upside down your bolt holes may not line up right!
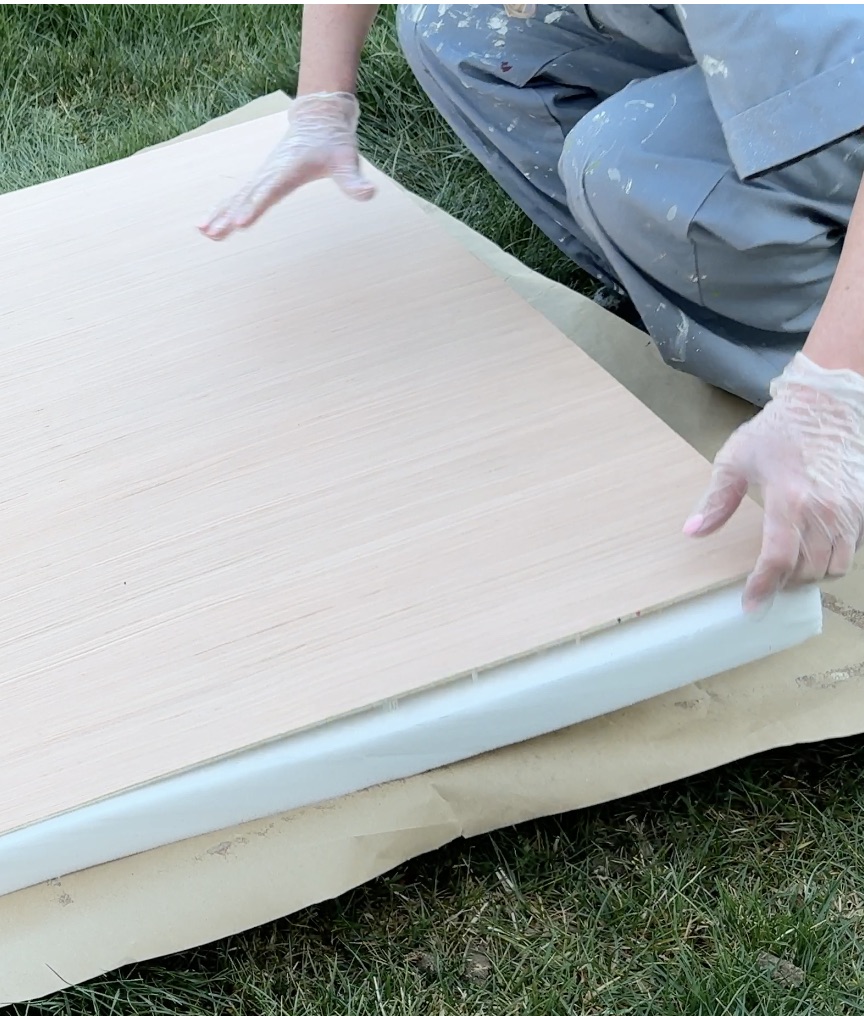
Layer It
Slip your washers and bolts back into the base holes.
Press the sticky foam onto the base.
Add some fluff
Lay the batting over the top of the foam and base and cut around the shape of the base. You don’t need to be careful or accurate here. You’ll cut away the excess as you staple it all together.
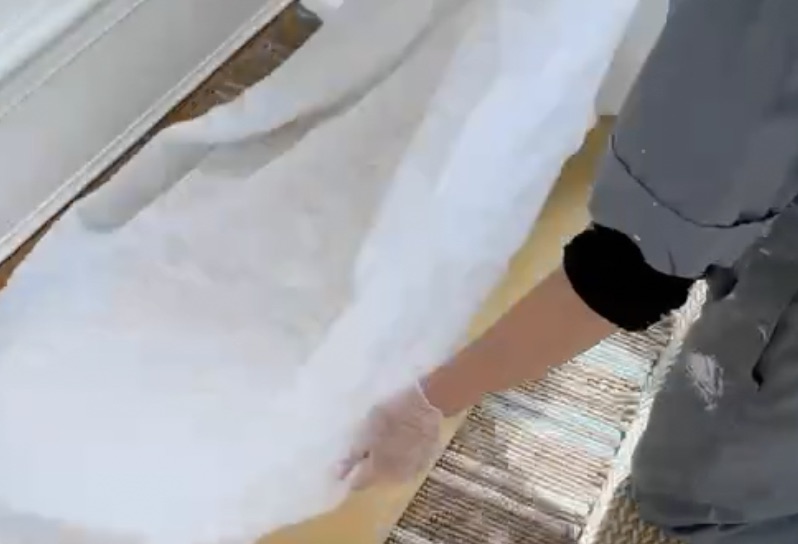
Hint: It’s better to have the batting cut too long/wide than too skimpy. Be generous.
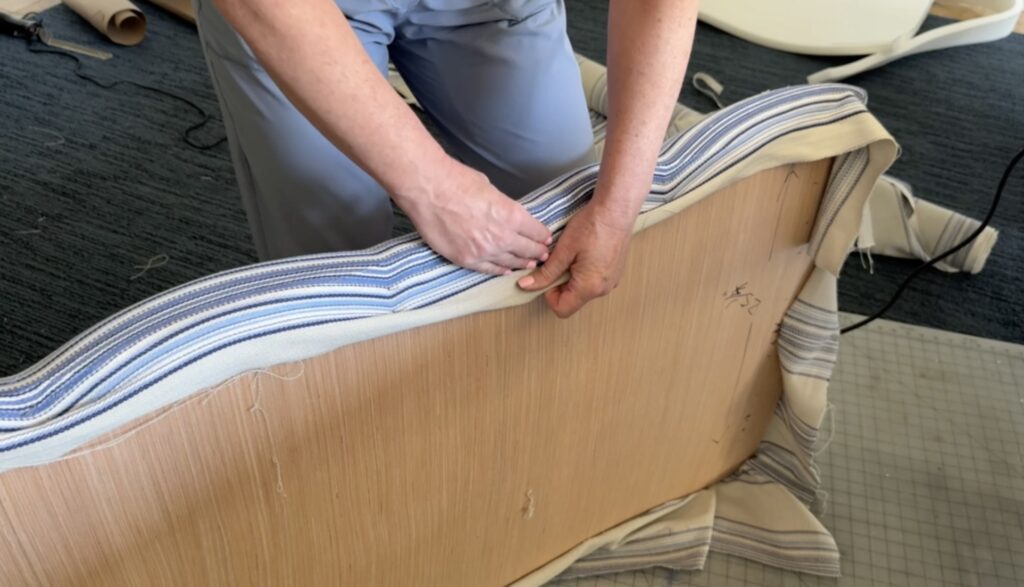
Fabric (or Rug)
Lay your fabric or rug over the base, foam & batting. If there is a pattern, center the pattern up the way you want it on the ottoman top. Cut away the excess fabric, but again, be generous. It’s better to have too much over the edges than not enough.
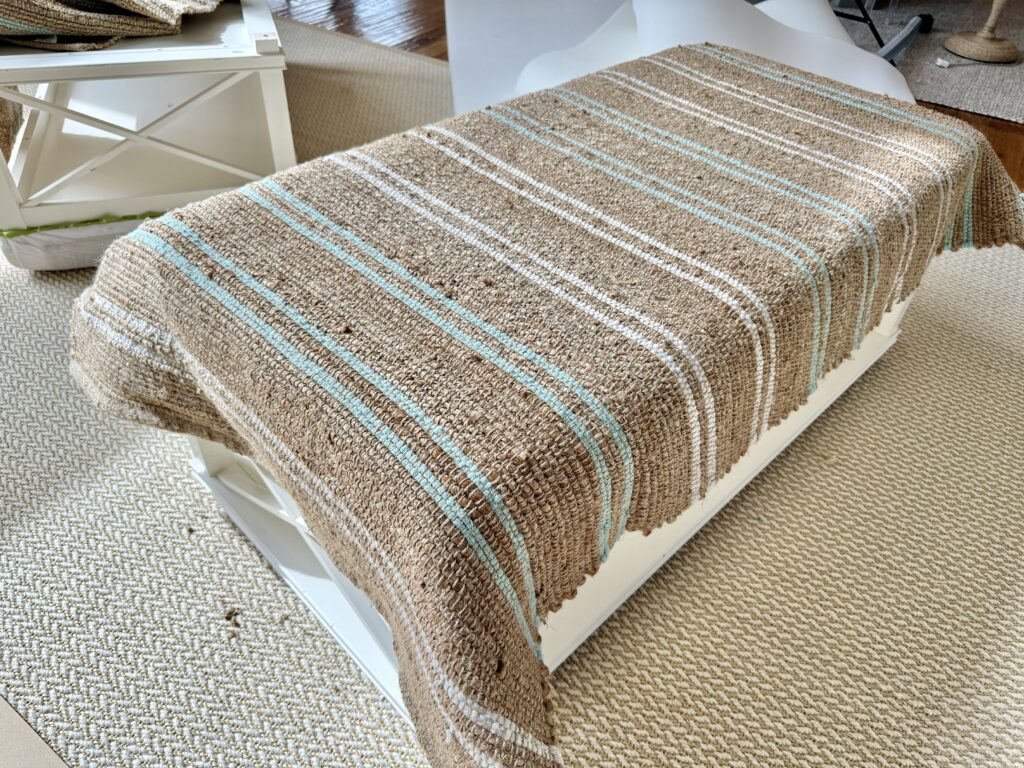
Hint: Don’t cut the fabric (or Rug) to just the “right size” for wrapping round the base. You’ll want a lot of extra for grabbing onto as you pull it tight. If the fabric is short it’s difficult to get a good grip. You’ll cut away the excess fabric after it’s all stapled down.
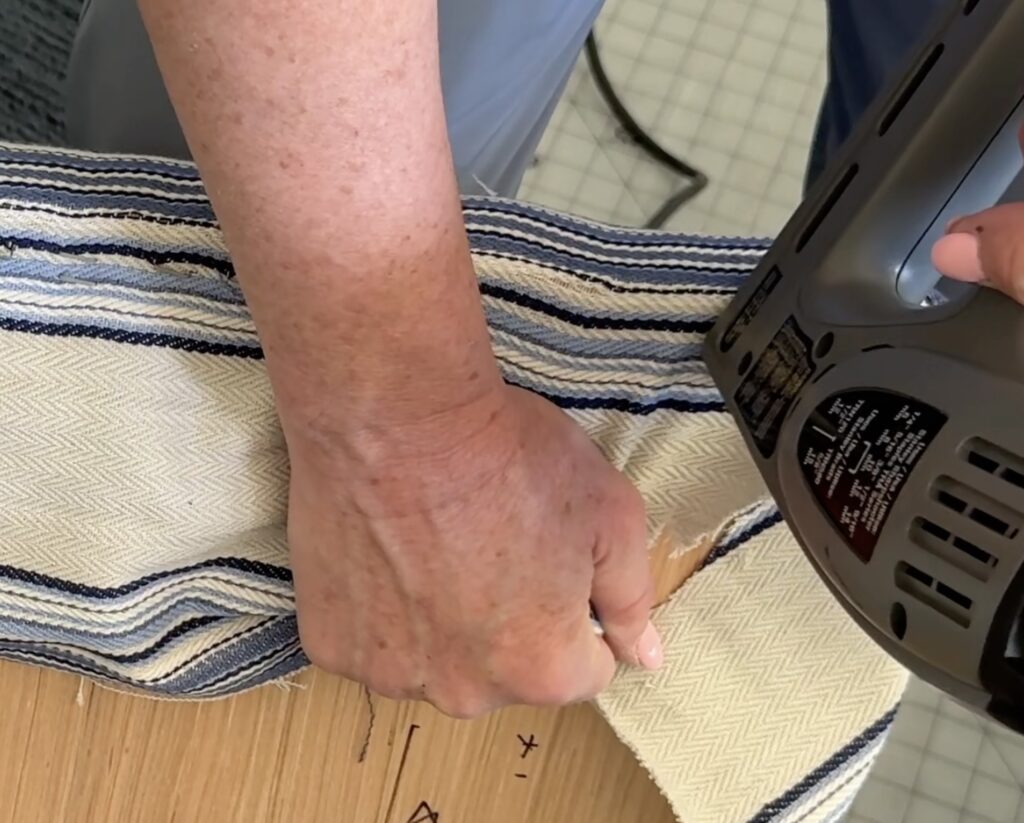
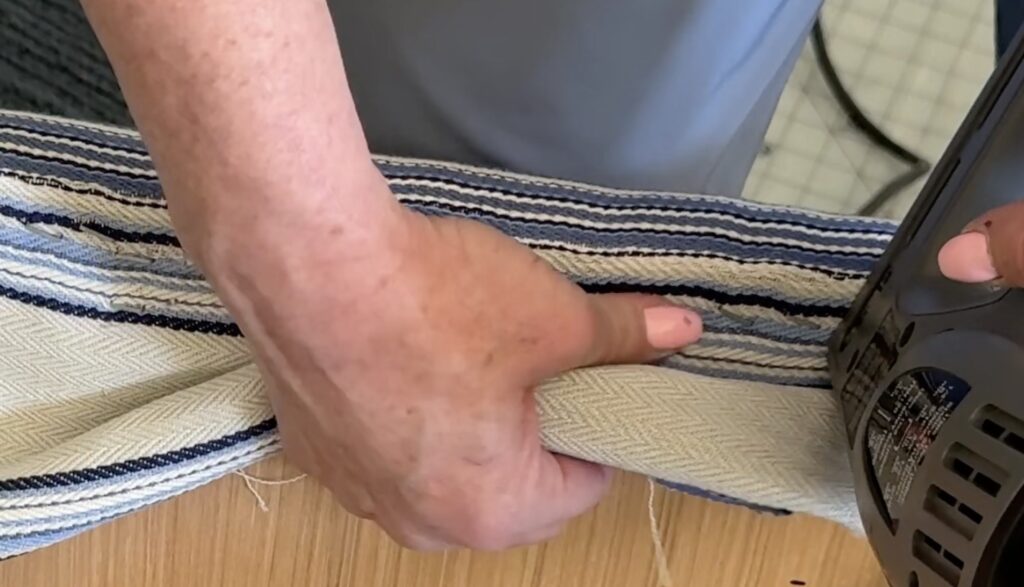
Staple
Staple the fabric to the underside of the base using an electric staple gun. Beware! There is a right and a wrong way to do this!
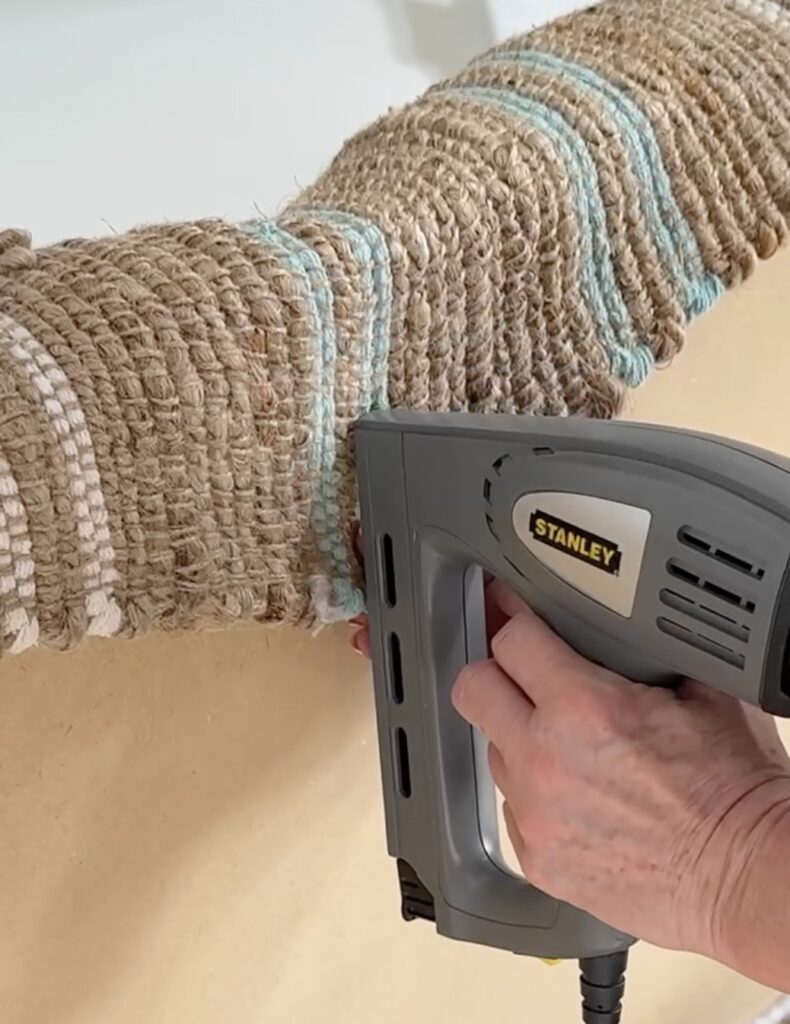
Centers First: Wrap and staple the center of each side of your wood base first. Do the center of one side, then flip it over and staple the center on the opposite side. Then do the centers of the sides. Know that you will likely end up removing and adjusting the tension of each of these initial staples later.
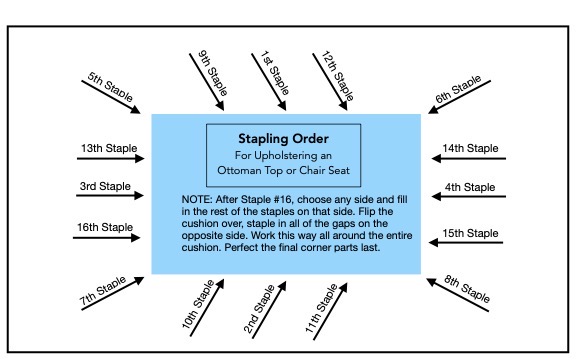
Corners Second: Next pull and staple each of the 4 corners . Again, you will most likely remove and adjust these corner staples later.
Middles: Going back and forth, up and down, staple the centers of the centers. Does that even make sense? On each side, fill in the staples, working the centers. See diagram above and the video for this to make more sense.
Rolling & Smoothing
As you staple, use your hands and fingers to press the fabric tight and smooth over the edges. Line up your fabric pattern the way it needs to be as you go. The trick here is to get it all smooth and looking the even along the edges.
Tip #1 – This takes a bit of practice and finesse. Don’t be shy about removing and re-doing staples to adjust the tension, creating a smooth, non-bumpy result.

Put It All Together:
Lay your upholstered base on your table top. Fit the bolts through our pre-drilled holes and screw the bolts in!
Your done! That’s it, that’s all there is to it!