Upscale A Lampshade

Basic DIY Lampshade Recovering
Recovering a lampshade is the perfect way to upgrade a room with custom details. This is a quick DIY project that even a beginner can quickly master! You’ll need a lampshade, obviously. But firsts, before you start, you may want to check out my Lampshades 101 post HERE to learn the basics about size, shape, style and even the mechanics of lampshades before you jump all in!
NOTE: You can watch a full Video Tutorial at the end of this article.
Gathering Your Supplies –
What you need to know first
Material
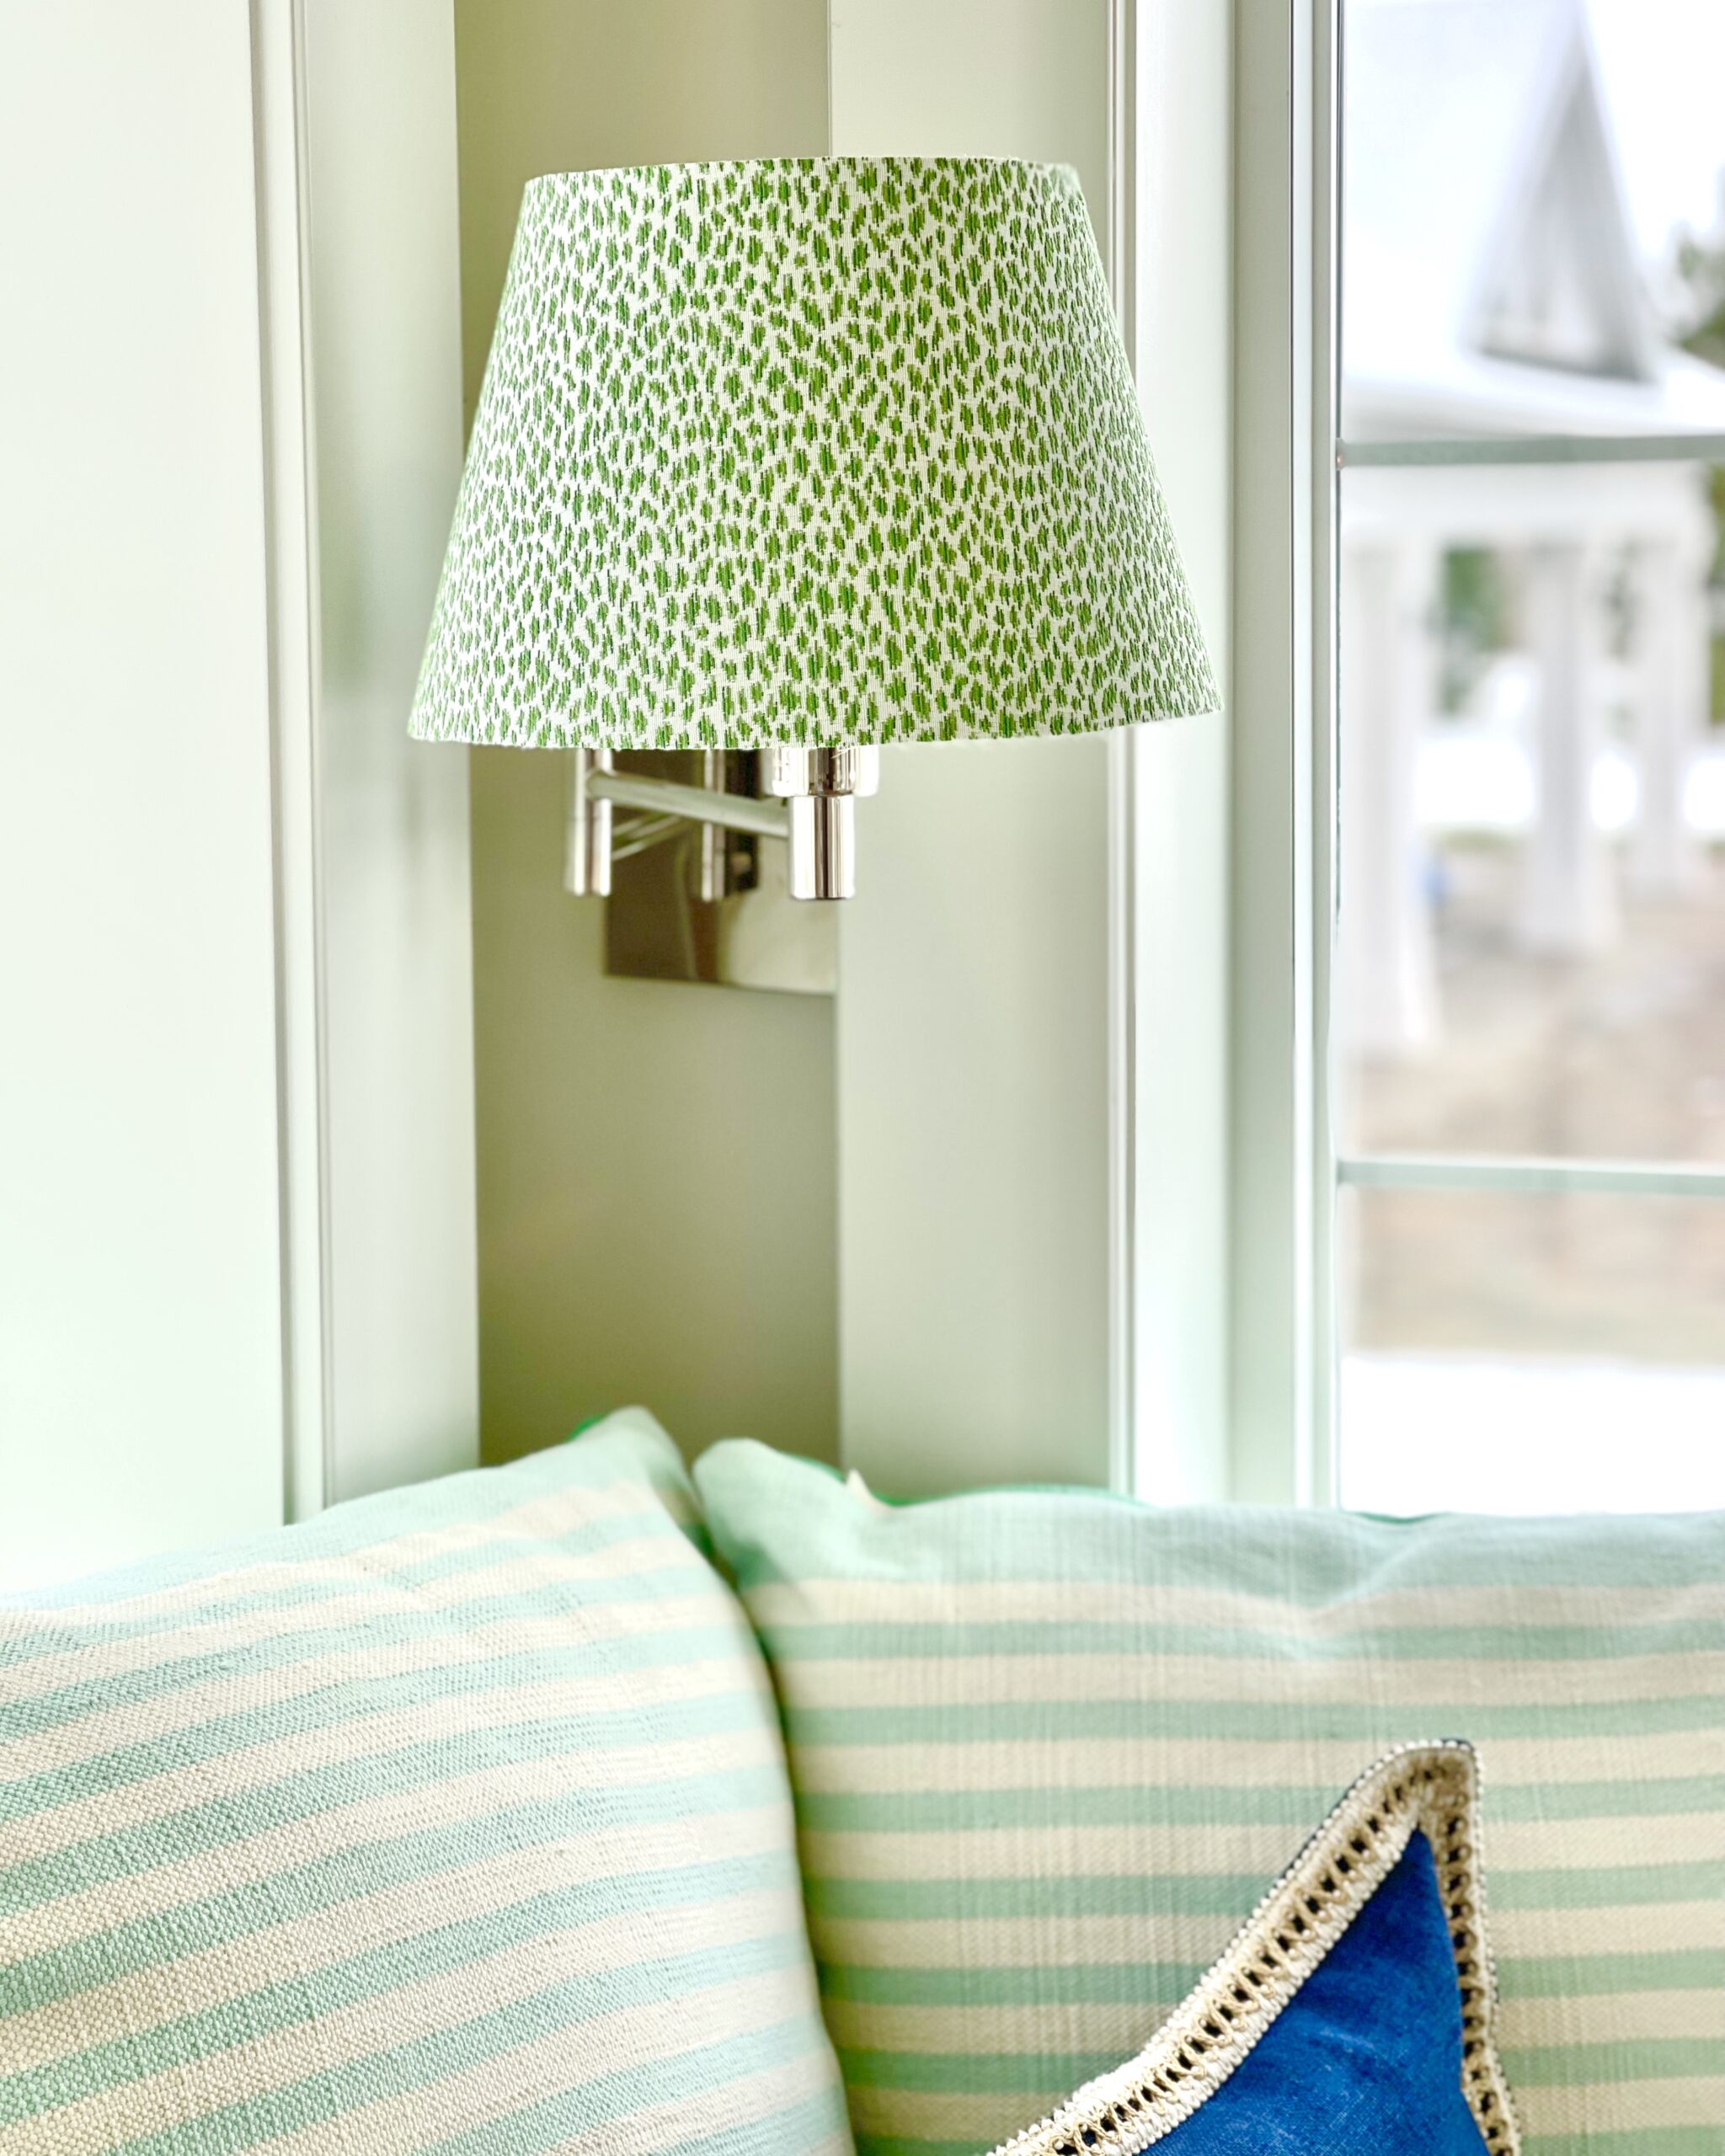
SO many options! Wrap your lamp shades in decorative fabric. Wrapping Paper. Scrapbook Paper. Wallpaper. Scarves. An old blouse you still love but don’t wear anymore. . . think outside the box! Even old posters turn out super fun. You could wrap the shade with rope or ribbon, or you could cover it with sea shells. Just look around until you find a style in colors that you love.
Keep in mind the opacity of the material you use. If the material is dense or very dark not as much light will shine through your finished shade, which will make the light it gives off dark and moody. Be sure this is the end result you want if this is the kind of material you choose. The lighter the paper or fabric you use, the more light the lamp will produce.
I do love a patterned lamp shade, big patterns, small patterns, random patterns, stripes, plaids and checks. They’re all fun and each elicits a very different vibe. Just be sure the vibe your choosing works well with and enhances the rest of what’s going on in the room.
If you want stripes, unless you’re already pro at this, you may want to stick with a drum shaped shade – a cylinder shaped shade, meaning the same circumference top, bottom, and middle. It’s easy to run stripes horizontally or vertically with a drum shade. Take note that stripes and large plaids are very difficult on a cone shaped shade. I’m pretty adept at this and even I avoid stripes on a cone shape.
Template Paper
I often recommend creating a template. To create this you’ll want a large sheet of paper. Depending on the size of your shade, you could use a roll of kitchen parchment paper, which is somewhat transparent. I like this option best if working with fabric or paper that has a pattern. You can also use wrapping paper or a roll of kraft paper. Generally you’ll need a larger sheet of paper than an ordinary 8×11 piece of paper.
Embellishments
To embellish or not embellish? I look for great ribbon, gimp and cordings. Fringe, tassels, pompoms – look on Pinterest and online sites that sell designer shades for inspiration.
Adhesives
I use spray glue and/or 3M ATG Transfer Tape for most lampshade projects. Usually both. I never use a glue gun on a lampshade. It’s nearly impossible to get a smooth even result with a glue gun. For this reason I’m not a fan and rarely use glue guns for any project if I can help it.
3M ATG Transfer Tape HERE is essential to my existence and a basic staple in my life! If you’ve been around me much, you know, I use the stuff almost daily. It’s ideal for lampshades because it sticks well to both paper and fabric, with the added luxury of being forgiving, making it easy to move or remove, but staying put until I choose to take it off.
Other Supplies
- Straight Edge or Ruler – I can’t function without this one HERE
- Cutting Matt HERE
- Small Kitchen Scraper (or Old Credit Card works) – These ones are cute HERE
- Rotary Cutter HERE
- Fabric Weights HERE (or some small household items to weigh the template to your material)
- 3M ATG Transfer/Adhesive Tape, I keep all 3 sizes on hand at all times! 1/4″ HERE 1/2″ HERE 3/4″ HERE
- Scissors
The Skills – How to Do It
Any Do-It-Yourself project requires some skill. The good news? Skills are not inherited, they’re learned. If you can read, or you can watch a video tutorial, you can easily and quickly acquire the skills to do these simple projects.
Tracing
If your covering your shade in a fabric or paper you’ll need to trace the shade. Weather creating a template or tracing directly onto the fabric, if the shade is anything other than drum shade, you’ll want to trace it out.
- Lay your material out with the wrong side facing up.
- Using a straight edge, draw a line the same length as the height of your shade, across the top of your fabric along the long edge of the paper.
- Place the vertical back seam of the shade square and straight along the line you drew. The top (smaller opening) of your shade should be facing toward the inside of paper so that it has room to roll all the way out without hitting an edge or ending point. Double check your placement twice or even three times to make sure the seam is straight and square with your line, this is important.
- Very slowly begin to roll the shade along the natural curve of the paper without letting it slide or move from the natural line that it wants to roll.
- Using a sharp pen or pencil mark each side of the shade as it rolls along, marking back and forth and back and forth as it rolls across your material.
- IMPORTANT NOTE: How you hold or position your hand is extremely important as you mark the edges of the shade. If you change the position or direction of our hand and/or pencil each time you make a mark, your line will not be straight or accurate. Be sure you hold your hand and the pencil in the same position each time you mark both sides.
- When the shade has rolled all the way around and back to the seam again, stop. Mark both sides of the seam edge.
- Put the shade aside.
- Using your straight edge, draw a straight line across from the mark on one side to the mark on the other side.
- Make another, second line 1/2′ to 3/4″ beyond (outside) the ending line that you just made. This extra length is for overlapping your seam a bit, and also rolling your seam over for a smooth, professional look, the thicker your material the wider you’ll want the seam allowance to be. If your fabric is very stiff or very thick you may need to skip having a rolled seam.
- If you plan to wrap your fabric over the edges of the shade to the inside of the shade, add 3/4″ to both the top and the bottom edges of your material. Remember, it’s ALWAYS better to have too much fabric than not enough when wrapping the edges.
NOTES: If you are making multiples of the same size shade, for example for a multi-light chandelier, you can make it easier on yourself by creating a template and then cutting each shade out using the template, rather than having to trace out each one individually.
When using a patterned material, I like making a template with something I can see through. This way I can easily position the pattern the way I want it to appear on my shade. Remember that the center of the arch will be the front center of your finished shade. Position the best part of your pattern there.
Also, if you’re covering a drum shade, lucky you. You can skip the tracing part. All you need to do is measure the height and circumstance of the shade. Then measure it out and cut straight lines to create a rectangle the size you need it. Don’t forget to add a little extra at the end for a rolled seam allowance if you want one.
Cutting
A rotary cutter is ideal for smooth, accurate cutting. If you have a rotary cutter you can just leave your material on your matt where you traced it, or lay out your template over your fabric. Weight the template in place. I use fabric weights. If you don’t have fabric weights you can use cups or really anything that will keep your template in place.
If you don’t have a rotary cutter, pin the template to your fabric and cut it out. If your using paper, you can use an Exact-o Knife or blade to cut so that you don’t make holes in your paper with pins. It can be tricky to get a smooth accurate cut with a knife or blade. Go slow. Or, better yet, order a rotary cutter on Amazon Prime and wait to cut until it gets here tomorrow!
Adhering
To attach your material to the shade, use spray adhesive/glue.
- Lay the material out face down on paper or cardboard. I like to do this inside a large, deep box to keep the adhesive overspray contained. Does this go without saying that you’ll want to do this outside due to fumes and sticky overspray?
- Be extra sure you don’t miss any spots and there is plenty of glue, to much is better than not enough. Missing even little spots will result in a bubble effect that you don’t want!
- Wear gloves for this, it will make a mess of your fingers, which can then transfer to your material and then you’ll be sad. Also, the aerosol in the spray glue (and also in spray paint) wreak havoc on a manicure, even if you don’t get any actual paint on your nails, which can be a big bummer.
Attach the Material to the Shade
- Let the adhesive set for a few minutes before attaching it to the shade. Ideally you want the glue to be sticky, but not wet.
- If you are doing a rolled hem on the seam of the fabric; lay out the fabric on your matt, cardboard or paper and carefully roll the seam over.
- If you have a rolled seam edge you’ll need to re-sticky the newly rolled edge. Adhere a strip of 3M ATG Tape to the un-sticky edge of the fabric. Press the tape down firmly with several passes with a hard edged kitchen scraper or a credit card. Leave the protective paper in place for now.
- Carefully, so you don’t get glue anywhere you don’t want it, especially on the font side of your material, line up the raw material seam edge with the back seam of the shade and slowly, accurately roll the material onto the shade, lining up the top and bottom edges as you go, reposition and even start over if you need to.
- Once everything is in place, remove the protective paper from the 3M ATG tape and press the seam in place so it’s smooth and straight.
- If you you are rolling the material over the top and bottom edges; using scissors, clip little cuts all the way round the top and bottom material that is overhanging the edges. This process is called “easing” and the idea is to gently, with ” ease” create way for the edges to lay flat on a curved surface. Careful, cutting too deep will leave visibly raggedy edges.
- Gently fold the material inward, over the wire edge and press into the inside of the shade. Adjust as needed as you go around the entire edges of the top and bottom.
That’s it – You did it!!!