
The flattering little light trick you need in your life!
Long ago I created a very simple cure for a lighting problem I had. It worked so great it’s become a staple in my design repertoire. This easy little trick gives me the ability to place light in the exact spot and height I want. I’m able to achieve flattering light in every room without having to hire an expensive electrician or tear into the sheetrock with a big messy project!
“Light is Life. ” Think this expression is an over-exaggeration? Just think about living without electrical light. . .
Given the importance of light in our lives, it stands to reason that light is also one of the most significant features in the design of any room. Yet, it’s too often one of last things people think about when designing a new space. Builders typically just throw up a ton of overhead can lights and call it “good.”
Oh Nooooo!
Overhead and canned light is just SO NOT GOOD! Turn OFF those boob and canned lights my friends!
Just think of it. When is the absolute worst time to have a photo taken of yourself? High noon, right?
No one loves a photo taken of them with the sun directly overhead. The harsh overhead light throws very unflattering downcast shadows on our faces. I recently heard a designer on one of my fave podcasts call this “Halloween Face.” “Bingo” I thought! “This is a perfect description!”
No one I know wants “Halloween Face.”
https://www.alicelaneinteriordesign.com/podcast

Create “Magic Hour” at Home
Now, think about this. When is the “magic hour” for beautiful portraits, and why is that? It’s either early in the morning or early evening when the sun is low in the sky and the light shines directly on our faces. We plan around these hours of perfect light for our best photos, when the low sunlight on our faces gives us a beautiful glow. It softens our features, even diminishes our wrinkles and imperfections.
Lighting in our homes is no different than the light from the sun. Our home lighting will either casts unflattering shadow on our faces or it will casts a warm, pretty glow on our faces. Which do you prefer?
The key to looking lovely at home is utilizing lighting that is positioned low, near face level. Think table lamps, wall sconces, pendant lights and even chandeliers.
I’m so adamant about this that in all the bedrooms and most of the gathering spaces in my home I’ve actually gone to the trouble to unscrew the lightbulbs in ceiling lights, or I replace them with burned out bulbs so they can’t even be turned on.
When designing a new build I often won’t even include overhead lighting in many rooms.
In all fairness, overhead lighting does have it’s place in world. It’s good for task work in a laundry room, or kitchen, or when cleaning a room. Other than that, it’s my humble opinion it should be completely banned!
We do still want loads of light, it’s just best when that light comes from lots of sources scattered strategically around the room.
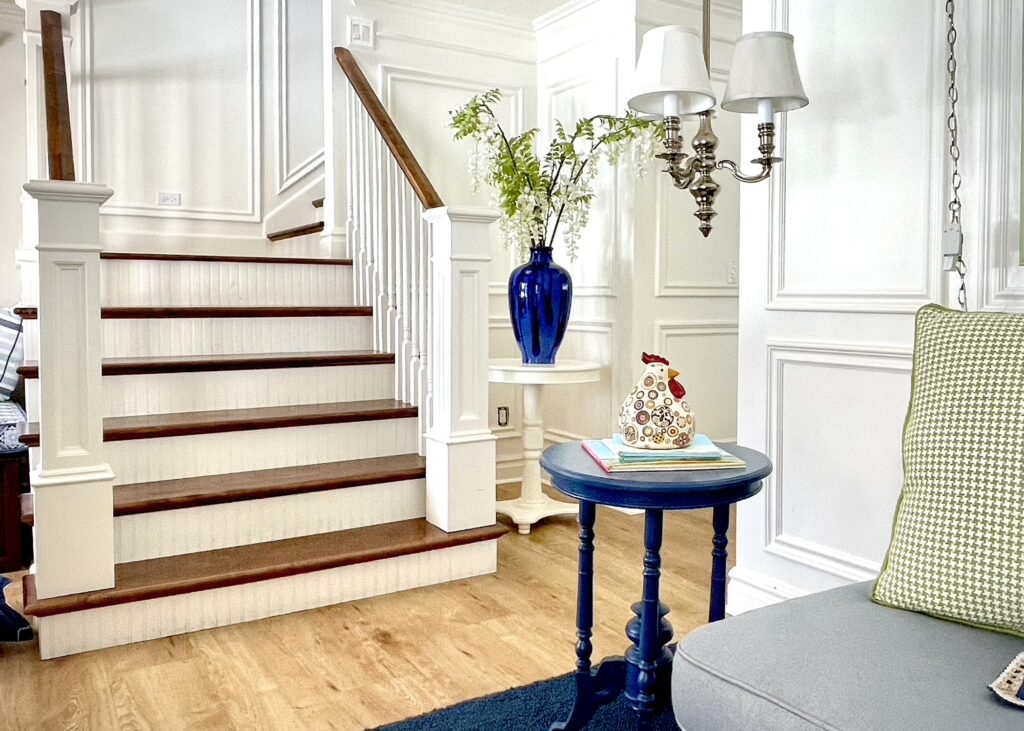


Unfortunately, all too often we don’t have the luxury of placing hard wired electrical boxes for lighting in the places we want light. We’re at the mercy of whatever, and wherever, the previous owners or the builder threw into the walls.
To add light fixtures after the fact can be done! It’s messy and expensive. . . and worth it! In fact adding new light sources is so important that I factor this possibility into every-single reno or re-decorating project!
My Bright Idea. . .
The first place I used my newly discovered technique was at our lake house. I wanted both flattering and practical light for the guest bedrooms. The rooms are very small and so the night stands on either side of the beds are tiny. Not much room for bedside essentials AND a lamp!
Direct light next to the beds for reading really is essential. It’s just not pleasant to sit and read in bed with harsh overhead light. We want soft, relaxing light that comes from slightly above and behind the book in our hands.

However, I’d already blown through the budget on this huge renovation project. I needed to come up with a solution that didn’t include an electrician, sheetrockers and painters.
“But. . . what if light could be added in some places without hiring an electrician and tearing into the walls? There must be a way, there’s always a way. . .”
My lightbulb moment (literally) was a flashback to a Saturday afternoon chore my Dad gave me when I was in high school. He had me replace the plugs on some of his power tools.
“Hmmm. . . I wonder. . .
If it’s good for power tools, wouldn’t this also work on any electrical device? Like. . . say. . . a hard-wired light?”
And it does! Every light, and I do mean ANY light; a chandelier, a pendant light, even a sconce lights, can be converted from a hard-wire light to a plug-in light. Just like a lamp, only better!
For a great video tutorial on the specifics of how to “soft-wire” a sconce light see my post Converting a Hardwired Sconce Light to a Plug-In Light
As always, I’m here to show you how it’s done!
I hope you’ll try out this little lighting trick to up your own home’s lighting game! When you do, remember to send me photos!
Have the best day my friend!

How to “Soft-Wire” Any Hard-Wired Light Fixture
Note: A hard-wire light means a light that is “hard-wired” to an electrical box in the wall.
But First. . . A Note About Remotes
Let’s talk just a bit about remotes. I almost always add remotes to my plug in lighting to make it super easy to turn them on and off. There are two options. One is a Handheld Remote which is extra nice because I can be extra lazy and switch my lights on or off without having to get outta bed. The downside? The littles like to play with the remotes and they lose them!
I’ve recently discovered a new option which is a Wall Mounted Remote. These are nice because you won’t have to look for the remote to turn the lights on and off, but you will have to get outta bed. . .
Decisions, decisions. . .
Both work the same. Plug the receiver into the power outlet on the wall. Put the battery in the remote. Now just plug your light into the receiver. Next, go order a replacement battery RIGHT NOW, before this one goes bad and you don’t have a spare! In all fairness, the batteries do last a good long time though. . .
I pretty much always buy the remotes with 3 receivers. This way I can use just one remote for the lights on both sides of the bed as well as a table or desk lamp in the same room. My favorites are this Handheld Remote or this Wall Mounted Remote.
Supplies ~ What You’ll Need
Light Fixture – this can be a pendant light, a chandelier, even a scone light (if there’s a wall to attach the sconce to).
Replacement Plug – You can find replacement plugs at any hardware store and from Amazon, of course! This plug HERE is hands down my favorite because its significantly easier to install.
Additional Lamp Wire – You may, or may not need some additional wire, depending on how long the existing wire is on the light you are using. HERE
Cord Cover – You’ll want something to “pretty up your cord,” such as decorative cord chain, a fabric sleeve (I recommend 3x the length of your cord for this), electrical channel cover, or, now they make lamp cord that looks like rope! It’s pretty cool!
- Covered Lamp Cord HERE
- Light Chain HERE
- Fabric Cord Covers HERE
Drywall Screw Anchors – The size of the anchors you’ll need will depend on the size/weight of your light fixture. I always just use the biggest ones so I know I’m good! You’ll need two (2) anchors. HERE
Swag/Ceiling Hooks – These are often used to hang plants from the ceiling. You’ll need two (2) of these. HERE
Screwdrivers – You’ll want both a Flathead screwdriver and a Phillips screwdriver on hand. My mini (and cute) Hammer & Screwdriver Combo works great for this project. HERE
Needle Nose Wire-Cutters – You can get wire-cutters that are specifically for cutting electrical wire, but they are not necessary. These ones are awesome. HERE
Optional Items:
Remote & Receiver Kit – These come as hand held remotes or as wall mounted “switches. I personally like using hand held remotes to make it easy to turn the lights on and off from anywhere in the room. I guess it may depend on if you think your kids will lose the remote, which mine often do!
Wall Mounted Remote HERE
Hand Held Remote HERE
Rotary Cord Switch – These little guys make it so you can switch the light on and off from the cord. You won’t need these if you are using a remote to turn the light on and off. They’re inexpensive, so it can’t hurt to to have one on hand, just in case you decide you want to use it. HERE
Tutorial
Step 1 ~ Measure, Measure, Measure
First measure for the length of your cord.
- Measure the ceiling height from floor to ceiling.
- Measure how far down the light will drop from the ceiling to height you want it.
- Measure the distance on the ceiling from the place where the light will hang down to the place where the cord will drop down the wall, double this number to allow for the cord to drape in pretty, intentional looking way.
- Measure the distance from where the cord drops down the wall and to the floor over to the electrical outlet (plug) where you will plug the light in.
- Add all of these measurement together. This number is the length of cord you will need. I typically add additional cord to allow for mistakes – you can always cut off some cord, but it’s difficult to add more if you’ve already cut it off!
(Note: you can use an extension cord from where the plug drops down the wall to the outlet if you prefer. This is what I typically do.)
Step 2 ~ Add more cord (if needed)
If your cord is not long enough you can use either a Rotary Cord Switch or some splicers to connect more wire. (See separate website post in how to do this.)
Step 3 ~ Thread the Decorative Cord –
It’s a little easier to string the decorative chain cord or sleeve before installing the plug. You don’t need to weave the cord through every link of chain, weaving through every 5th or 6th link will do the trick, you can do more or less depending on the look you prefer.
Note: You can skip this step entirely if you are using a covered cord.
Step 4 ~ First Things First – Is the Plug Polarized?
IMPORTANT! Identify If the new plug is polarized and identify the hot and neutral wires!
You will know if the plug you are using is a polarized plug because one prong will be bigger than the other. The big prong is the neutral side, the small prong is the hot side.
You must attach the neutral wire to the side with the neutral, bigger prong.
IF the plug is NOT polarized, Skip ahead to the next section.
IF the pug IS polarized the following will help you to identify the hot and neutral wires on your cord.
Is the Cord Polarized?
On the cord one side of the casing may be smooth and the other side may be ribbed. The smooth side is the hot wire and the ribbed side is the neutral wire.
– OR –
The wires may be different colors. One wire may be red or black, and the other wire white. White is the neutral wire and the red or black wire is the hot wire.
– OR –
The one side of the cord may have printing on it, and the other side no printing. The side that has printing on it is the hot wire. The non-printed side is neutral wire.
– OR –
IF your cord has none of the above attributes, the cord isn’t polarized and it doesn’t matter which side of the plug you place your wires.
Step 5 ~ Easy Plug Method
Now for the magical part. . .
This is the plug kit I prefer. HERE
I like these particular plugs because they are far and away the easiest to use. But, if you don’t mind the extra work and really want to use a different brand or kind of plug, I do give detailed directions for the standard method below under the “Alternate Plugs” heading.
Step 6 ~ Snip the Cord
Look at your cord and notice how there is an indented seam down the center. The seam, or channel separates two wires casings. The electrical wires run inside each of the casings. Often one side is the hot wire and one side is the neutral wire. (See the “Is the Plug Polarized? section above if you skipped it).
Using sizers, snip a cut in the seam and pull the cord apart for about 1 inch.
Step 7 ~ Identify Hot & Neutral Sides of Cord (if applicable)
Identify the side/casing that is smooth or that has printing on it. This is the hot wire. Trim the side with the hot wire so that it is just a tiny bit shorter (about .5mm) than the casing on the neutral side.
Step 8 ~ Position the Plug & the Cord
Look at the prongs on the new plug, one prong will be larger than the other. Position the plug prong side facing down, the larger prong on your right side and the cord opening on your left side.
Push the top of the cord into the slots at the top (right side) of the box. The longer, neutral wire should be closest to you. The note that the neutral wire will either be ribbed or will not have any printing on it
Bend the cord across the top of the plug boxes opening so that the cord fits down into the little groove on the left side. You may need to use a flathead screwdriver to push the cord down inside the box.
Step 9 ~ Engage the Wires With the Plug Cap
Take the plug cap and slide it into place along the top of the box. You may have to manhandle this a bit – its a tight fit and takes a bit of muscle to get it onto place. I use a small utility hammer to help me out with this.
As the cap is pushed into place, it squeezes the cord down into little metal prongs inside the plug that pierce the casing and push into the copper wires inside. This creates the needed electrical connection.
Step 10 ~ Light It Up!
Now just plug your new “lamp” into your wall, or even better, your remote receiver! It’s just that slick and easy!
Hang the Light ~
- Identify where on the ceiling (or wall) you want your light to hang from.
- Install a Heavy Duty Drywall Anchor in that spot. I personally like these particular DryWall Anchors HERE, but your ceiling hooks, like the ones I use HERE, likely came with some as well.
- Identify where you want the cord to drop down the wall. Install another Drywall Anchor in the ceiling right up against the wall in that spot as well.
- Screw the ceiling hooks into the drywall anchors.
- Hang the light. Fuss with and adjust the height to where you like it. I often spend an excessive and unnecessary amount of time obsessing over this little detail.
- Drape the cord to the second ceiling hook that is against the wall. Now waste another 20 minutes unnecessarily fussing with and obsessing over the perfect amount of drape for the cord.
- Plug it in, grab your favorite magazine and give your new light a test drive!
Traditional Plug Method –
Skip this section if you used the “Easy Plugs Method” above.
Step 1~ Trim the Cord
If needed, cut the cord so the ends have nice, clean even cuts and no wire is exposed beyond the plastic casing.
Step 2 ~ Separate the Wire Casings –
Look at your cord and notice how there is an indented seam down the center. The seam, or channel separates two wires casings. The electrical wires run inside each of the casings. Often one side is the hot wire and one side is the neutral wire. (See the “Is the Plug Polarized? section above).
Using sizers, snip a small cut in the seam. Using your fingers gently pull the cord apart for about 3″-4” inch.
Step 3 ~ Remove the Plastic Casings
Expose about a ¼” of the bare wires inside each of the two casings. Using sharp Needle Nose Wire Cutters (or the special electrical cutters) remove about 1/4” (or more) of the plastic casing from the tips of the two cords. The trick is to do this without cutting the wires inside.
To do this, use the wire cutters to gently score the plastic casing in the same place all the way around the casing. Do this without actually cutting through the wires themselves. It’s tricky, this may take some practice.
Use the non-cutting tip of the needle noes pliers to pull on the casing. The casing should slide off, exposing the wires inside. If it doesn’t slide off, continue to gently score the casing until it does.
Do this to expose both sets of wire on the end of the cord.
Note: I recommend practicing this on some left over cord to get the feel of it before doing it on the actual project. Also, This is part of why it’s a good idea to allow yourself some extra cord when measuring, just in case you have to start over a few times.
Step 4 ~ Connect the New Plug
Open the plug casing if its not already. Unscrew the top screw and open it up.
Make sure the screws inside where the wires will connect are loosened.
Twist the cords exposed wire fibers tightly. This will help them stay together for a good connection.
Slide the exposed wire into the little holes on each side of plug. Making sure you have the natural and hot wires in the correct side if your plug is polarized (see above).
Tighten the screws to the wires so the cord and wires are securely snug and won’t pull out.
Close up the plug and just plug it in!
