Halloween Tabletop Headstones

Create your own Mini Halloween Tabletop Headstone’s with just packing foam, a sharpie marker and some spray paint.
Making creepy looking gravestones is much easier than you think! And you can make them with just a few basic supplies and a bit of garbage.
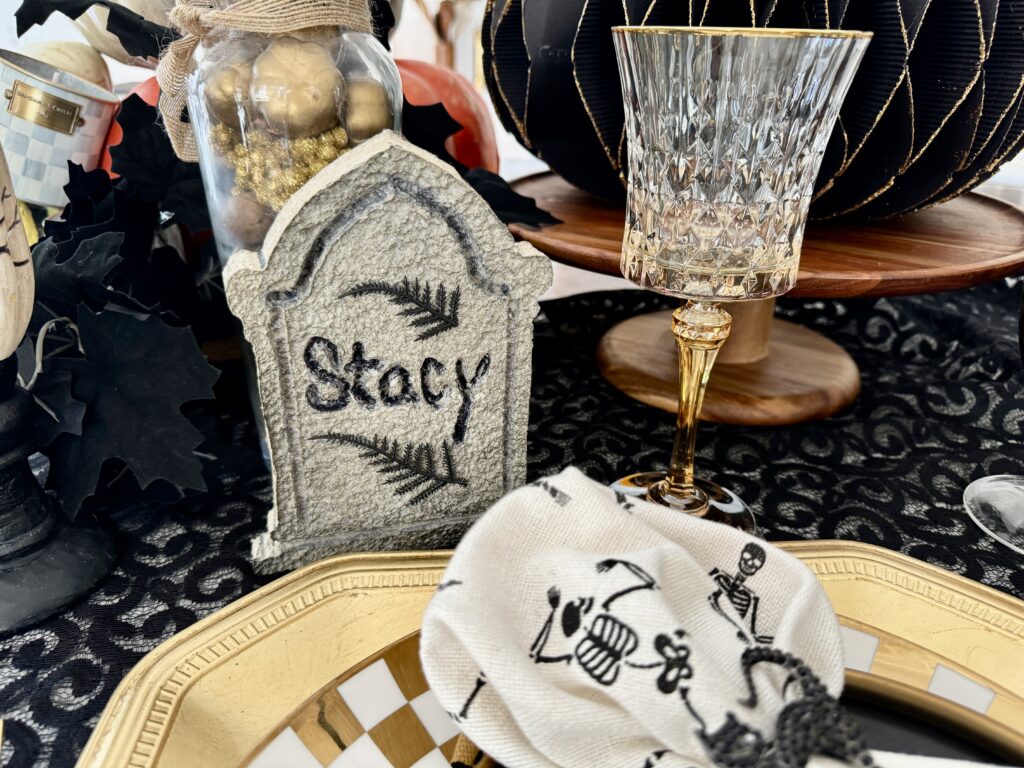
Yep. The placecards for my sophisticated Halloween dinner decor are made from what would otherwise be garbage. I salvaged the foam from the packing materials inside the delivery boxes of my new garage work benches.
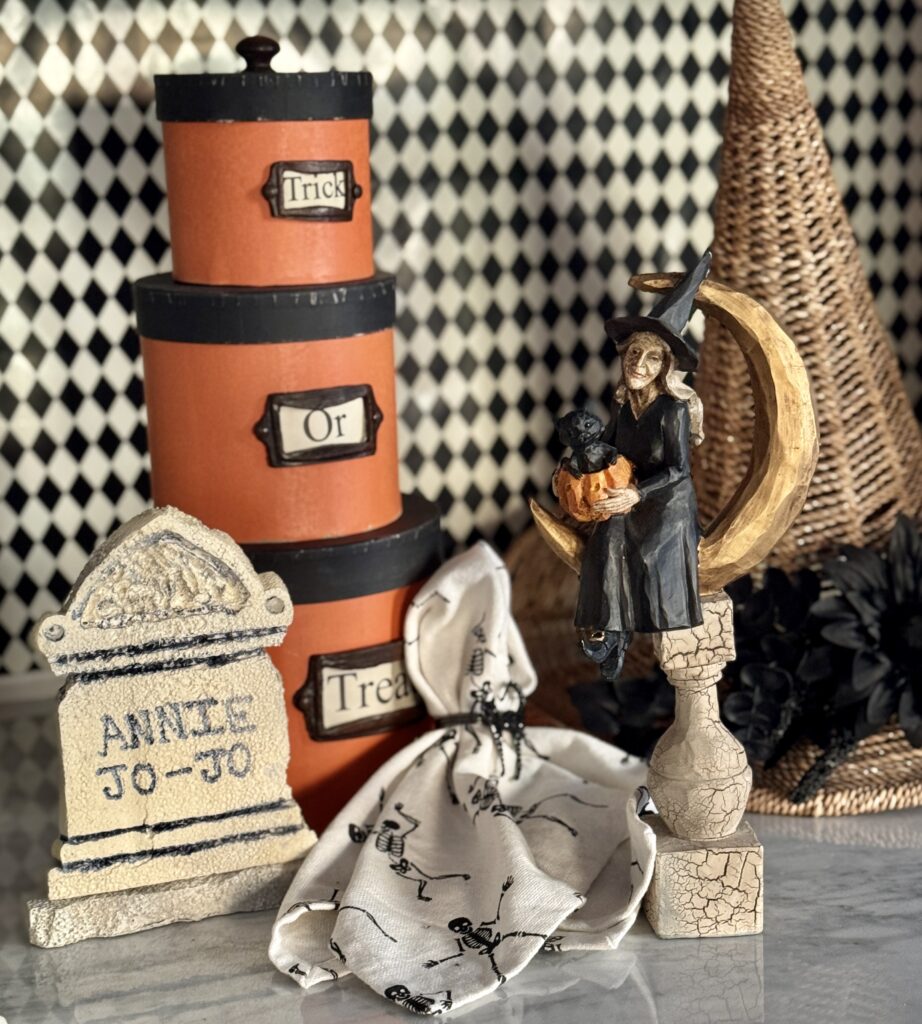
I saved all this non-biodegradable foam from a landfill and repurposed it to artful Halloween Decor. Now, the would be garbage has transformed into a mini graveyard on my dining room table. Like most DIY Halloween projects, these are such great fun to make!
Here’s how I did it. At the end of these step-by-step instructions you’ll also find the link to a Full Video Tutorial.
SUPPLIES
- Styrofoam Sheets, like the ones used for packing material. 3/4″ to 2″ thick works best.
- Black Sharpie Markers
- Sharp Serrated Knife
- Stone Color Spray Paint in at least 2-3 colors/shades.
- Hot Knife for cutting foam is NOT required, but it sure will make the project easier and more fun! The one linked HERE is the kind I use.
INSTRUCTIONS
CREATE HEADSTONE SHAPES
You can, of course, draw up your own shapes. I’m all about cheating for expediency sake. I jumped on Etsy.com and searched “Headstone Clip Art.”
I chose an Etsy file with lots of different headstone shapes to give variety to my personal graveyard. You can find the one I purchased HERE.
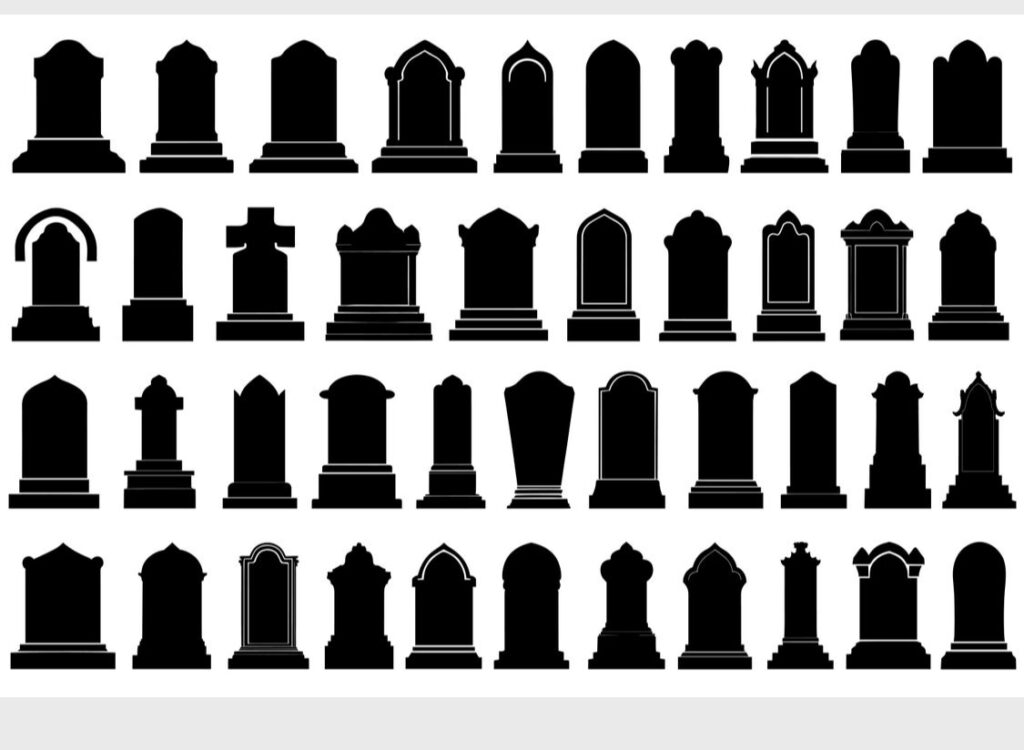
Etsy Clip Art Images are an easy way to create the shapes for your headstones.
Drop the images you want to use into a printable file. I always use the Pages App on MacBook. I create a document and import the images to the size I want. Then just print them out.
Side Note: Etsy is my Go-To resource for so many things artistic. I’m creative, but I am definitely NOT an artist. I’m all about supporting other creatives through buying images from independent artists. All you have to do is search your keyword along with the words “clip art” incldued on the searchline.
Voila! You now have tons of wonderful PDF, JPEG & SVU images to choose from. Just pay a small fee (usually well under $5), download, and drop them into your document!
CUT OUT HEADSTONES
First, cut out the paper Headstone shape with scissors. Lay the shape on your foam board. You can use any thickness of foam that suits your purpose.
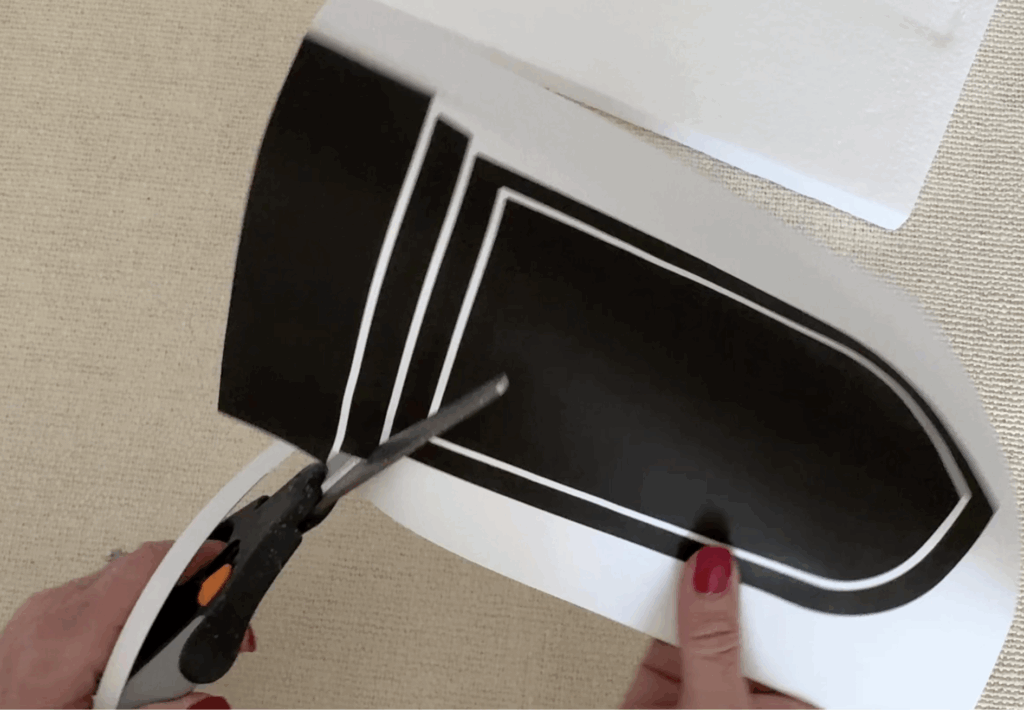
Use pins all the around the perimeter to secure the paper to the foam.
Method 1: Cut out your shape using a sharp, serrated knife, Notes: The smaller the serrations on the knife the easier and better it will work.
Pro-Tip: Using the tiny cutting knives found in a pumpkin carving kit works well to get around small shapes and details.
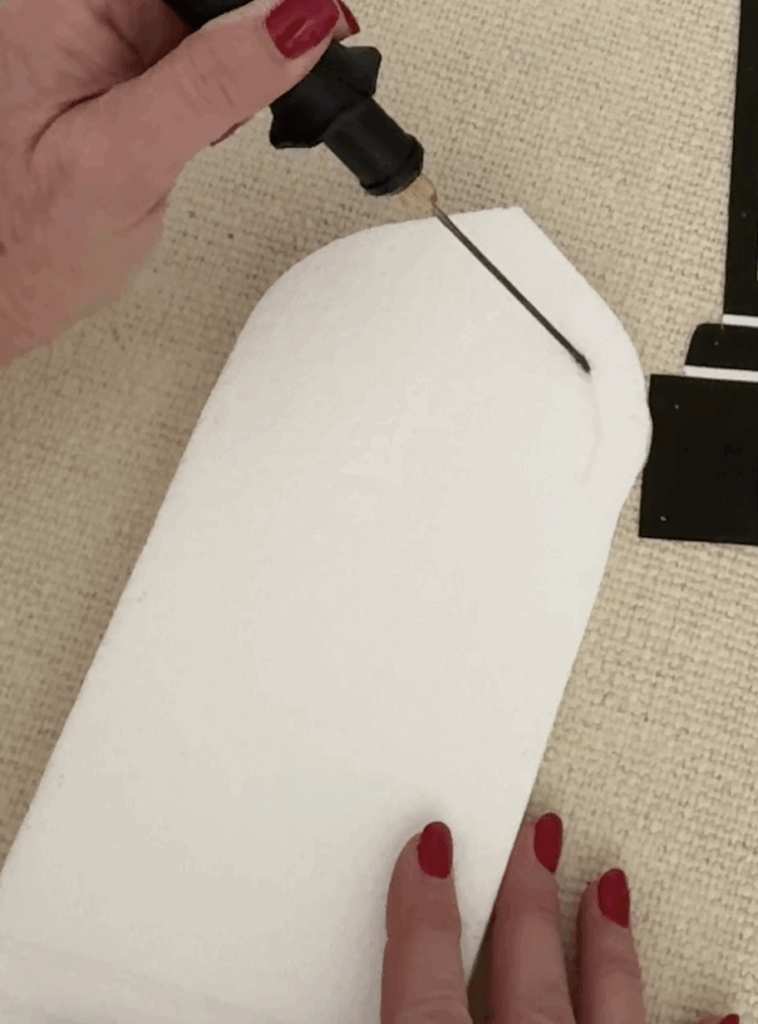
Method 2: Using a hot knife is by far my prefered method! Just slide the heated blade right along the edge of your paper to cut the foam. The paper provides a nice steady guide. Take care to keep the blade moving, it melts the foam fast.
Jump on Amazon and buy a hot knife HERE. Using this inexpensive creative tool makes quick, clean work when cutting styrofoam.
The heat from the hot blade actually melts the foam rather than cutting it. Resulting in very clean cuts. No clingy foam mess!
Pro-Tip: I recommend a few minutes of practice on some scrap to get a feel for how the hot knife/blade works.
Side Note: A major bonus, beyond how fast and easy the foam cuts, is how the heat melting the foam prevents mess! Cutting with a knife creates a ginormous mess of little foam balls that cling to everything and everyone!
ADD THE DETAILS
It’s easy to add architectural details and lettering for names or funny sayings on your Headstones. Lightly draw out what you want to add with a pencil for placement first. Then go back over it with a Sharpie Marker.
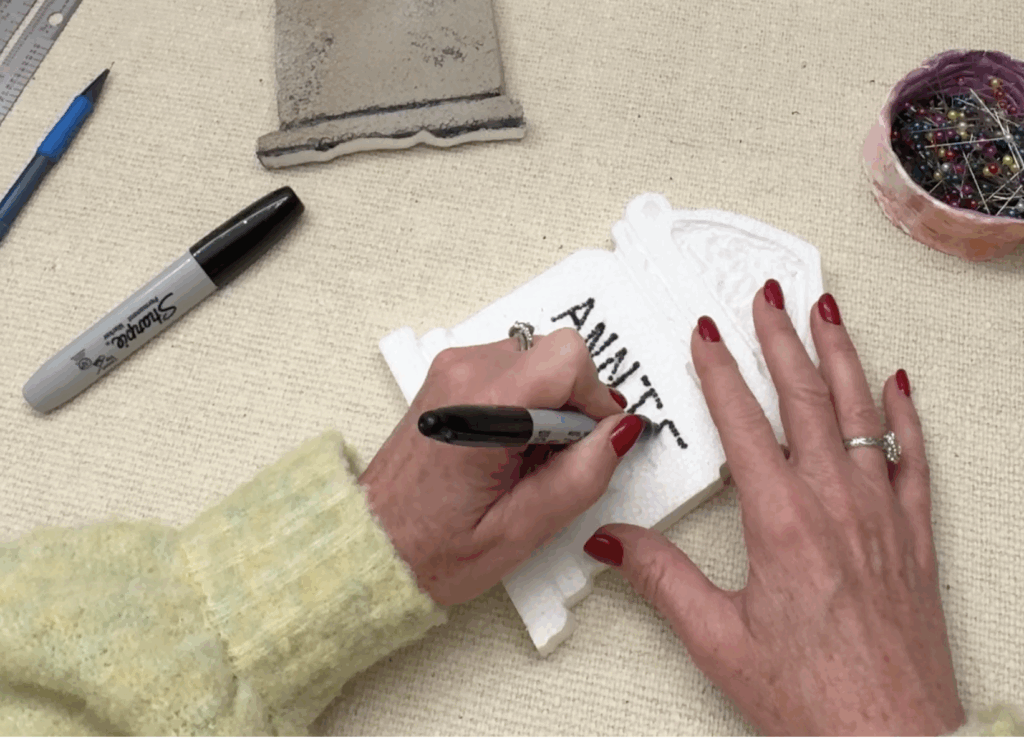
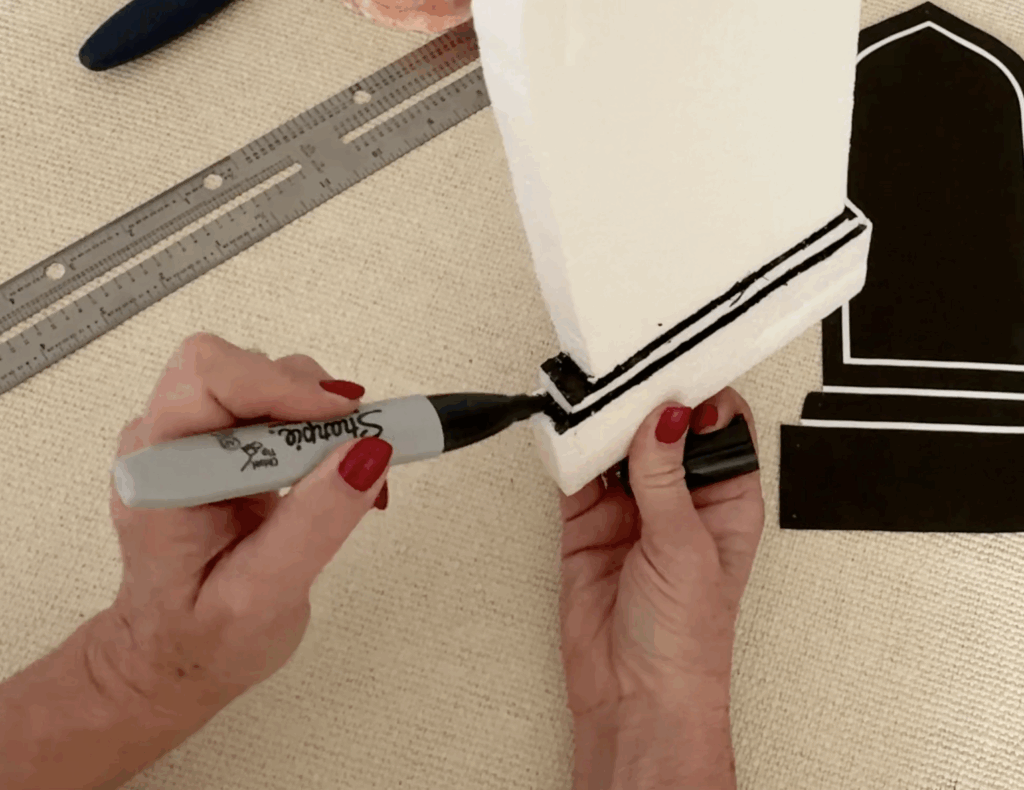
I dont know the science behind it. But I do know it works. For some unknow to me reason, the combination of the Shapie Marker and spray paint causes the marker lines to indent into to foam. It’s like magic!!!
If you want an even greater carved effect, use the hot tool wand. Go over the areas you want to carve out with the wand before adding the Sharpie marker.
PAINT
To achieve a more realistic effect I use two or even three shades of spray paint. To be even more realistic with my overall graveyard look, I like to vary my headstone colors. Some I do in more cool grays, some in warmer tones. This is where you can just play around and experiment with the paint.
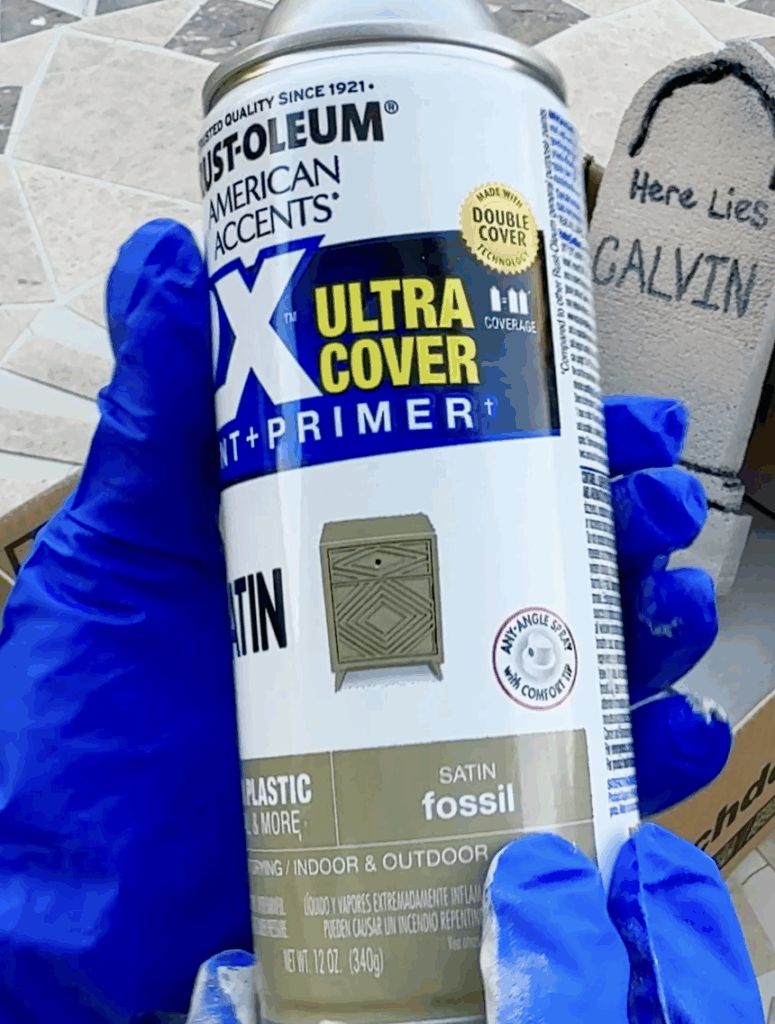
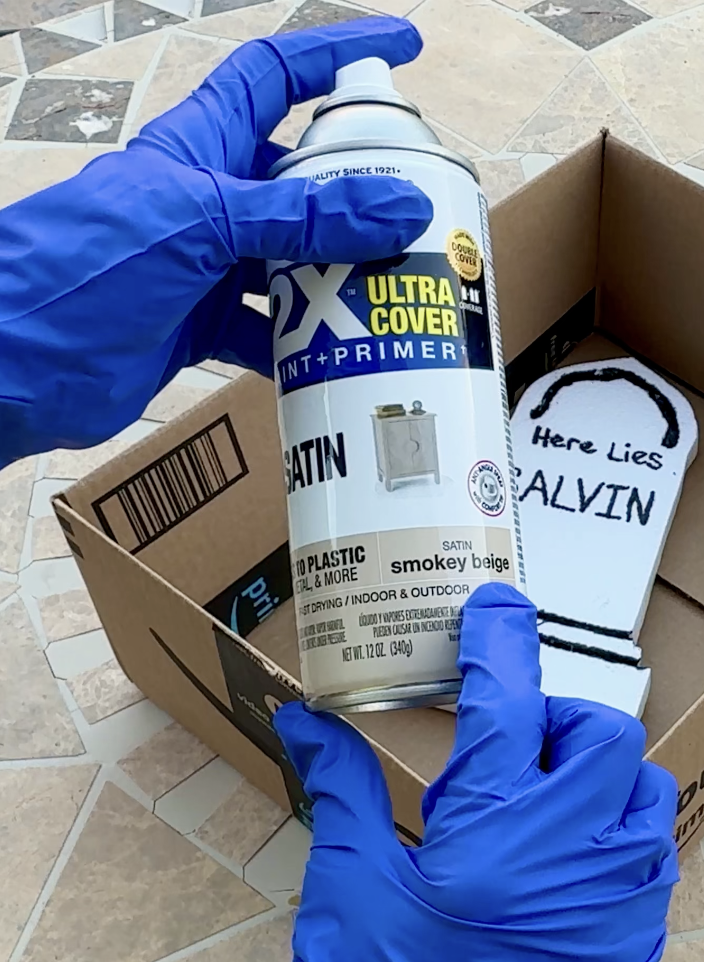
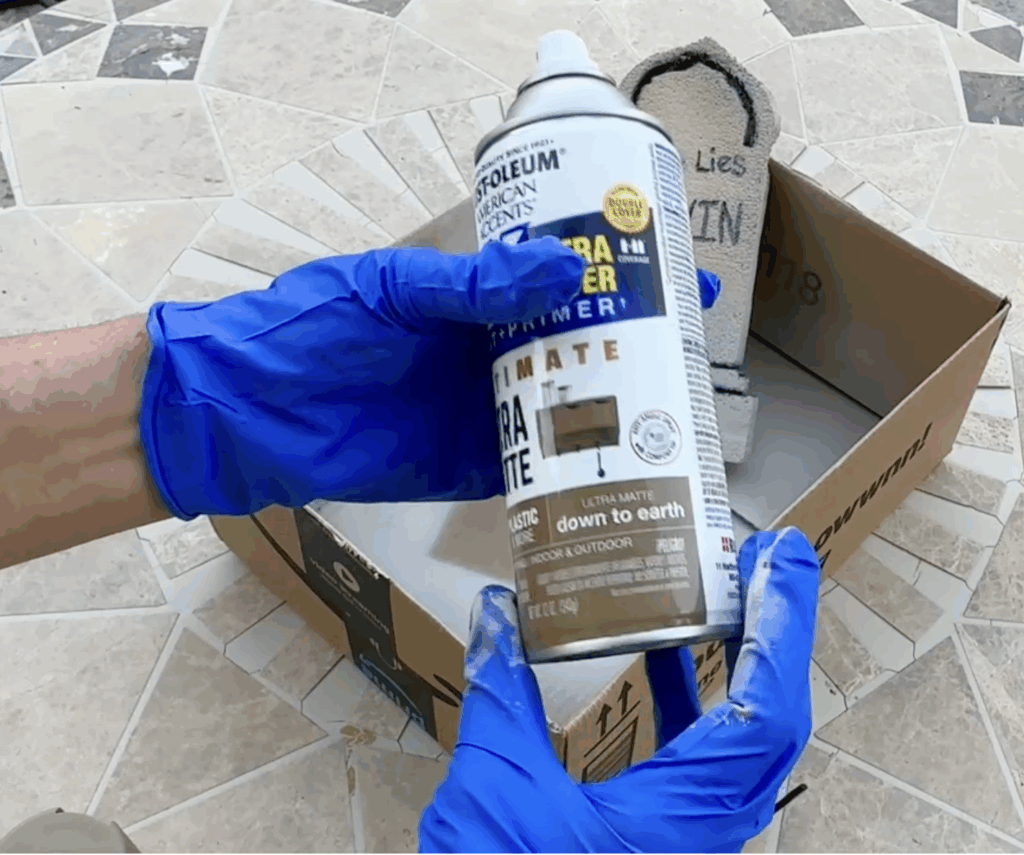
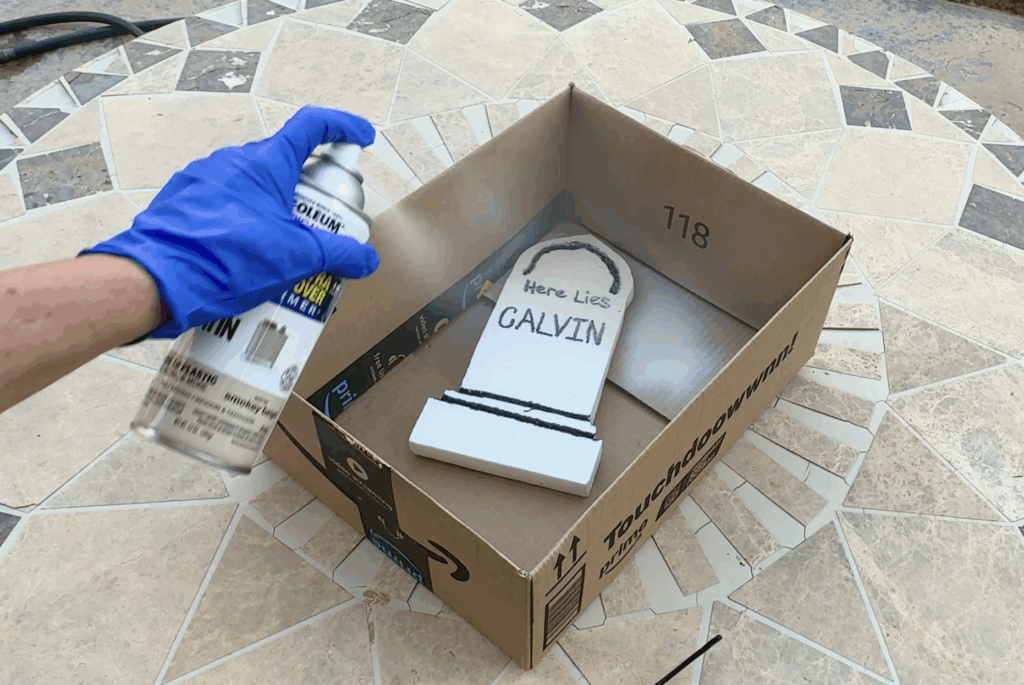
I like to cover the entire “stone” with a single solid base color. Then go back over it with very light dustings of two other colors. Just playing with it until I’m satisfied with the overall effect.
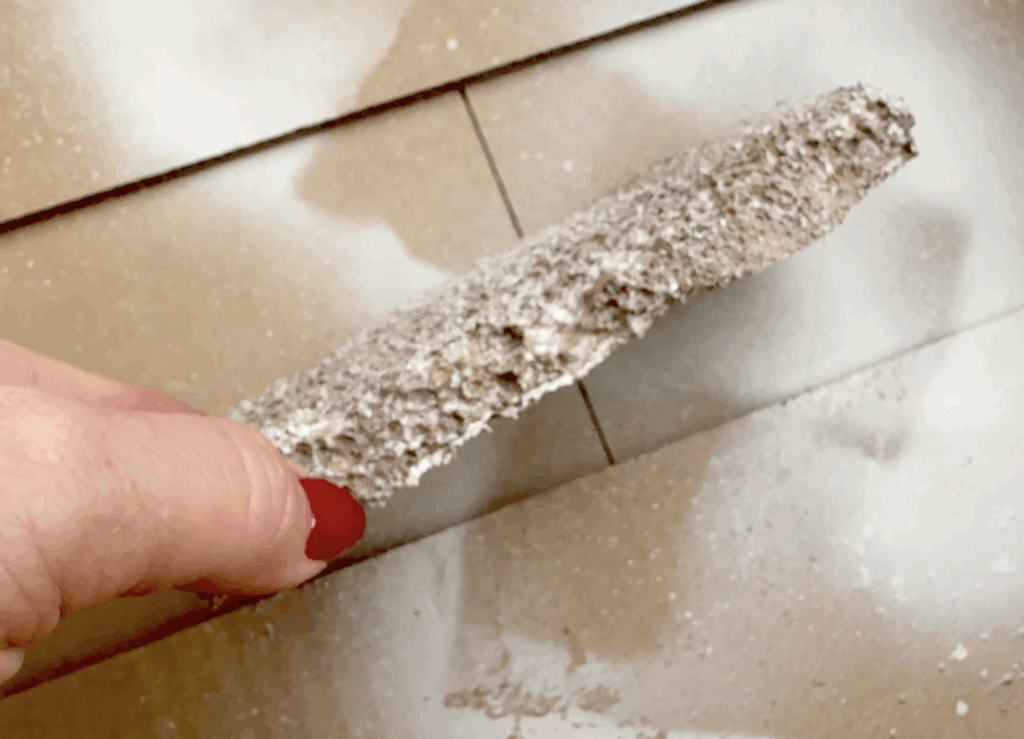
Pro-Tip: One of my favrite things about the spray paint and foam is how heavy spray will eat away at the foam, resulting in an aged, craggy, creepy look. Try it out and play around with the effect!
FINAL TOUCHES
I like to add little decorative details to my Headstones. Just clip little pieces from faux florals, spray them black and glue them to the headstone. Be cautious with hot glue on the foam, it will melt. Careful use of a low temp hot glue gun works fine for this.
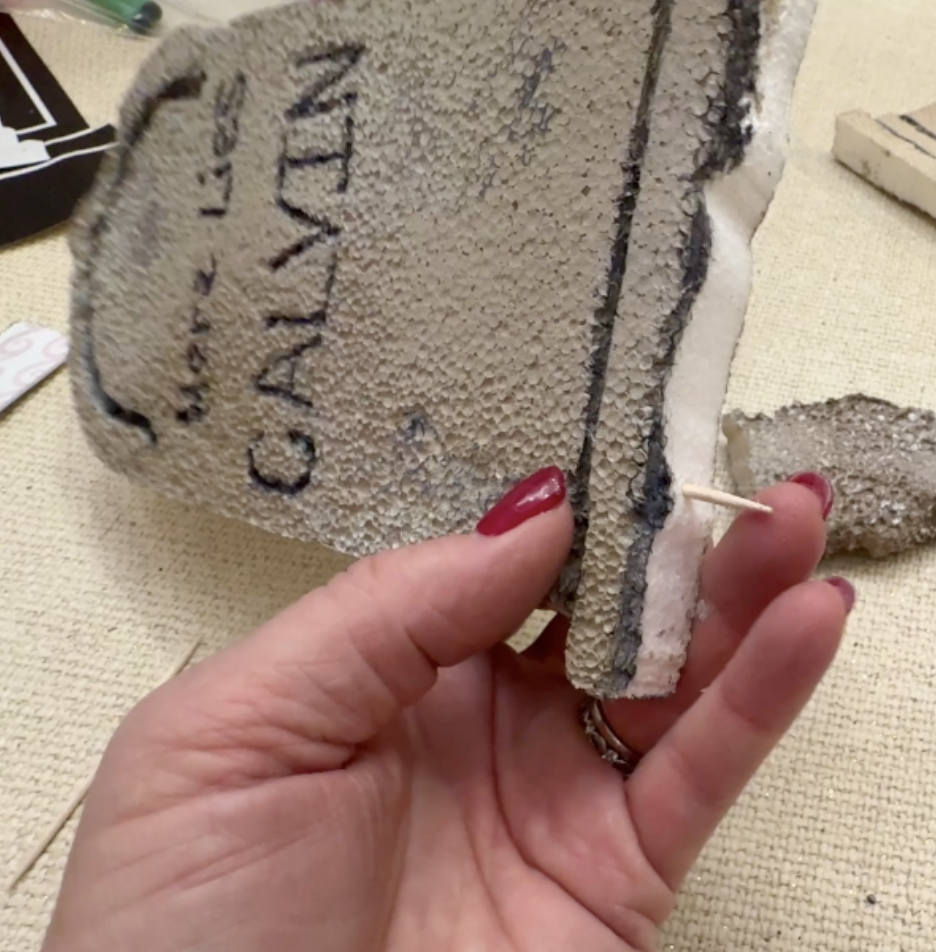
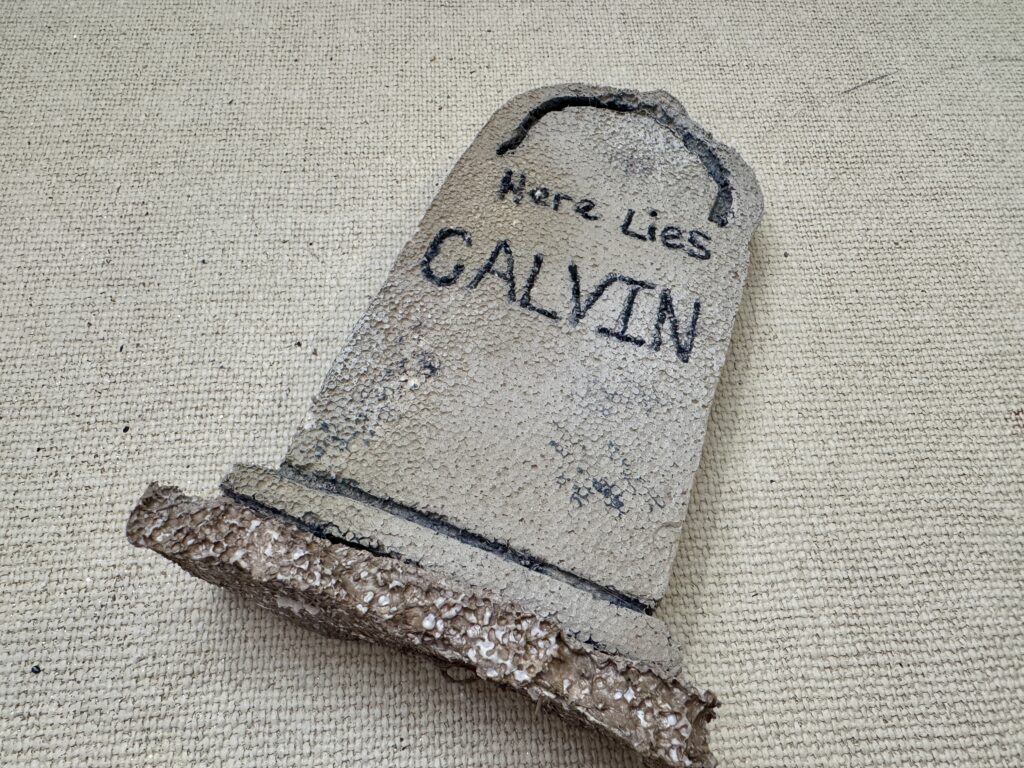
I also like to add a base, which helps to steady the thin lightweight foam. When spraying the headstones, you can also spray some flat, rectangular pieces to post your headstone onto.
I attach the bases to the headstone using low temp hot glue with a tooth pick through it while the glue is still hot and soft.
Where are you going to put your headstones? Will you send me a photo of what you’ve created and how you’ve styled them into your Halloween decor? I can’t wait to see!!!