Tutorial – Making Panorama Sugar Easter Eggs

All the details for making traditional Panorama Sugar Easter Egg Shells.
Creatng Panorama Sugar Eggs at Easter time is a time honored tradition that spans generations. Learn about these elegant confections HERE
As a side note, I shared all about making sugar panorama eggs in my recent Studio-5 Episode, you can watch the episode HERE. Studio-5 Sugar Eggs Episode
SUPPLIES
- Electric Mixer or Beaters
- Candy Egg Molds
- Sugar
- Meringue Powder
- Water
- Food Coloring
- Flat Edged Utensil for Scraping
- Spoon with Round Shaped Tip
- Heavy Duty Plastic Bags or Plastic Drop Cloth
- Large Mixing Bowls
- Dish Towels
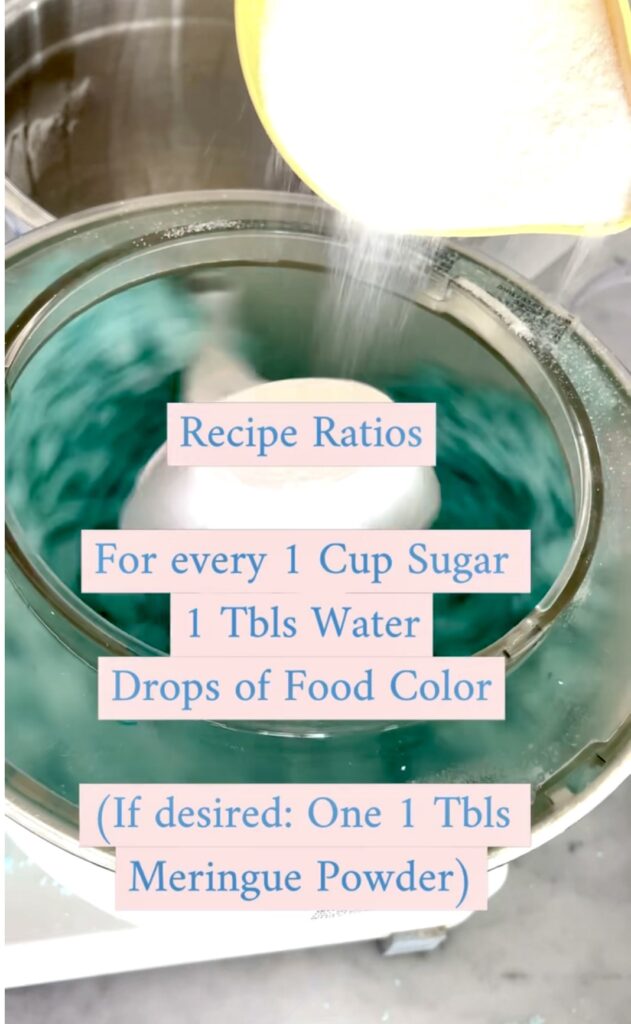
THE RECIPE
- 1 Cup of Sugar
- 1 Tablespoon Meringue Powder
- 1 Tablespoon(ish) of Water
- Food Coloring. A tiny amount, only as much as it takes to get the color you desire.
The sugar egg shell recipe is extremely simple. All you need to remember is the ratio of
ONE, to ONE, to ONE.
How much sugar to use depends entirely on how many eggs you want to make and how large your egg molds are. I found that with 4 cups of sugar I could make 2 medium size and 2-3 small eggs. This is achieved by reusing the sugar scooped out of the centers to repack more eggs molds.
Number One Rule When Making Sugar Eggs! Always remember, water is the sugar egg’s greatest nemesis! Be sure everything is super duper dry. Your hands, your tools, bowls, spoons, countertops, and most of all, your egg molds! Everything should be dry, dry, dry!
Candy Egg Molds
These can be tricky to find. Most candy egg molds are made for chocolate and are too flimsy to hold the shape of the sugar. I have found that sturdy plastic egg shells meant for Easter decorating, egg hunts and gifting work well. I found these at Hobby Lobby. They work great.
Wilton used to make an amazing set of 3 different size shells. I have a set and they’re awesome. Sadly, these are no longer available. Although, someone in one of my recent workshops was smart enough to search for them on Ebay, and she actually scored a set!
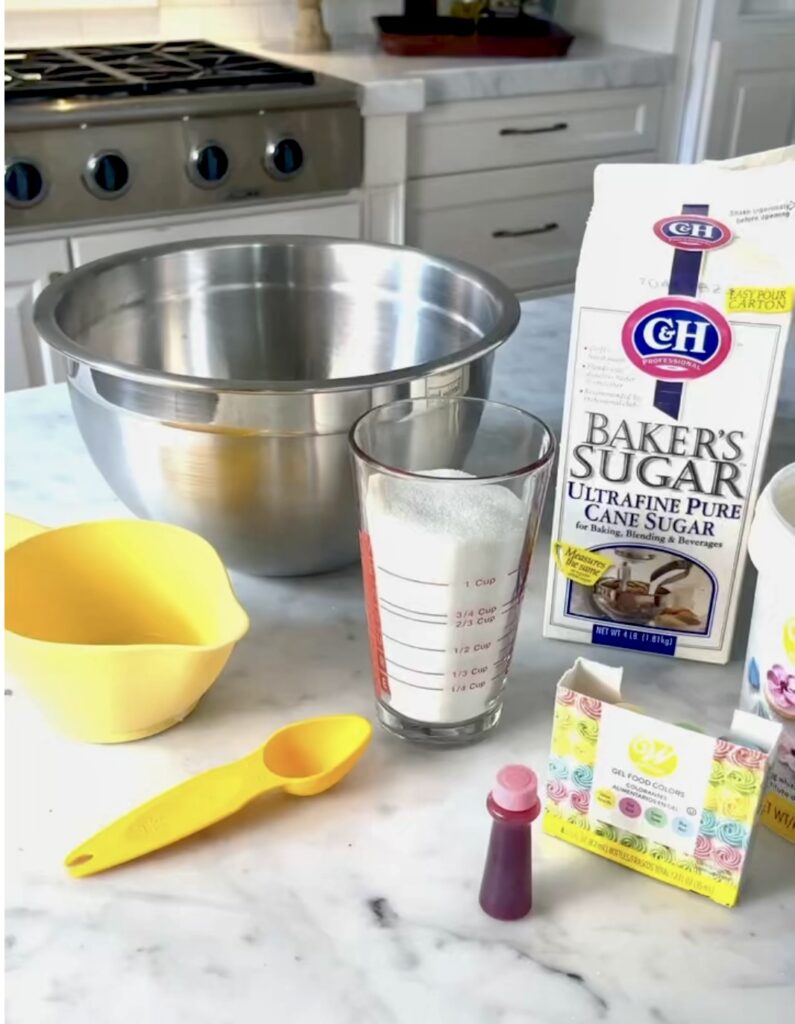
Sugar
I use regular granulated sugar. Some tutorials I found recommended using Fine Bakers Sugar. I tried this and didn’t like it as well. The finished product was not as sparkly and lacked the texture that I prefer. Also, the bakers sugar is harder to find and comes in impractically small and expensive quantities.

I did like the effect of mixing a smaller amount of the bakers sugar in with the granulated sugar. (I used ⅓ bakers sugar to ⅔ granulated sugar in these experiments) However, in the end I did not like the result enough to endure the hassle and expense of using the bakers sugar. This is a personal opinion. Give the bakers sugar a try if you want to see for yourself if you prefer the finished effect.
Meringue Powder
The Meringue Powder is entirely optional. You can make the eggs without it, using just water and sugar. However, the Meringue is stabilizer that will make your finished eggs much more sturdy and hardy. They will be less prone to breaking and last longer if you add meringue powder.
Creating these beautiful eggs takes time and effort. I want mine to last, so for me, the meringue powder is worth the extra expense.

Meringue powder is not available in my local grocery stores. I’ve purchased it at craft and baking supply stores. I’ve also discovered I can get it on Amazon. It’s a couple dollars more on Amazon, but saving myself a special trip to the baking supply store is often worth it for me.
Water
The water can be a bit tricky, so read this part carefully!
Although my recipe calls for 1 Tablespoon of water for every one cup of sugar, this is guideline more than a rule. How much water you will need will depend on the amount of humidity you have in the air on any given day. In other words, the amount of water you need can change for every batch you make!
Add water slowly and mix it in well before testing and determining if you need to add a bit more, and a bit more. Go slowly, taking the time to get it right and you’ll save yourself more time and lot of headache.
If, however, you get carried away with the water and your sugar ends up too wet, just do one of two things. Add more sugar to even it out. Or let it sit for a bit (mixing frequently) until it dries to the right consistency.

What is the right consistency? Think slightly damp sand. Not the wet, soggy sand right at the waters edge, but rather the lightly damp sand a little further up the beach. Wet enough to hold a sand castle together, but not so soggy the sand castle melts into a blob.
NOTE: You will know your sugar is too wet if you turn the egg out of the mold and it appears blotchy or even worse, is all pocky. Not to distress. Return the sugar to the bowl, mix well and allow the sugar to dry out just a bit (stirring it often).
Note: The sugar is too dry if it crumbles and falls apart when you turn the egg from the mold out onto the plastic covered countertop.
Food Coloring
I highly recommend using liquid Food Coloring rather than paste Food Coloring. Paste coloring tends to be blotchy and streaky and it’s very difficult to even out the color in the sugar mixture. If you must use a color paste, I recommend fully dissolving it in your water first.

How much Food Coloring you will use depends entirely on your own personal preference. For a lighter pastel color egg, use less. For a bolder, brighter color egg you will want more. Like with the water, add the coloring in tiny drops, mixing well and going slowly to achieve the color you desire.
THE PROCESS
In the Mixer
Using an Electric Mixer or Beaters, thoroughly blend together the dry Sugar and Meringue Powder.
Slowly, very slowly, add water a little bit at a time, mixing thoroughly between adding the drops of water.
Add your food coloring one drop at a time, mixing well between drops. Add as much color as you need to achieve the color you want. Remember, a little tends to go a long way.
Pack the Egg Mold
Pack the sugar into the bottom of the egg mold in layers. Scoop a spoonful of sugar into the bottom of the egg mold and pack it down real well with the back of the spoon or with your fingers. Then add another scoop and pack that down real well before adding the next spoonful, and so on, and so on. As you do this, look at the bottom of the egg (if your egg mold is clear). If you can see any gaps or fissures in the sugar, use your fingers, pressing into the sugar to smooth out the flaws.
Once the sugar is packed to the top of the egg mold, press hard all around the outside edges with your thumbs to really compact the edges.
Having really compressed the sugar around the edges and in the center, add more sugar to fill the egg to the top again. Over fill the egg so the sugar mounds over the top edge.
Using the flat edge of a spatula or kitchen tool of any kind, evenly scrape the excess sugar from the top. Be sure there are no depressions or divots in the sugar. Depressions or divots can cause the sugar egg to sink or crumble after turning it out.
Turn Out the Sugar Egg
Flip the egg over onto a flat, dry surface covered with a thicker, smooth plastic bag or drop cloth. Slowly remove the egg mold. You may need to give the center of the egg mold a slight squeeze to get the packed sugar to release from the mold.
It is essential that you flip the bottom of the sugar egg onto a plastic surface. This plastic surface will help to keep the under, inside of the egg moist so that it can be scooped out, thereby creating the hollow shell.
Drying
Allow the egg to dry for 1 ½ to 3 hours. How long the egg needs to dry and set will depend on how wet the sugar is and how much humidity there is in the air. So the drying time will very.
The egg will dry from the the outside in. The objective is to allow the outside edges to begin to harden inward, while keeping the very under center of the egg moist, so it can easily be scooped out.
How thick or thin the shell of your egg will be is determined by how long you allow the egg to dry/harden before hollowing out the center. The longer it drys, the thicker the shell will be.
Scoop Out the Center
Once the outside of the egg is hard to the touch, the center can be scraped or scooped out. If you want a thicker, more sturdy shell, let it dry longer. If you want a thinner, more delicate shell, dry it for less time. Once you do this a couple of times you’ll get a feel for how long it takes and when to scoop it out.
Using a metal spoon, carefully scoop out the soft sugar center of the egg. Scoop the soft sugar into a bowl to be used again for making more eggs.

Take care to hold the shell loosely in your hand and to not squeeze the egg. Scrape the sides and bottom of the egg to make a nice, even hollow shell all the way around the egg. Because the egg will dry evenly from the outside in, the shell should basically create itself with a very even circumference all the way around.
Set the egg out on the counter, this time with the center side up so the inside of the egg will dry and fully harden. You can leave this to dry for at least a couple hours. Several hours is ideal.
Trouble Shooting:
Your eggs look pocky when you turn them out of the mold.
This is probably because of one of two reasons.
- The sugar is too wet. Let it dry a bit, stirring it every so often until its the right consistency.
- The plastic mold had a bit of moisture inside of it. Clean and thoroughly dry the egg mold, stir the sugar real well and try again re-packing the egg mold.
You accidentally break an egg that’s drying or is already fully dry and hard.
You can reconstitute and reuse the sugar. Put the dried sugar/egg into a ziplock bag with a piece of white bread for a day or two, until the sugar mixture becomes soft and moist again. You can then reuse the sugar to make a new egg.
CREATING WINDOWS
This is the most tricky part of the project. Don’t get discouraged if you have to practice this a bit. There may be a little learning curve here. But doing it a few times, you’ll get the hang of it!
I tried all the different methods I could find on the internet for making the windows in the sugar eggs. They were ALL frustratingly difficult and ineffective. I noodled on it for days. There had to be a better way. . .
Then inspiration struck. Water is the enemy of the sugar egg. BUT maybe the water was also the answer to my window problem? I had nothing to loose by trying it out. And guess what it worked like a gem!
Here’s what you do. Once the egg shell is hollowed out and left out to fully dry and to get nice and hard, then it’s ready for a window.
What you need
- A flat surface dish or bowl. A small glass storage container, pie pan or small casserole dish works well for this.
- Paper Towels
- Sand Paper
- Optional: Dremel Tool
Making the Window
If the mold has a flat, bottom side of the egg, I like to use this flat, bottom side to create the window.
Put a small skiff of water in the bottom of the flat dish.
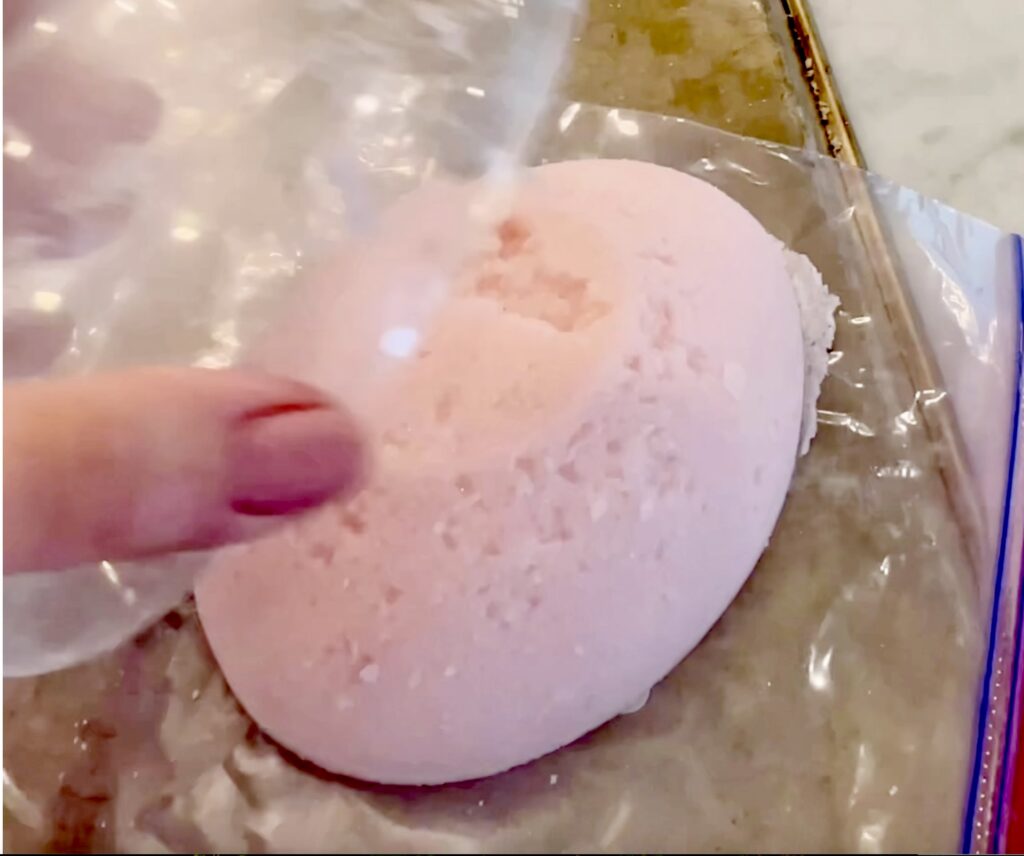
Place one side of the egg mold (the flat bottom if it has one) into the dish and let it set for just a couple seconds.

Watch the inside of the egg, as soon as you can see shadows of moisture coming through the bottom of the egg take the egg from the water and place it on a paper towel folded over a couple of times.
Let the egg set for a several minutes on the paper towel until you can see that the water has turned the sugar to “mush” in the center of the egg.
Carefully lift the egg from the paper towel. It should leave an oval mush on the paper towel and create an oval window in your egg!
CAREFUL HERE! Without flipping the egg over, using a second dry piece of paper towel, begin to gently dry and soak up the moisture and mush from the edges of the window you have created. Be careful to resist the urge to flip the egg over to see the window until after you have dried it really well. You don’t want any wet sugar to flip onto your egg shell, as this could mar the surface of the shell.
Shape the Window
Shape the window into the oval you want using your fingers to gently remove shell and shape the opening. If the window is not as large as you’d like it to be, you can drop it back in the dish with just a skim of water again for just a second or two. Repeat this until you get the size and shape of window you desire.
Allow the shell to FULLY dry again. After the shell is dry, if needed you can use sand paper or even a dermal tool to perfect the shape.
Remember, you will be covering the edges of the window with embellishments, so don’t stress to much over making the edges of the window “perfect.” In the end, it wont’ matter much.
Storing Left Over Sugar Mixture
Your sugar mixture will begin to dry out immediately. To avoid the sugar becoming chunky, crumbly or completely dried out use one of these two methods.
Method 1 –
For short term use, I cover the bowl with a wet dish cloth. I wring it out so that it’s not dripping, but it’s more than damp, it’s wet.
IMPORTANT NOTE: Be sure the top of the sugar mound is low enough in bowl that the wet towel is not actually touching the sugar!
You can keep your sugar damp for days simply buy keeping it covered with a wet towel. Here in Utah where it is very dry, I have to rewet the towel a few times a day.
Method 2 –
Put your damp sugar in a ziplock bag with a piece of white bread (think soft, kids bread, like Wonder Bread). Be sure to remove the crust before putting the bread in with the sugar. (The crust gets soggy and can leave tiny annoying brown flakes in your sugar mixture.)
PRO-TRICKS: I have stored the sugar for a year in a ziplock bag. I just added a slice of bread to the bag and let it set for a couple of days. Doing this completely reconstitutes the sugar to the right consistency to make more eggs. Be sure to remove the crust of the bread before placing it in the bag with the sugar.
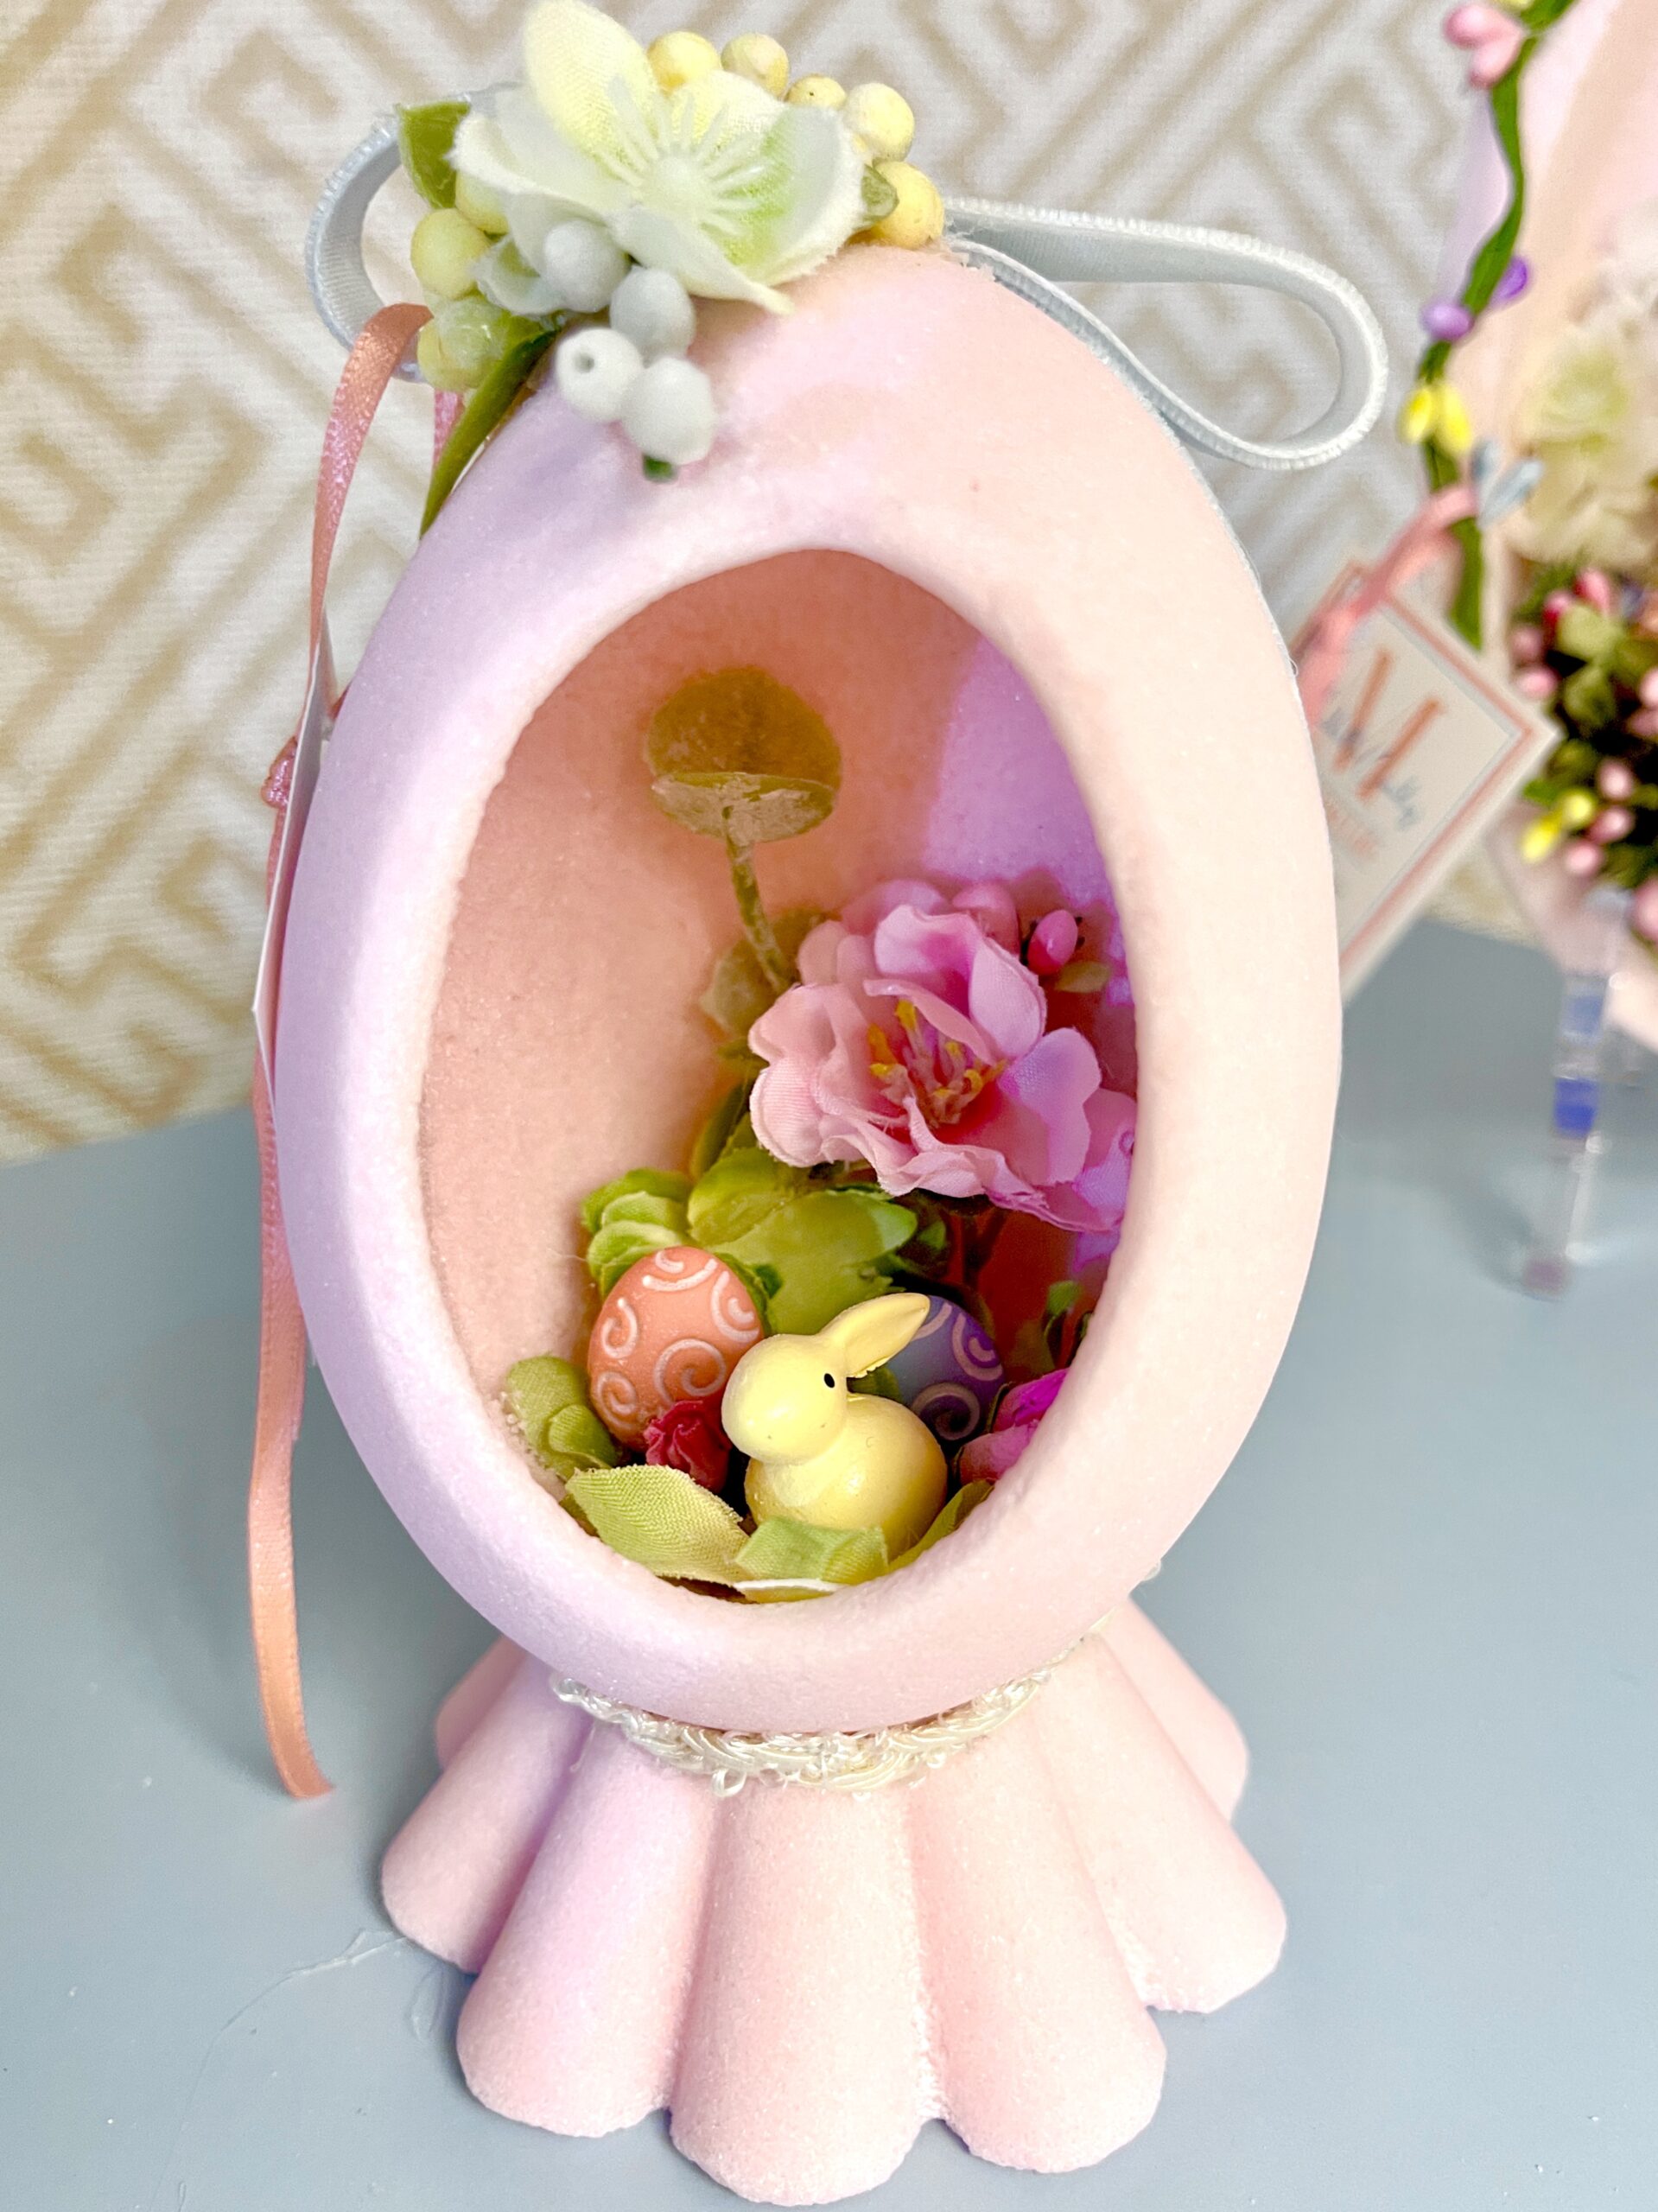
Once the shell is completely dry and hard, you are ready to decorate your eggs!
For Tutorial & Tips on how to decorate the eggs and create dioramas inside the egg shells HERE